72: Writing to Learn (2 of 2)


2-what


Screen Shot 2016-05-09 at 6.05.20 PM


4 Writing to Learn (WTL) Strategies (for more WTL’s go here or here or here)


  1. Nonstop write:
    • students write nonstop in response to a prompt for set time (3-5 min)
    • write in sentences and paragraphs
    • focus on quantity, not on perfect grammar
    • uses:  varied, include by not limited to:
      • reflection
      • introduce material
      • recall material just covered or uncovered
      • build up student perseverance
      • practice for essay writing on timed tests
      • watch how thinking evolves over a project
    • Play by play:
      • start with shorter period of time and build to gradually build up student stamina
      • explain purpose of writing activity and how writing will be used
      • explain norms – silence write for entire period of set time
      • to alleviate writers block – give students 1-2 min to brainstorm what to write with a partner
      • quick class brainstorm on class visuals
      • reasons students may shut down before time expires:
        • putting thoughts to paper is a skill that needs to be practiced
        • continuous sentence and paragraph writing takes effort
        • requires students to expand on details until exhausted
      • work the room and encourage students to continue writing who stop early – ask for more examples and details
      • leverage the work:
        • use as conversation starters:
          • read aloud in pairs and discuss and report out findings
          • share in groups of 3-4 and identify common threads and report out findings
        • guided rereading – reread piece and look for:
          • sentences that get to heart of your message
          • examples that illustrate message
          • off topic and vague sentences
          • 3 favorite words
        • self evaluate writing style
          • rank how quickly one gets off topic
          • rank how well you keep writing for set time
          • number of words in entry
          • what do you need to do differently to meet later expectations (ex: min 150 word count)
  2. Reflective Write:
    • writing piece meant to get students to reflect on learning
    • uses:
      • pause and note what was learned and how learning occurred
      • situate learning in larger context
      • diagnostic tool – are students on track? what’s hard? how deep is their thinking?
      • process readings
      • gather thoughts for upcoming task
    • play by play:
      • model what reflective writing could look like, include:
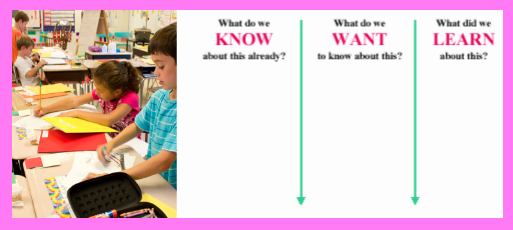
        • reflections on mistakes and confusion
        • reflections on learning processes
      • read and analyze features of sample reflections from previous years
      • practice reflective writing on a simple common process
      • work the room
        • encourage individual students who struggle
        • if most struggle, stop work time and model again
      • leverage the writing:
        • follow up with one-on-one conferences on student thinking and struggles
        • use as conversation starters in reflective conversations
  3. KWL:
    • brainstorming used to drive instruction:
      • K – what do I know
      • W – what do I want to know
      • L – what have I learned
    • used throughout the project (note – another form of this is a Knows, Need-to-Knows and Next Steps chart)
    • uses:
      • expose and build on prior knowledge
      • expose need-to-knows and want-to-knows
      • expose misconceptions
      • review what has been learned
      • engage students in co-planning upcoming learning activities
    • play by play
      • prior to teaching a topic have students individually brainstorm everything they know about the topic
      • gather student ideas on flip chart in the K column – record all ideas, even misconceptions
      • can put question marks next to statements that contradict each other
      • students brainstorm list of questions about the topic in groups of 3-4
      • remind students they can ask questions that go with disputed ideas (ones with ?)
      • gather student ideas on flip chart in the W column
      • encourage students to nod heads if they have the same question being put on the flip chart
      • later in the project, have students brainstorm more questions – gather these in the W column
      • later in the project, have students brainstorm list of what they have learned – gather these in the L column
      • tips:
        • if students hesitate on the want to learn lists – ask them to predict what they are about the learn
        • do not use on topics that students have no prior knowledge of
        • prior to gathering whole class lists, ask students to share what they wrote in groups of 3-4 and come up with list of 5 common items and report these to the whole group share
        • could ask students to brainstorm next steps to learn what’s in the W column
  4. Teacher student correspondence:
    • teachers and students passing notes / letter over extended period of time
    • uses:
      • model writing
      • individualized texts
      • get to know students
      • gather feedback to target instruction
      • improve morale
      • deeper learning
      • build relationships with students
      • hear from students who don’t talk much
      • cues for guiding individualized instruction
      • cluster student needs for responsive teaching
      • self-assessments
      • classroom management
    • play by play
      • get students set time (~ 15 min ) to respond to prompts such as
        • how is the course going?
        • how can I help you be more successful?
        • anything you want to tell me about your life out of school?
        • what kind of things do you do outside of school?
        • what makes the course challenging?
        • what connections do you see between the course and your life?
      • alert students that you will alert the guidance counselor if they reveal things that need guidance counselor follow-up
      • write a short note back in response to each student’s writing
      • tips
        • do with one period a week to avoid getting overwhelmed
        • if individual letters take too much time – read all letters and write one long letter in response to all of them to the whole class, try to work all students input and questions into the letter


3-sowhat

Teachers can use a variety of Write-to-Learns (WTLs) to get students to actively process information in a variety of ways.  Teachers can use the non-stop writes to see how student thinking is evolving and to help students gather thoughts that can impact products.  Teachers can adapt the KWL steps above to facilitate more detailed and helpful Know, Need-to-Know, Next Steps discussions.  Teaches can use teacher student correspondence to model writing, convey caring, and build up moral and relationships.

4-nowwhat
Preparation Steps
  • Analyze standards and generate learning targets
  • Analyze behavior norms and student behavior and generate character learning targets
  • Use knowledge of content and students to Identify which WTL’s can be used to process information in ways that highlight useful connections
  • Develop prompts and tools related to selected WTL’s that target academic and character learning targets
Early Implementation Steps
  • Implement WTL’s.  See ideas above and also  herehere  and here.
  • Facilitate follow-up discussions and activities that make use of the WTL’s.
Advanced Implementation Steps
  • Have students reflect on WTL’s and try to identify which strategies are the most helpful.  Use their suggestions to build WTL routines that match their preferences.
  • For individual WTL’s – give students choice among several strategies that match their preferred modes of communication.


5-relatedstuff

71: Writing to Learn (1 of 2)

1-sources


2-what


Screen Shot 2016-05-09 at 6.11.20 PM


4 Writing to Learn (WTL) Strategies (for more WTL’s go here or here or here)

  1. Written Conversations
    • students process material by passing notes to each other about the material
      • wonder if technology like TwitterTodaysmeet, etc can be used to support this strategy
    • quiet, energetic way to process content
    • Play by play:
      • set times for writing and exchanging notes
      • introduce norms – stay on topic, write the whole time, silent writing
      • work the room to make sure students are on task and to note interesting ideas
      • don’t feel pressured to read every note, believe in the power of unguided writing-to-learn exercises
      • Types of exchanges
        • live – quick, occurs in real time
        • take-away – slower, students have more time to compose notes
      •  Variations:
        • attach reading to large poster
        • have team of 2 or 3 read reading silently and write notes to each other about the reading in the poster margins (use a unique color per student so you can see individual contributions)
  2. Write-arounds
    • using passing and writing protocols to facilitate written conversations about content within small and large groups
    • can enable students to expand each other’s knowledge and correct each other’s misconceptions
    • Play by play:
      • arrange students into groups of 3 to 5 (4 is ideal)
      • hand out large pieces of paper
      • introduce norms: silent writing, write the whole time
      • each student start the paper by writing their name or initials at the top of the page
      • instruct students to write all their thoughts related to a topic for a set period of time (1 – 5 min)
      • observe students and instruct them to pass their paper to their right (within their team) after most of the class has written about a quarter of the page
      • students write name or initials on next line of new paper and write a reaction to previous student’s work
      • rotate until original papers return back to their initial writers
      • can do another cycle with a more specific prompt
      • then have spokesperson from each team share highlights in the silent conversation in a whole group conversation
      • Variation (Silent group discussion):
        • students write 2 questions on a paper
        • then instruct students to pass papers in directions that result in all students getting a new paper
        • students then answer 1 of the 2 questions and add a new question
        • pass papers again
        • students then answer 1 of the questions and add a new question
        • repeat for 5 rotations
        • discuss interesting exchanges in whole group or small group discussion
  3. Carousel brainstorming:
    • students rotate in teams to discuss, brainstorm and write about several topics (1 per rotation)
    • purposes:
      • introduce new topics (could be a good K/NTK activity)
      • active review activity
    • Play by play:
      • design 3 – 4 questions, headers, or statements and post on posters on walls spread out around the room
      • group students into teams of 3 or 4, each team has it’s own color
      • disperse teams among the poster
      • give a set time for students to discuss the header and write as many related ideas as possible
      • teams rotate to a new poster
      • instruct teams to read over poster first, discuss its contents, and brainstorm only NEW related ideas (no repeat ideas), team members assign a new recorder per rotation
      • students follow instructions and rotate when instructed by teacher
      • teams continue to read, discuss and brainstorm NEW ideas, team members assign a new recorder per rotation
      • teacher can make time durations shorter and shorter as it becomes harder to produce NEW ideas as posters fill up
      • Analyzing brainstorming:
        • when teams return to original poster, they digest entire poster and discuss it – notice what’s new, new connections, new questions, etc  Teams assign a speaker to present key findings on each poster
        • can go on a gallery walk of completed posters and take note of the top 3 ideas in each poster
        • can facilitate a silent gallery walk – after viewing all posters students can complete a WTL that describes their findings
        • after rotations, have teams decide on what topic they’d like to become experts on – have them research the topic and report it to the class at a later time
  4. Double – entry journal
    • 2-column way of recording and processing learning
    • left column = notes to summarize information. right column = reaction to notes
    • Examples of column headings for double-entry journals: column 1, column 2
      • computation, explanation for each step
      • problem, solution
      • reasons for, reasons against
      • opinion, proof
      • quote, explanation of importance
      • quote, personal connections
      • quote, discussion questions
      • observations, inferences
      • pros, cons
      • words, images
      • facts, feelings
      • information, values
      • interesting visual, associated thought or feeling
    • Play-by-play
      • decide on headings that enhance learning targets
      • model the process to get students started
      • explain purpose of assignment (ex: evidence of completing reading, basis for an upcoming discussion, etc)
      • work the room – see if students are using the strategy to make deep connections
      • if the connections are superficial, pause activity and model how to make deeper connections
      • uses of notes:
        • basis for discussions
        • collection can be used to review material
      • variation:
        • if double-entry notes occur several times – let them write them on left-side pages and leave partner right-side pages blank; for review, they can fill up the right-side pages with summaries of their notes
        • can be used to help students actively process videos and readings
3-sowhat
Teachers can use a variety of Write-to-Learns (WTLs) to get students to actively process information in a variety of ways.  The written dialogue, write-around, and carousel brainstorming activities can be used to get peers to expand each other’s knowledge and correct misconceptions.  The double-entry journal technique can get students to make powerful associations between new material and their thoughts and feelings.


4-nowwhat
Preparation Steps
  • Analyze standards and generate learning targets
  • Use knowledge of content and students to identify which WTL’s can be used to process information in ways that highlight useful connections
  • Develop prompts and tools related to selected WTL’s
Early Implementation Steps
  • Implement WTL’s.  See ideas above.
  • Facilitate follow-up discussions and activities that make use of the WTL’s.
Advanced Implementation Steps
  • Have students reflect on WTL’s and try to identify which strategies are the most helpful.  Use their suggestions to build WTL routines that match their preferences.
  • For individual WTL’s – give students choice among several strategies that match their preferred modes of communication.
5-relatedstuff

68: Models, Critique & Descriptive Feedback

1-sources


2-what


Screen Shot 2016-05-09 at 9.25.15 PM


Key terms:
  • models:
    • exemplars that demonstrate key features of a genre
    • can be student work, teacher work or professional work
  • critique lessons:
    • lessons that define qualities of high quality work by analyzing models
    • aimed at improving skills of whole group
  • descriptive feedback:
    • forms: teacher-student conference, written comments, peer-to-peer feedback
    • precise constructive comments that help students improve quality of work
 
Tips for Building Safe Culture:
  • norm:  be kind, be specific, be helpful
  • be clear and encouraging
  • shape descriptive feedback with individual in mind
  • be aware, stop comments that are unintentionally or intentionally unkind
  • practice critiques on examples generated outside the classroom
Tips for Choosing Models:
  • models show students where they are headed
  • include examples of features tied to learning targets
  • gather good examples of student work from previous projects
  • file models by genre
  • create models if needed
  • use models from professional world
  • choose models that illustrate different approaches to the same assignment or different strong features
 Modeling with Weak Work
  • work must be anonymous
  • model respectful critique
  • has compelling, common flaws
  • can have a mixture of strong and weak elements
  • best examples are results of students who tried hard but had confusions that created specific problems
Critique Lesson Steps:
  • choose work samples that go with learning targets
  • students individually examine multiple samples and try to make sense of them  – what’s good, what’s confusing, etc.
  • students in small groups discuss what features were strong and provide evidence
  • teacher facilitates whole group discussion of models
    • gathers general observations
    • gathers observations that relate to learning targets
    • discusses which parts are strong/accurate and explains why with evidence
  • students in small groups brainstorm attributes of good work
  • teacher facilitates whole group discussion to synthesize their tips for producing strong work
Critique Lesson Tips:
  • target critique to specific features that tie to learning targets
  • clarity of learning targets should not prevent students from sharing unrelated surprises and discoveries
  • focus on content, concepts, skills, genre features, habits of scholarship
 
Possible Times to Implement Critique Lessons:
  • at start of project to introduce a genre
  • in middle of project during work time to support focused revision
  • just before presenting work to fine-tune final revisions
  • just before self and peer assessment sessions to teach students how to give effective feedback
  • after assignment is due to reflect on quality and set new goals
Facilitating Discussions Tips:
  • define sequence of discussion prompts that align to learning targets
  • structure time, set amount of time per section
  • define and assign discussion roles
  • define norms relating to participation and listening
Gallery Critique:
  • all students post work to examine
  • good for identifying good features and strategies
  • too many samples to analyze gaps
  • for written work – short excerpts of larger piece work best
  • Steps:
    • Introduce norms and goals
    • Post work
    • Silent gallery walk and take notes of strong examples
    • Discuss what was noticed
    • Discuss what’s working using specific examples and explanations
In-Depth Critique
  • single work is analyzed for what’s working and not working
 
Critique Facilitator Tips:
  • Strategically choose students for comments
  • Radiate enthusiasm and positivity
  • Offer compelling statements to build interest and add key points
  • Reframe student observations to make them more clear when needed
  • Guide discussion towards learning targets
  • Make sure students observe discussion norms
  • Have student rephrase vague statements for more clarity
  • Model good critique
  • Make clear that the work itself, not the author, is the subject of critique
  • Model use of “I” statements – “I think … “
  • Start discussion with warm feedback before moving to cool feedback
  • Frame ideas as questions whenever possible
  • Keep discussion moving at an energetic pace
  • Help students notice and remember key comments in discussion
  • Direct attention to important examples (if not mentioned)
  • Guide discussion towards specific strategies that meet learning targets
  • Display key ideas and strategies in clear specific language
  • Guide students to use academic vocabulary in discussions that go with learning targets
Features of Descriptive Feedback
  • Focused on growth of individual student’s skills and/or understanding
  • Typically a one-one-one teacher-student exchange
  • Rests on base of a strong positive teacher-student relationship
  • Includes strategic positive comments that make feedback easier to hear
  • Based on strong knowledge of students’ strengths, areas of growth, and goals
Continuum of How Students Hear Feedback
  • Blames teacher for being mean
  • Ignores feedback
  • Hears feedback but doesn’t know how to use it
  • Receives feedback, uses it but doesn’t meet goals
  • Receives feedback, uses it, reaches goals and can teach others
Planning for Effective Feedback
  • Know that students who are most likely receive to feedback well are already successful, see continuum above
  • Communicate belief in students’ ability to use feedback to meet high expectations
  • Teach students the language of critique related to learning targets
  • Consider good timing:
    • Provide enough time for students to use the feedback
    • Immediate feedback is best for factual knowledge
    • Time delay in feedback is better for more complex tasks
    • Provide frequent ongoing feedback on major assignments
  • Consider quantity:
    • Prioritize feedback related to  learning targets
    • Consider how much feedback individual student can take in at once
  • Written vs Oral feedback?
    • oral feedback while student is working is more effective and efficient
      • get students to paraphrase oral feedback
      • give within teacher-student conference
    • written feedback on a checklist, assignment sheet, or rubric
  • Group vs Individual feedback?
    • individual feedback conveys caring
    • whole group feedback is good for correcting a common error
  • Consider tone:
    • positive, constructive
    • suggestions not prescriptions
    • avoid pointing out what’s wrong without offering suggestions
    • avoid punishing tone
  • Aim for clarity:
    • student-friendly, specific
  • Keep Learning Target in mind:
    • connect feedback to how to improve on learning goals
    • avoid making it personal
  • Leverage comparisons:
    • use checklists or rubric with criteria to compare student work to
    • avoid comparing work to other students – can damage student motivation
  • Be aware of student perceptions of feedback
    • does student understand feedback?
    • does student feel safe and valued?
    • situate feedback within positive culture and positive relationships that value student-engaged assessment
  • Feedback Implementation Tips:
    • Teacher-Student:
      • plan and schedule conference times
      • be concise and clear
      • target one skill at a time
      • use student work to assess effectiveness of feedback
    • Peer and Self Feedback
      • teach students purpose and strategies for giving feedback
      • revisit learning targets often and check that students know how to recognize them in student work
      • model giving effective feedback
      • emphasize self over peer feedback – research has shown that the former is more effective
      • precede feedback sessions with whole group critique lessons that scaffold how to give effective feedback


3-sowhat
Models, critique, and descriptive feedback are tools for improving performance in school and in many other settings and professions.  Students can’t visualize quality work in a genre without having seen and analyzed examples.  Examining models makes standards real and tangible.  Critique and descriptive feedback help build a culture that promotes agency (effort develops skills).  They teach students how to achieve quality standards more independently.


`
Preparation Steps
  • Gather strong models that demonstrate key learning targets
  • Research activities aimed at identifying strategies for analyzing models, peer/self critiques, and generating quality feedback.  See above and literacy articles for ideas.
  • Build culture that values critique and constant improvement
Early Implementation Steps
  • Teach students how to be kind, specific and helpful in their feedback
  • Incorporate critique lessons and descriptive feedback into product scaffolding and benchmark days
  • Use learning targets to frame critique and descriptive feedback
  • Facilitate critique lessons using tips listed above.
  • After critique lessons have modeled effective feedback, facilitate peer and self feedback activities.  See tips listed above.
  • Provide ongoing individual feedback to students in short conferences.  See tips above.
Advanced Implementation Steps
  • Use practiced protocols to reflect on work during process of creation, right before presentations and after presentations
  • Use critique lessons to help students co-author or author rubrics for products
  • Use checklists of common pitfalls gathered over time to guide peer/teacher critique sessions
5-relatedstuff

66: HCD Ideation: Prototyping Phase

1-sources

Class 4 Readings in “Design Kit_The Course for Human-Centered Design.” Dropbox. Web. 14 Mar. 2016.

2-what


Screen Shot 2016-05-09 at 9.34.57 PM


Key Terms:
  • Ideas:
    • answers to the How Might We … ? questions
    • have potential for success, innovative
  • Concepts:
    • polished, concrete ideas
  • Prototypes:
    • tangible ideas
    • rough, just accurate enough to get useful feedback
  • Experience Maps:
    • Visual storyboard that describes beginning, middle and end of user experience of prototype
PROTOTYPING PHASES
  1. Generate Ideas:
    • Choose appropriate space – large enough to move in & post many ideas
    • Gather tools for displaying ideas
    • Recruit large diverse team
    • Keep pacing high energy – no more than 1 hr total, 15-20 min per question
    • Select facilitator
    • Introduce RULES:
      • Defer judgement
      • Encourage wild ideas
      • Build on other ideas
      • Stay on topic
      • One conversation at a time
      • Be visual.  Sketch ideas.
      • Go for quantity
    • Equip everyone to participate
    • Attend to each question, one at a time
  2. Select Promising Ideas:
    • Cluster similar ideas
    • Everyone votes for Top 2.  Vote directly on top of ideas
    • Tally and discuss results.
    • Decide which ideas to develop.
  3. Determine what to Prototype:
    • Break down beginning, middle and end of user experience
    • Create Experience Maps
    • Identify key questions
    • Create order of operations
      • Prioritize questions and prototypes used to investigate these
  4. Make Prototypes:
    • Create rough 3D models of concepts
    • Use digital tools to build a mock-up
    • Role play user experience
    • Create diagram that maps out key processes and services
    • Create stories – newspaper articles, job descriptions that relate key features of concepts
    • Create fake advertisements that highlight key features, tweak to different audiences
  5. Test & Get Feedback:
    • Consider setting – informal or close to actual setting?
    • Define what to test
    • Define feedback activities – ensure that these are best suited to things being tested
    • Invite honesty & openness – communicate that idea is rough and can change in response to feedback
    • Stay neutral – do not be defensive
    • Adapt on the fly – change as you go if possible
    • Provide multiple prototypes if possible
    • Find space and time to discuss initial impressions of feedback
    • Captures ideas & iterations – photo-journal key processes & prototypes
    • Share impressions – compare notes with team and document findings
  6. Integrate feedback & Iterate:
    • Share findings on Post-Its
    • Cluster similar findings
    • Categorize findings by: concerns? pros? suggestions?
    • Evaluation relationship of findings to original intent of product
    • Prioritize feedback – which is most important? what to respond to?
    • Evolve prototypes – makes changes that eliminate barriers and respond to key suggestions
  7. Repeat Steps above Iteratively


3-sowhat
This phase enables teachers and students to convert ideas into tangible solutions and then test pieces of these solutions in quick tests that allow designers to quickly learn and iterate from their mistakes.  Going through this process can teach learners how to use iterations to learn and revise and how to learn from their mistakes.


4-nowwhat
Preparation Steps
  • HCD Ideation: Prototyping Steps applied to Solving Student Learning Design Challenge
    • Recruit a design team and select a problem that relates to student learning and complete the Inspiration phase
    • Recruit a design team that will help you identify document key insights that you gathered during the Ideation: Synthesis phase
    • Recruit a diverse larger brainstorming team.
  • Scaffolding HCD Ideation: Prototyping Steps for Students
    • Experience HCD process prior to facilitating it to learn how to better scaffold it
    • Let students in design teams select a worthy design challenge (or assign one)
    • Guide them through a student friendly, time affective version of the Inspiration phase
    • Guide them through a student friendly, time affective version of the Ideation: synthesis phase
    • Develop visuals and assign readings that teach students how to go through key steps in a student friendly, time effective version of the Ideation: Prototyping phase.
    • Secure A LOT of Post-Its, secure materials for making 3D prototypes, or teach them how to use Post-It and CAD software.
Early Implementation Steps
  • HCD Ideation: Prototyping Steps applied to solve student learning design challenge
    • Meet with brainstorming team in a space with lots of Post Its and wall space.
    • Generate ideas while following the brainstorming rules.  See above.
    • Select the most promising ideas. See above.
    • Investigate the user experience and decide what to prototype.  See above.
    • Create prototypes of various forms.  See above.
    • Test prototypes and get feedback.  See above.
    • Integrate feedback into revised prototypes and iterate See above.
    • Develop, test, and refine prototypes several times.  See above.
  • Scaffolding HCD Ideation: Prototyping Steps for Students
    • Facilitate student design teams through a student friendly, time-effective version of the steps listed above
Advanced Implementation Steps
  • HCD Ideation: Prototyping Steps applied to solving a student learning design challenge
    • After enough has been learned from prototyping, move on the Implementation phase.
  • Scaffolding HCD Ideation: Prototypin Steps for Students
    • Let students reflect on how Inspiration: Prototyping Steps can be used to develop better insights to problems in other courses and in their own lives
    • Facilitate students through the Implementation phase


5-relatedstuff

56: Using 6 Facets to Brainstorm Scaffolding

1-sources


2-what


Screen Shot 2016-05-09 at 10.22.24 PM


Explain
  • What kind of theory-making and connecting must students encounter if they are to grasp what is not obvious, meet new ideas, test and verify tem, and build their own theory or explanation?

  • What artifacts, data, behaviors, and events should they have to try to explain to gain practice in generalizing and drawing sound inferences?
 

Interpret

  • How will the work require students to make interpretations, derive meaning, explore the importance, or find the significance of knowledge?

  • What texts, events, or other resources will be provided “by design” as significant sources for significant and revealing interpretative work?

Apply

  • How will the work enable students to test their understandings in apt and varying contexts where authentic situations, purposes and audiences will require thoughtful transfer of prior learning?

  • How can the work encourage students to propose or even invents new and revealing applications of their learning?


Perspective

  • How will the materials, experiences, and tasks help students to grasp multiple points of view and critically evaluate these?
 

Empathy

  • What kinds of direct/simulated experiences in class can cause students to personally connect with the experiences of others?


Self-Knowledge

  • What kinds of experiences will help students self assess and reflect on what they do and don’t understand?

  • How will the lesson evoke the habits of mind and biases students bring to the work?

3-sowhatThe scaffolding prompts aim to guide brainstorming for scaffolding activities that address the six facets of understanding.  The six facets of understanding can be used to add depth to scaffolding sequences that address specific learning goals.  They can help students makes connections with contents that are engaging, meaningful and long lasting.  Research has shown that ALL students benefit from high challenge & high support curriculum designs.


4-nowwhat
Preparation Steps
  • Analyze and prioritize standards clusters for an upcoming project.
  • Identify which facets of understanding align best with standards-based goals.
  • Using the question prompts above to research and brainstorm scaffolding that align to standards-based goals and to focus facets.
Early Implementation Steps
  • Implement scaffolding activités.
  • Use formative feedback to fine scaffolding and to help students get the specific information they need to improve learning and products.
Advanced Implementation Steps
  • Document which facets are being used in projects over time.  Reflect on most commonly used and rarely used facets.  Reflect on whether or not these different frequencies are a necessary result of the discipline or are a result of teacher preferences.
  • If gaps are due to teacher preferences, try designing scaffolding activities and products that address gaps.
5-relatedstuff

54: Three Teacher Roles


2-what


Screen Shot 2016-05-09 at 10.32.28 PM


3 Teacher Roles
  1. Didactic instructor:
    • lectures, direct teaches 
    • good for teaching facts, discrete knowledge, concrete self-evident information, rules, recipes, algorithms
  2. Constructivist facilitator:  
    • facilitates learners through well-defined inquiry-based experiences
    • good for teaching counterintuitive or subtle ideas and concepts, learning strategies, how to make systematic connections
  3. Performance coach:
    • leads students through guided practice and provides formative feedback
    • good for teaching foundational (enabling) skills that can be broken down into reasonable chunks
    • good for helping students refine understandings and products
Other tips:
  • Be explicit, concise and clear.   Excess talk can lead to unclear goals and explanations.
  • Distinguish between just in time and just in case.
  • Build in pre and post reflections
  • Use textbook as a resource, not as a syllabus
  • Be mindful of expert blind spot
  • Use whole-part-whole approach
    • discrete skill to complex process to discrete skill
    • content to performance to content
  • Use iterative approach that cycles between challenges, models, practice, feedback, and performance


3-sowhat
TIMMS studies have shown that teaching styles that favor less front-loaded direct teaching and more guided inquiry tend to develop better understanding.  Using the right role for the right task can make learning more effective and engaging.  Since learning involves transfer and doing, the performance coach role is very important.


4-nowwhat
Preparation Steps
  • Examine scaffolding and assessments in project calendar and reflect on what teacher roles support different activities and learning goals
  • If needed refine scaffolding activities in order to better leverage the teacher role that is best suited to the learning goals
Early Implementation Steps
  • Apply teacher roles to activities that best suit the roles
  • Use student reflections to determine if teacher roles are helping students learn
Advanced Implementation Steps
  • Make students more aware of the teacher roles and explain rationale for switching to different roles
  • Ask student to reflect on how different teacher roles are affecting their learning and to provide teacher with constructive feedback on their roles
5-relatedstuff

46: Six Facets of Understanding Question Stems

1-sources


2-what


Screen Shot 2016-05-09 at 11.04.57 PM


  1. Explanation:
  • What is the concept in ….?
  • What are examples of …. ?
  • What are the characteristics/parts of …. ? Why is this so?
  • How might we prove/confirm/justify …?
  • How is … connected to … ?
  • What are common misconception about …?
  1. Interpretation:
  • What is the meaning of …?
  • What does … reveal about … ?
  • How is … like …  (analogy/metaphor)
  • How does …. relate to me/us?
  • So what?
  1. Application: 
  • How and when can we use this (knowledge/process) … ?
  • How is … applied in the larger world?
  • How could we use … to overcome … (obstacle, constraint, challenge)?
  1. Perspective:  
  • What are different points of view about … ?
  • How might this look from …. ‘s perspective?
  • How is … similar to / different from … ?
  • What are the strengths and weaknesses of … ?
  • What are the limits of … ?
  • What is the evidence for … ?
  • Is the evidence reliable? Sufficient?
  1. Empathy:  
  • What would it be like to walk in …. ‘s shoes?
  • How might … feel about … ?
  • How might we reach an understanding about … ?
  • What was ….  trying to make us feel/see?
  1. Self Knowledge: 
  • How do I know …?
  • What are the limits of my knowledge about … ?
  • What are my blind sports about … ?
  • How can I best show … ?
  • How are my views about …. shared by … (experiences, assumptions, prejudices, values, style)?
  • What are my strengths and weaknesses in … ?
3-sowhat
The six facets of understanding can be used to scaffold and assess deeper levels of understanding targeted learning goals.  The question stems above can be used to design question prompts for scaffolding and assessments activities that use the six facets of understanding.


4-nowwhat
Preparation Steps
  • Analyze standards and determine which facets of understanding work best with standards expectations
  • Use question prompts above to help design assessments and reflection prompts related to focus facets
Early Implementation Steps
  • Use facet questions to give students formative feedback on their products and understandings so that students can refine these
  • Use facet questions as diagnostic questions to check if activities are supporting students and to finetune activities
  • Use facet questions to guide reflections and discussions about understanding learning goals
Advanced Implementation Steps
  • Use 6 facets sentence stems as a tool to help students generate better knows and need-to-knows during project launch and throughout the project
  • Convert question stems to sentence stems so that they can support student reflections on what they have already learned


5-relatedstuff

44: Project design: multiple entry points

1-sources


2-what


Screen Shot 2016-05-09 at 11.14.53 PM


3 Stages of Backwards Design:
  1. Identify Desired End Results:
    • study standards and learning goals
    • identify learning goals and desired enduring understandings
    • prioritize learning goals
  2. Determine Acceptable Evidence:
    • determine what evidence we will accept to show that students have achieved mastery of goal
  3. Plan Learning Experiences and Instruction:
    • what foundational skills will students need to reach goals?
    • purposefully design and analyze learning tasks: how will formative assessments be used to develop student learning? what tasks will help students develop a deep understanding of learning goals?
    • Avoid common errors (see pitfalls above)
 
NOTE:  These steps do not need to occur in the order above.  The models below will show other ways to design projects.


Begin with Content Standards:
  • Analyze nouns in standards and connect these big ideas

  • Identify key knowledge and skills in standard

  • What essential questions follow from standard?

  • Analyze verbs and connect these to performance assmts

  • List learning activities

  • Refine unit to insure alignment across all phases


Begin by considering real world applications:
  • Clarify larger purposes and connections between applications and content.

  • Identify specific real world tasks that embody goals

  • Determine enabling knowledge & skills needed for tasks

  • Sketch learning plan that enables practice to mastery

  • Infer questions learners need to frequently consider as they learn

  • Identify content standards that explicitly tie to tasks
  • Revise to align design elements as needed


Begin with an important skill:
  • What complex worthy task does this skill support? How does this skill connect to other relevant skills?

  • Identify related content standards

  • Determine what assessments are implied or explicit in standard

  • Identify strategies for using skills effectively

  • Identify big ideas and essential questions that undergird the skill

  • Devise learning activities.

  • Revise for alignment.


Begin with key resource or learning activity
  • Start with winning activity or sanctioned resource

  • Consider: Why does this activity matter?  What big ideas does this activity help us understand?

  • Clarify essential questions that will point to these big ideas

  • Identify the skills, facts, and understandings the activity is meant to yield

  • Tie activity to relevant standards and infer key concepts and skills in these
  • Revise assessments and learning activities as needed.


Begin with a key assessment
  • Clarify goals and levels of transferability built into assessment

  • Identify standards that address these goals

  • Infer relevant big ideas, understandings, essential questions required to pass assessment

  • Develop and refine performance assessment tasks that parallel the required assessment

  • Craft and modify learning activities to ensure effective and purposeful performance.

  • Revise to align design elements as needed


Begin with an existing unit
  • Place elements into template and look for alignment across 3 phases.  Do the goals match the assessments?

  • Do lessons relate to richest aspects of goals?

  • Clarify big ideas and long term performance goals related to standards

  • Ask often: What should students come away understanding?

  • Revise assessments and lessons to do justice to Stage 1 elements

  • Revise to align design elements as needed


3-sowhat
Because the inspiration for projects can be varied, it is helpful to see different processes for designing projects that start from different entry points.  The key thing about the 3 phases is not that they occur in order, but that a fully designed project addresses all the key points in ALL 3 phases, i.e. clear aligned picture of learning goals, valid assessments, and good scaffolding.  The color coding above illustrates how the 3 different phases arise in different models for designing projects.


4-nowwhat
Preparation steps
  • Develop a Year at a Glance (Scope & Sequence)
  • Prioritize standards in scope and sequence
  • Use one of the strategies above to develop a project that goes with a unit cluster of standards
  • Use Understanding by Design template and related standards to guide and evaluate project development
Early implementation steps
  • Use design criteria to evaluate project elements as they are implemented in project
  • Document evaluations of projects and extract generalizable tips and ideas that can be applied to future project designs
Advanced implementation steps
  • Use the multiple entry point models to help students design their own investigations and projects
5-relatedstuff

43: Backwards Design Template & Standards

1-sources


2-what
Stage 1 Template
udb1
 
Stage 1 Evaluation standards
To what extend does the design focus on the big ideas of targeted content?
  • Are the targeted understandings
    • enduring, based on transferable, big ideas at the heart of the discipline and in need of uncoverage?

    • framed by questions that spark meaningful connections, provoke genuine inquiry and deep thought, and encourage transfer?

  • Are the essential questions provocative, arguable, and likely to generate inquiry around the central ideas (rather than just a pat answer)?

  • Are appropriate goals (i.e. SWLO, content standards) identified?

  • Are valid and unit-relevant knowledge and skills identified?
Stage 2 Template
ubd2
Stage 2 Evaluation Standards
To what extent do the assessments provide fair, valid, reliable and sufficient measures of the desired results?
  • Are students asked to exhibit their understanding through authentic performance tasks?

  • Are appropriate criterion-based scoring tools used to evaluate student products and performances?

  • Are various appropriate assessment formats used to provide additional evidence of learning?

  • Are the assessments used as feedback for students and teachers, as well as evaluation?

  • Are students encouraged to self assess?
Stage 3 Template
ubd3
Stage 3 Evaluation Standards
To what extent is the learning plan effective and engaging?
  • Will the students know where they’re going (learning goals), why the material is important, what is required of them (unit goals, performance requirements,etc ..)

  • Will the students be hooked – engaged in digging into the big ideas (through research, inquiry, experimentation, problem solving ..)

  • Will the students have adequate opportunities to explore and experience big ideas and receive instruction to equip them for the required performance?

  • Will the students have sufficient opportunities to rethink, rehearse, revise, and refine their work based upon timely feedback?

  • Will the students have an opportunity to evaluate their work, reflect on their learning, and set goals?

  • Is the learning plan tailored and flexible to address the interests and learning styles of all students?

  • Is the learning plan organized and sequenced to maximize engagement and effectiveness?
Holistic Criteria 
To what extent is the entire unit coherent, with all the elements of all 3 stages aligned?


3-sowhat
The Backwards Design Template and Standards summarizes all the components and criteria in the backwards design process.  This process aims to design and implement units (projects) that avoid 2 pitfalls common in traditional units: 1) hands-on without being minds-on and 2) coverage instead of uncoverage.


Phase 1 aims to guide teachers to develop a clear, prioritized picture of a unit’s learning goals.  Phase 2 aims to guide teachers to think deeply about what portfolio of assessments will count as a valid system for seeing evidence of student mastery of learning goals.  Phase 3 focuses on developing scaffolding that aligns to learning goals and assessments.


NOTE:  Although these phases are numbered, they do not always need to be completed in number order.  They key thing is that all phases are completed and well considered prior to project launch.  To see multiple orders for completing this template, based on different ideation processes, see this article.


4-nowwhat
Preparation Steps
  • Recruit teacher sounding boards who will trial this template and standards with you
  • Use this template and standards to plan projects
  • Use backwards design standards to reflect upon and to refine project template form
  • Run critical friends with other teachers that is influenced by the backwards design standards.  Refine template form as needed.
  • Gather and create resources that are outlined in completed template.
Early Implementation Processes
  • Implement project plan outlined in project template.
  • Gather notes on how well each phase is working during the project.
  • Use reflection prompts and facilitated discussions to gather more student data as to whether or not the plan is helping student stay engaged and dig deeper into their learning.
Advanced Implementation Processes
  • Use student data to plan better for remediations and to better align hooks to student interests
  • Create a simplified version, student friendly version of standards.  Show student panel your template and have them evaluate the project outline in the form using the standards.  If you don’t want to reveal the hook early, you can ask former students to serve on your evaluation panel.
  • Use simplified (or not) version of template and standards to guide students to design their own projects and independent inquiries.
  • Integrate some components from Human Centered Design into template and standards


 5-relatedstuff

39: Essential Questions

1-sources


2-what

Screen Shot 2016-05-08 at 9.17.04 AM

What are essential questions?

  • thought provoking questions that guide students to key big ideas in the discipline
  • broad questions full of many transfer opportunities
  • engaging, stimulates lively discussions
  • requires students to consider alternatives, weigh evidence, support and justify their ideas
  • naturally recur, create opportunities to transfer to other contexts and contents
Rationael for Essential Questions:
  • Essential questions are examples of important questions that can recur throughout our lives.
  • Essential questions point toward key inquiries related to big ideas in disciplines.
  • Essential questions help students investigate core concepts in the discipline.
Tips for Writing Essential Questions
  • design questions that are student friendly, thought provoking, challenging, and a priority
    • examples: How precise must we be? To what extent is DNA destiny? In what ways is algebra real and unreal? What makes writing worth reading?
  • Jeopardy method: start with unit topics and brainstorm questions
  • Use 6 facets of understanding to craft questions
  • It is OK to design essential questions that are engaging to students, but not necessarily to professionals
Tips for Implementing Essential Questions
  • Check that students understand the essential question
  • Design inquiry activities based on essential question
  • Use several, logically sequenced essential questions in one project
  • Post essential question(s) in classroom
  • Help students to personalize essential questions by sharing hunches and related personal stories
  • Allot sufficient time for unpacking essential question(s)
  • Share essential questions with other teacher to create opportunities for shared or related essential questions in multiple contents
For more information about essential questions, check out this article: Crafting driving questions.


3-sowhat
Essential questions avoid designing curriculum with 2 pitfalls: 1) hands on, but not minds on 2) coverage instead of un-coverage.  They can inspire students to engage deeply in content.  They can frame big ideas that recur in the course.  They can be used to design curricula that treat students as potential performers, not sideline observers.  Students can learn how experts ask questions. Students can learn how to go beyond accepting facts based on faith; they learn how to accept knowledge baed on evidence. Essential questions can help students explore connections among ideas.


Essential questions can signal to students that learning is not just about finding the answer, but about learning how to learn. They provide opportunities for students to demonstrate mastery through transfer of knowledge to unique contexts.  They point towards big ideas in the disciplines.  They show that the conclusions yield by big ideas can vary due to varying contexts.  Investigating essential questions can help students focus on and uncover ideas specific to a project.


4-nowwhat
Preparation Steps
  • Analyze standards.  Identify enduring understandings and supporting skills.
  • Design essential questions that align to enduring understandings in the standards.
  • Design activities that guide students to inquire into and investigate the essential question and related questions.
  • Post essential question(s) in classroom.
  • Ask for feedback on essential question(s) and use feedback to revise.
Early Implementation Steps
  • Communicate and discuss essential question early in the project.
  • Let students develop questions and hunches and stories that relate to essential question early in the project.
  • Let students investigate questions, hunches and stories related to essential question.
  • Use essential question as a pre-assessment and diagnostic tool at several points in the project.
Advanced Implementation Steps
  • Design several essential questions that frame different phases in a project.
  • Ask students to revise essential questions to make them more clear and provocative.


5-relatedstuff