#EdublogsClub 6: Challenge Accepted

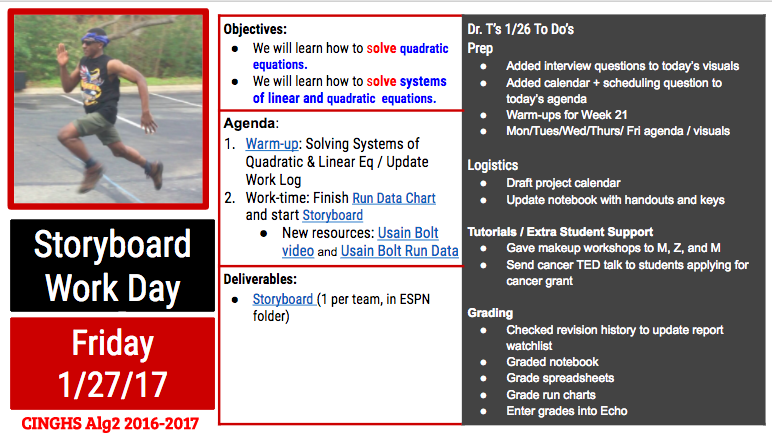
This year I took on the exciting challenge of being a founding staff member of Cedars International Next Generation High School (CINGHS).  CINGHS is a public STEAM academy that is fully committed to Project-Based Learning (PBL).  Since our staff is small, I accepted an expanded teaching role.  I got Math Certified last summer and agreed to teach both Math and Science classes at CINGHS.  This year, I’m co-teaching an Integrated Physics and Engineering class, I’m teaching an Algebra 2 class, and I’m assistant teaching an 8th grade Math course.  Having multiple preps at a PBL school is very challenging.  To get a taste of how much needs to get done to manage these courses, you can go here.

In addition to my main teaching responsibilities, I’ve also agreed to be the campus testing coordinator for STAAR and for fun, I am our school’s mascot (@TheCedarsRaptor) at many of our students’ games. I’m also applying for several grants so that our school can quickly acquire the resources we need to be a first class STEAM Academy.  Here is the top 10 list of things I’m doing to make this year sane and enjoyable:


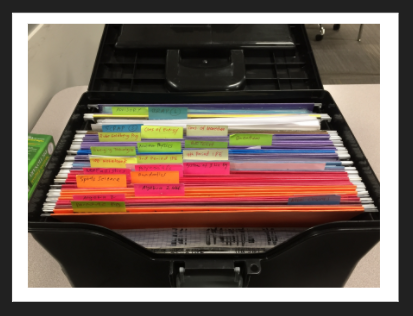
Challenge Accepted Habit #10: Stay organized.

I have a file box that keeps all my activity sheets, rubrics, formula charts, etc. for my two main preps for an entire trimester:

I also organize my web browser bookmarks to make all my project documents accessible within 1 to 2 clicks.  Staying organized means I don’t waste energy looking for things.  Staying organized is one of the ways I maintain a home field advantage in all the places where I teach.  


Challenge Accepted Habit #9: Eat Brains (read, ask questions).

Last year, I went bananas on a project to type out all my book notes and this year I am reaping the benefits.  All my book notes are here.  Whenever I wonder about how to do things better, I just search for the topic in my book notes and gather a couple ideas until I feel comfortable enough to try something new.  I’m always looking for more books to read carefully.  If you have any recommendations, please share via comment.  

I’m also fortunate to work with a highly talented and creative staff.  I brainstorm and vet new ideas with my co-workers.  If I see students are really into an activity in another class, I take a peek and learn what I can.

I learn from educators outside my school through Twitter Education Chats.  The schedule for these is posted here.  I use Tweetdeck to organize my tweets into columns dedicated to specific hashtags in order to participate effectively in Twitter chats.  My favorite chats are #pblchat and #edchat.


Challenge Accepted Habit #8: Maintain a happy list.

This year I started maintaining a happy list.  It currently has 60+ items on it.  It is wonderful.  Just seeing the length of it as it grows makes me smile.  Maintaining the list helps me to feel grateful and light.


Challenge Accepted Habit #7: Maintain a hack list.

Whenever I discover how to do something better, I add the thing I figured out to my hack list.  This list reminds me of solutions I’ve already figured out, it keeps me creative and on the lookout for new solutions, and it builds the belief that I’m tricky enough to solve all the problems I encounter daily.


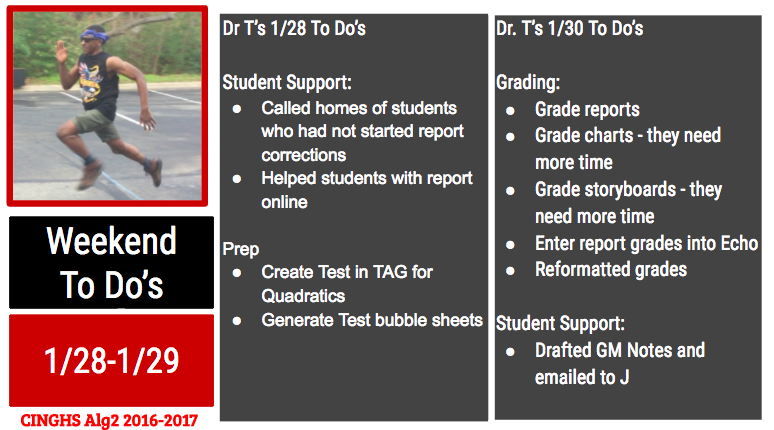
Challenge Accepted Habit #6: Maintain a To Do List that makes Big Goals (Operations) visible everyday.

My current To Do template is divided into these sections:

  • Operation Treat Yourself – things I do to take care of myself
  • Operation De-Entropy – things I do to slowly clean my house day by day
  • Operation Brown Belt / Stay Fit – daily fitness / karate to do’s
  • Operation No Work Weekend – things I do during work week to keep weekends work-free
    • Algebra 2 To Do’s
    • Physics To Do’s
    • 8th Grade Math To Do’s
    • Other
  • Operation KIT – staying in touch with people I don’t work with
  • Operation Adulting – errands I run unrelated to school
  • Operation Einstein – going above and beyond so my 2017 Einstein Scholar application won’t be sad
  • Operation STAAR – things I do as campus testing coordiance

Within these sections are numbered lists.  Items are PINK if I plan to do them today.  They are GREEN if I am working on them now.  They are BLUE if I won’t get to them today.  They are BLACK if I completed that item.  I enjoy making the colors change as I complete items throughout the day.  At the end of the day, I copy the list into the next day’s To Do page, delete all the BLACK and turn priority things PINK.  I am on Day 28 of this To Do list and it’s the longest I’ve ever kept a New Year’s Resolution (the reason why I designed this To Do system).  My 2017 Resolution is to live each day without regret.


Challenge Accepted Habit #5:  TEMPLATE-FY.

Whenever I get the sense that I’m creating a document that I might use again in the same form or similar form.  I create the document as a template first and put it in one of my Template folders: IPE Templates or Algebra 2 Templates.  Having many templates has helped me to complete my lesson preps (and do other things) MUCH FASTER.  


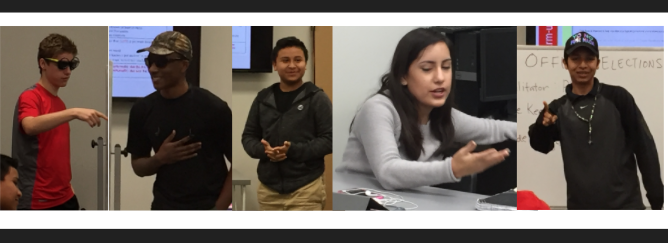
Challenge Accepted Habit #4:  Train and rely on student officers.

Each of my class periods has 3 class officers: a facilitator, a time manager, and a grade manager:

  • The facilitator starts my class by going over the daily agenda while I take attendance.  They also facilitate some class discussions and act as the main activity leader on days when I need to miss class.
  • The time manager tracks the time till the end of class and announces how much time we have left to complete activities.
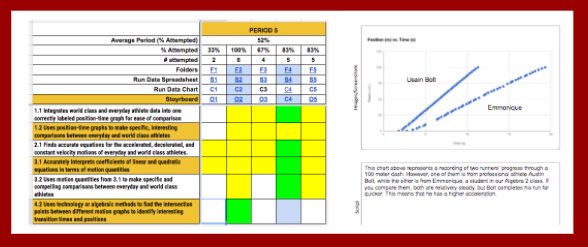
  • The grade manager uses task completion charts to remind students in person and via email to turn in late work.

Having well-trained class officers is pretty amazing.  I get to lead activities with a team of teachers that includes teachers and students.


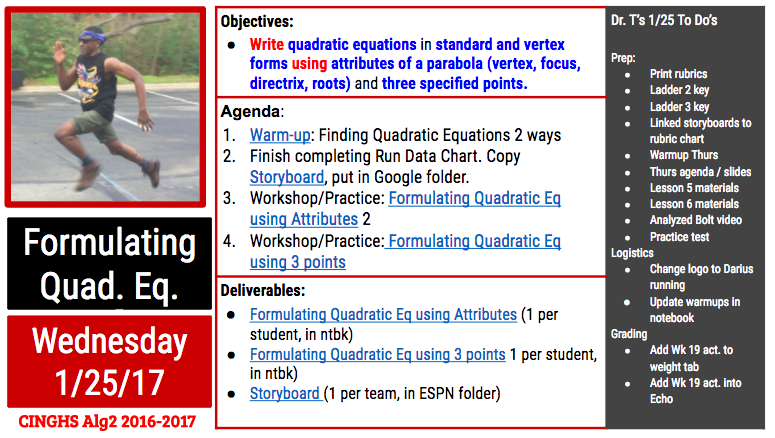
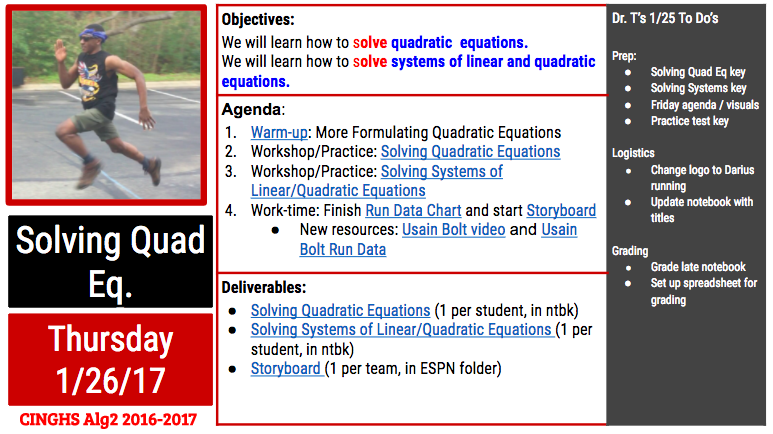
Challenge Accepted Habit #3:  Prep lessons roughly a week ahead of time.

I’ve started planning lessons earlier in order to free up weekends for things other than work.  In addition to this benefit, prepping early means I can create things with very little time pressure.  I have time to draft lesson activities, visuals and handouts and then revise those over a couple days.  I have time to make keys and to try out activities and make tweaks to optimize the activities.  This tweaking window is pretty sweet.  Knowing I have time to revise lessons, frees me up to create quick rough drafts of lessons.  During the quick rough draft phase, I feel free to try out new things and repeat old things that have worked.


Challenge Accepted Habit #2:  Exercise regularly.

I row on a rowing machine nearly everyday.  I’m in the middle of a long term project to row to the moon.  Every morning, I make coffee and then I row a 5K.  Then I get ready for work, walk my dog and head to work.  I also try to attend 3 karate classes a week so that eventually I can test for my brown belt (maybe in 2017?).  Exercising regularly helps me burn off stress and keeps me pretty healthy.


Challenge Accepted Habit #1: No Work Weekends!

I complete enough during the work week to dedicate my weekends to relaxation and to my hobbies.  I sometimes work on the weekends if I feel like it, but I complete enough during the week so that I don’t have to.  Having the freedom to take weekends off is making my work schedule feel very sustainable.  This is first year of teaching where I’ve managed to do this regularly and it feels AWESOME.  I spend my weekends napping, reading, solving puzzles, watching basketball games, practicing karate, going on dates, treating myself, etc.  By Monday I am completely refreshed and ready to take on a new week.  Knowing I have a work-free weekend coming up, helps me stay motivated and focused during the workweek.  

A Tale of Two Projects: Week 2 Algebra 2 Sports Science Project

Week 2 of the Sport Science Video Project was jam-packed with content scaffolding on quadratic functions.  It turns out that analyzing the motion of 100-m runners is not a simple task.  To analyze and draw interesting conclusions from 100-m position-time data, one must know how to:

  • formulate quadratic equations from data tables,
  • solve quadratic equations
  • solve systems of linear and quadratic equations
  • interpret motion quantities embedded in linear and quadratic equations

In Week 2, we covered all these skills (and then some) and started applying them to the run data generated by students and by world class athletes (Usain Bolt).  

Note: If you’d like to learn more about this project in its earlier or later phases, go here.


Week 2: Project Day 4: Data Analysis


On Day 2, we started class with a warm-up that had students make connections between the coefficients in quadratic equations and motion quantities such as initial positions, initial velocities and accelerations.

We went over the correct results so that students could start to interpret some of the quadratic functions that fit their run data.  


After this warm-up, the teams used Coach my Video to advance their running videos frame-by-frame and gather time data that went with each 2-m increment marker on the 100-meter track the students created on Day 3.  They entered these times into a Google Sheet that automatically graphed their data on a position-time graph.


Then they used their position-time graph workshop notes to divide up their graph into sections that corresponded to different types of motion.  They started using Desmos to find regression equations that fit their data.  Their recorded their results in a graphic organizer called a Run Data Chart that they copied and stored in their project Google folder.


Later in the day, I prepared for the rest of the week by grading revised reports from the NERFallistics project and by preparing a workshop on formulating quadratic equations from data tables using technology.


Week 2: Project Day 5: Content Scaffolding

On Day 4 of the project, we learned several skills related to quadratic functions.  I also got to check out if students responded well to a new method I had developed for displaying procedural skills.


We started the class by going over how to use Desmos to find regression equations from points in a data table.  We went over a handout with this step-by-step graphic organizer:

We went over the steps for a sample problem together.  Then we set a work timer for 10 minutes to try these steps on 4 other regressions: 3 sample problems and 1 from their own run data sets.


This visual also shows my new method for displaying procedural skills: the left column outlines each step in the procedure and the right column demonstrates each step on a sample problem.


After they had a little time to practice the skill of using Desmos to find regression equations, we moved on to a new mini workshop on the attributes of quadratic functions.  This mini-workshop covered things they already knew (vertex, axis of symmetry, y-intercept, x-intercepts) and introduced new attributes (focus, directrix).  I gave them time to read through the definitions and then we discussed how to label the attributes on a sample quadratic function.


After we had reviewed the forms of quadratic equations and the attributes of quadratic functions, we started going over different ways to use the attributes of quadratic functions to find their equations.  


The first method we covered was how to find the quadratic equation for a function given its roots.  I kept with my new format for presenting new procedures.  The left column outlined each step to find the equation.   On the space on the right, we applied each step to a sample problem.   After we had gone over 1 sample problem, we set a 10 minute timer for the students to practice this new skill on a couple practice problems.  While they practiced, I monitored their work and answered their questions.


Then we learned how to find the quadratic equation of a function given its vertex and one other point.  We learned how to find the equations in vertex and standard forms.  We again worked through a sample problem together and then set aside work time to practice the skill on new problems.  Some students requested that I email them the Notability file containing the workshop problems.  Students always have the option to get a pdf-copy of workshop materials because I use Notability for a majority of workshops – especially ones where I demonstrate how to do various types of calculations.


After we went over this skill, we called it a day because everyone’s heads (mine included)  were hurting by that point.  What a productive day!  I told the students that they were markedly smarter (at least within the specific domain of using quadratic functions) as a result of their hard work during that day.   


Later in the day, I prepped for the remainder of the week by preparing workshops on formulating quadratic equations given any 3 points and on transforming equations from standard to vertex form (completing the square).   I also figured out a way to analyze Usain Bolt’s data.  I used his average stride length (2.44 m) to associate positions with all his footfalls.  I then then paired those positions with times I gathered using Coach my Video.  I also found a storyboard template that my students could use to plan their videos and I uploaded it to the students’ project briefcase.

Week 2: Project Day 6: More Content Scaffolding

On Day 5, we learned 2 more ways to formulate quadratic equations: using a focus and directrix and using any 3 points.  We kept with the format of modeling a practice problem with each new skill in a mini workshop following immediately with practice time to apply the skill to several practice problems.  


The mini workshop on formulating quadratic equations given a focus and directrix was the final workshop in a series dedicated to using the attributes of quadratic functions to formulate quadratic equations.  While making my keys, I noticed how easy it was to mess up this process by substituting the focus (instead of the vertex) into the vertex form for the quadratic equation.  I made a mental note to watch for students making this easy-to–make error and was able to catch it a couple times during the students’ practice work time.


For the next workshop, I used the TI-emulator to show students how to use a scientific calculator to solve systems of linear equations.  To find a quadratic equation from 3 points, one can substitute the 3 points into the standard form of a quadratic equation three times.  The result will be a system of 3 linear equations.  In an earlier project, students had learned how to use Gaussian elimination to find the solutions to systems of 3 linear equations.  Using their prior knowledge, we discussed and demonstrated how to convert the 3 linear equations into an augmented matrix.  Then I introduced them to a new matrix: the reduced row echelon matrix.  I wrote a sample one on the whiteboard and asked them what was the (x,y,z) solution embedded in the matrix.  The students used their prior knowledge of matrices to find the answer quickly and accurately and then they started to appreciate the power of this matrix.  Then I demonstrated how to enter the augmented matrix into the TI-83 and then use it to find the reduced row echelon matrix.  The students were able to do this with some coaching in very little time and then several got pretty emotional.  I think they were remembering the trauma of using Gaussian elimination to solve systems by hand and comparing it to the ease of using the calculator to solve matrix equations.  Some got really happy.  Some were irritated and asked why I taught them Gaussian elimination instead of this method earlier.  I replied because Gaussian elimination is written into the Texas TEKS so I am professionally bound to teach it to you.  We ended the class period on this high / sour note.


Later in the day, one student requested that I change the project logo from the ESPN Sports Science logo to an image of one of the Algebra 2 students running during our data collection day.  I got permission from the running student to make this change and then made it official.


I prepared for the remainder of the week by preparing lessons on solving quadratic equations and solving systems of quadratic and linear equations.  I also prepared a Practice Test on quadratic functions for the following Monday.  I updated the warm-ups in the class version of the Algebra 2 notebook.  I also started setting up my grade sheet and Echo for the tasks I would grade later this week.


Week 2: Project Day 7: Content Scaffolding (Finale)

Day 7 of the project was the final day for introducing new content skills.  The remainder of the workshops in the project would be dedicated to fine tuning those skills to apply them to products.  Prior to introducing students to the quadratic formula, we introduced the discriminant: how to calculate it and how to interpret it.


We used this visual during the workshop to go over how to calculate the discriminant and then how to interpret its value.  After this mini-workshop, students had 10 minutes to practice calculating and interpreting discriminants before we moved on to a mini workshop on the quadratic formulas.


For our mini workshop on using the quadratic formula to solve quadratic equations, I intentionally chose a sample problem with 2 complex roots.  This gave me an opportunity to introduce complex numbers and how to use these to find the solutions of quadratic equations with negative discriminants.  When we got to the step of simplifying the square root part of the equation, I let them plug in the expression into the calculator as is and let them see the errors that the calculator generates.  Then we talked about how to use “i” to resolve this dilemma.  Several of the students had seen “i” before but had never been formally introduced to it.  After we discussed this sample problem, the students asked for 15 minutes of practice time to work through several practice problems.  The practice set included problems with 2 real roots, 1 real root, and 2 complex roots.


In the final workshop of the class period, we went over how to use the quadratic formula to solve systems of linear and quadratic equations.  We practiced setting the equations equal to each other and rearranging the resulting equation into a form that could be resolved by the quadratic formula.   In the remainder of the class period, they practiced using this skill to solve several systems of equations (3 given by me and 1 using equations they had found from their analysis of their run data).


Later in the day, I finished making my Quadratic practice set keys.  Any student can get access to a key on a practice set by showing me their work on the practice set.  As long as they try all problems, I share them on a Google pdf copy of key.  Many students asks for the keys and many have learned to correct their work in different color pencil using the key so that they know what they need to think about to improve their skills.    I also completed my Practice Test key to prepare for Monday’s class.


Week 2: Project Day 8: Full Work Day

After a dense week of content scaffolding, we ended the week with a full work day.  The students used this day to apply the skills they had learned that week to the analysis of their student run data and of Usain Bolt’s run data.  They worked on recording their results in a Run DataChart and in a storyboard for their sports science video.  Some students also used this time to finish and ask for help on practice sets from earlier this week.  Aside from helping them with the warm-up and from answering their questions, I was pretty hands off on this day.  I kept my spidey senses alert to hear what difficulties students were running into while analyzing their data and preparing their storyboards.  I took note of these things to anticipate the types of workshops students might need next week.


This visual shows a sample slide in a student storyboard and the rubric chart I use to show feedback feedback on their work: green squares = full credit and yellow squares = partial credit.  I add comments inside their products that describe how to convert yellow rubric chart squares to green ones.


Later in that day, I prepped for the following week by preparing next week’s warm-ups, agendas, and agenda / activity visuals.  I also got the class notebook up to date with this week’s activity sheets.  Then I graded the students’ notebook activity sheets for this week and entered those grades into Echo.


Week 2 Weekend: Week 3 Prep

Saturday at midnight was the final deadline for NERFallistics report corrections.  Because this grade was so high stakes, I supported the students in 2 ways: parent phone calls and virtual office hours.  Saturday morning I called the parents of all students who had not started report corrections because it was the final day in a 2-week correction period.  During the late afternoon and evening, I made myself available online for students with report corrections.  I ended up using the messaging feature on Google docs to support students with many questions about their report corrections.   


Also on Saturday, I used our test software (DMAC) to create the end-of-project test.  We are required to use DMAC for two assessments per six weeks.  I typically use DMAC for my end-of-project tests and my trimester exams.  


On Sunday, I graded the students storyboard and run charts and realized they needed more time and support so I extended the deadlines on these and modified some of the upcoming warm-ups to cover issues that I was seeing in their products.  I noticed they were struggling to associate the numbers in their spreadsheets and in their regressions with meaningful running statistics.  I created a couple warm-ups to make those connections more explicit.  


After finalizing my grades, I created the Week 20 Task Completion chart.  The image below shows the task completion chart (with student names boxed out).  Red boxes denote missing assignments.  The grade manager uses this visual to provide face-to-face and emailed reminders to students to turn in missing assignments.


195: PBL Tips on Managing the Process

1-sources


2-what


Screen Shot 2016-05-12 at 11.34.02 AM


At project start, make sure students are on the right track:
  • Help students brainstorm next steps (such as research plans) prior to beginning those processes
  • Hold early private meetings with teams while the rest work on other assignments (ex: background reading assignment) to vet and give feedback on their next steps and research questions
  • Require deliverables with early work sessions to make sure students are making progress and gaining momentum
  • Provide milestones, benchmarks and templates to support students in managing projects
Tailor grouping strategies to project needs:
  • Vary out grouping methods: student choice, teacher choice, random draw, etc
  • Aim for heterogeneous groups that team up students who are advanced with students who struggle
  • Grouping friends together works well with projects that require a lot of work outside class time
  • If a project requires a lot of different skills, may aim to form teams that include students who have those skills as a whole when combined in teams
  • Mixed method – students choose pairs and then teacher chooses which pairs to combine into teams of 4
  • Make grouping appear random even when it is actually very deliberate
  • Expert -> jigsaw teams – expert teams become very verses in 1 topic and then jigsaw teams are formed to include one of each type of expert
  • Use knowledge of students to create balanced teams
  • Sometimes when students choose their own teams end up with several strong teams and several unfocused teams
  • Could make students apply to be on teams
  • Have students conduct a team inventory of their skills and compare that to the skills needed to complete the project – if there is a mismatch they can lobby to switch team members to better align their team’s skills to the project
  • Fake Autonomy – group all students into 3-4 colors.  Students who should not work together share the same color.  Ask students to form teams that include one student of each color
  • Can have students submit 1st and 2nd choice for partners and try to honor their requires while forming balanced teams
  • Can have students rank their interests from a list of topics and form teams based on common interests
Plan how to accommodate the needs of diverse students
  • Plan in remediation time for students who don’t get it the first couple times
  • Have students develop a portfolio that crosses projects so they can access resources throughout the year
  • Use knowledge of students to provide different types / levels of support to different students
  • Students can get help from teachers, other students, the library, the internet, etc.
  • Try to allow for time for students to work with their friends or work on a topic they are interested in
  • For more on differentiating for various needs, see this article: Clustering student needs for more efficient planning
Intervene with students who are not carrying their own weight:
  • Sometimes let teams go through the firing process and then the student needs to work alone.  Or that students can produce a body of work and apply for a rehire from another team.
  • For teams that complain about team members not working, facilitate a meeting to renegotiate and tighten timelines.  Add more details to timelines including action item descriptions, action item owners, and specific deadlines.
  • Inform parents when their child is missing checkpoints and brainstorm together how to improve students’ project and self management skills.
  • Have individuals and teams reflect on group processes so they can become more aware and communicate to each other and the teacher about their group concerns and problems.
  • Brainstorm with teams who are stuck or off task on ways to become more motivated and focused.
Keep track of each group’s progress
  • Move a lot! Use the proximity effect (location matters more than content) to coach students working in teams
  • Set clear benchmarks and deadlines and have quick touch-in meetings to check on teams’ progress and answer questions and concerns
  • Let students complete a project planning form and then have a review meeting around that form.
  • Use checklists or 3×5 cards to record group observations
  • Instruct teams to maintain group folders that include all their logs and product artifacts.
Make sure groups keep track of their own progress
  • Instruct groups to meet and record who attended the meeting, what was accomplished, the meeting agenda, data, location
Keep public records of group progress:
  • Maintain a public accountability chart that shoes what benchmarks teams have completed – make this a graphic display that everyone can see
  • Allow time at the start and end of work days to set and track team goals
The Internet is only one information resources.  Students often need help to use it efficiently
  • Use school librarian as a project partner
  • Provide students with a starter list of helpful websites
  • Teach students how to analyze the content of websites and evaluate whether or not they possess the prerequisite knowledge to understanding the web content
  • Teach students how to evaluate the validity and quality of web sources
Technology can be a powerful tool; it can also crash and burn.
  • Trial and troubleshoot tech before using it in a project
  • Identify people who can help you troubleshoot technology
Don’t use tech blindly.  Select tech that enhances student learning
  • Select tech that addresses the meat of the project effectively
  • Before using a tool ask: What can be accomplished by this tool?  Can we do this using simpler tools?
  • Allow time to train students how to use selected technology.
  • Use tech only when it is appropriate and enhances student learning.
Don’t be afraid to make mistake
  • When mistakes are made, model how to fail forward by brainstorming solutions with students
Don’t be afraid of making mid project corrections
  • When students are missing essential info, let students know how / when class will get together to fill in the gap
  • Rethink timelines if you realize that students can’t meet the original timeline or are ready and willing to do more
  • When problems arise, hold a class meeting to debrief the situation and brainstorm and select solutions
  • Renegotiate expectations with teams that run into unexpected obstacles – focus new expectations on what’s critical to learn
Debrief project with your class and ask for project feedback
  • 2 questions:
    • What is of lasting value to the learner as a result of completing this project?
    • What is of lasting value to the community as a result of completing this project?
  • Show students models of good reflection before they start generating reflective comments.
  • Ask students
    • what didn’t work and why and possible alternatives?
    • what the fell they did well in the project?
    • what they feel didn’t go well?
    • what grade do they deserve and why?
    • are you proud of your end product?
    • how could end product be better?
  • Could gather feedback on overall project and specific end products on sticky notes
  • Keep student and teacher notes on project improvements in a secure place
  • Processing time is well worthwhile – set aside time for it
Reflecting on the Driving Question
  • Reflect on the driving question to review content and hopefully make long lasting learning connections


3-sowhat
Effective (poor) project management can make (break) a project.  Students need support developing skills related to self- and project-management.  Setting aside time to scaffold these skills and using templates to reinforce / guides these skills will make students more effective at learning within PBL projects.


4-nowwhat
Preparation Steps
  • Analyze standards and create related list of academic learning targets.
  • Create project products and expectations.  Create an inventory of skills students need to have to be successful in the project.
  • Create character learning targets that are skills in the inventory that students may not have yet.
  • Design scaffolding and templates for character learning targets.
  • Select and troubleshoot technology that advances learning
Early Implementation Steps
  • Set aside time in projects to scaffold character learning targets.
  • Provide feedback on templates that scaffold project and self management process in touch-in meetings
  • Provide opportunities for students to set and track their goals throughout the project
  • Facilitate a post-project reflection discussion to gather feedback on what worked and alternatives to problems
  • Use variety of grouping methods that enhance project goals
  • Select and use technology that advances student learning; scaffold the tech
  • Intervene / support teams / individual students who are struggling
Advanced Implementation Steps
  • Ask upperclassmen to coach / mentor students in project management skills
  • Ask experienced students to design their own project planning forms
  • Use tech to update group accountability charts in real time
5-relatedstuff

123: Alternate Question Response Formats

1-sources


2-what


 Screen Shot 2016-05-09 at 12.35.47 PM


  1. Choral Responses
    • What – Class answers at once in unison
    • Why – Check for understanding, review, reinforce knowledge, drill & practice
    • How – Develop routine cue to signal time of response
  2. Signaled Answers
    • What – All students answer with a hand signal
    • Why – Check for understanding, review, reinforce knowledge, drill & practice
    • How – Develop routine for types of signaled answers (ex: thumbs up, thumbs down)
  3. Numbered Heads Together
    • What  – Students in numbered teams think together and provide response when number is called
    • Why – Peer teaching, Holding students accountable to cooperative learning styles (ex: jigsaw), review concepts prior to learning new ones, activate prior knowledge
    • How – Form heterogenous teams where each member has a different number (1, 2, 3 or 4).  Pose question.  Give teams time to compose responses.  Call out a number and all students with that number raise their hands.  Call on a couple students with their hands raised.
  4. Think-Pair-Share
    • What – Students process responses individually, in pairs, and with the whole group.
    • Why – Review, activate prior knowledge, give students processing time prior to discussions
    • How – Pose question.  Give students time to compose responses quietly and individually.  Give students time to share responses with a partner.  Then pairs share responses with whole group.
  5. Peoplegraph
    • What – Students stand on a continuum line to express their opinion
    • Why – engage students in active thinking prior to a discussion or written assignment, give students time to consider core concepts
    • How – Setup way to communicate meaning of high and low values on the continuum, pose question, ask students to stand on the line according to their opinion, provide time for students in close and far proximity to share why they chose their position on the line
  6. Data on Display
    • What – Creating collective visual displays of students’ opinions
    • Why – Examine assumptions.  Practice hypothesizing, making predictions and analyzing data.
    • How – Students given a set of questions on a workshops; each response is a percentage from 0 to 100%.  Poster bar charts for each question are set up around classroom – horizontal axis is divided into 10% bins.  Students use post-its to place their responses on the poster charts.  Once all votes are posted, students examine each poster, notice and discuss trends.
  7. Synectics
    • What – Students use metaphors to make connections to ideas and solutions
    • Why – Develop deeper insights into topics by viewing them from different perspectives.  Promote divergent thinking and diverse points of view.
    • How:
      • Simple – Pick 2 opposite objectives (ex: ice cream or spaghetti)  Ask students to think individually whether they think a topic is more like 1 metaphor or the other.  Then group students and have them discuss their associations and come to a group response.  Then each group shares responses.
      • 4 corner – Pick 4 metaphors and label 4 corner of room (ex: football, tennis, basketball, golf).  Place a poster post-it at each corner.  Present a topic.  Students decide which metaphor goes best with the topic.  They work in teams with students who share their opinion to list the reasons why the topic goes with the selected metaphor (5 minutes).  All 4 groups share their lists with the whole group.  Then students continue discussing topics or do a related writing assignment.
  8. Interview Design
    • What – Students collect answers to interview questions in round robin style.
    • Why – Encourage students to respect and become aware of different points of view.  Promote active listening and note taking.  Provide structure for every student to answer every question.  Practice in summarizing.
    • How – Divide class into 1 of 2 concentric circles.  Each student gets one sheet with copy of a single interview question.  Students sit in concentric circles.  Time is allotted for inside person to ask outside circle person their interview question and listen and take notes (1 min).  Then time is allotted for the outside person to interview the inside circle person and take notes (1 min).  Then the outside person rotates 1 spot in the clockwise direction.   Time is allotted for each pair of interviews.  Then the outer circle rotates again until all students have had the opportunity to answer all interview questions.  Then groups are assembled of students who had the same interview question.  Each group looks for major themes in the responses (5-6 min) and then each group reports these to the class
  9. Fishbowl Discussion
    • What – Students discuss topics while other students take notes and analyze them for major themes
    • Why – Practice note taking and active listening.  Practice discussion skills and receive feedback in a safe environment.
    • How – Arrange students in 2 concentric circles.  Seat enough students in the inner circle to leave 1-2 seats empty.  Go over discussion norms: examples: invite all people to speak. use appropriate wait time. Pose a question.  Students in the inside circle discuss question while outside circle students take notes.  After discussion facilitate a debrief discussion in which outer circle students share major themes and to what extend the discussion was effective
  10. Say-It-In-A-Word
    • What – Students respond to a question with a single word
    • Why – Practice decision making and active listening.  Level playing field by insure that every student has same opportunity for initial response.
    • How – Class sits in a circle.  Teacher poses a questions.  Gives students processing time.  Students take turns responding to question with one word.  Teacher asks following up choices that ask students to explain their word choices.


3-sowhat
Knowing alternate response formats can help teachers facilitate classroom conversations that are more varied and that require and value participation from all students.  Varying the format can keep conversations fresh and high energy.  For best effect, it helps to select a response format that matches an instructional goal.


5-relatedstuff
Preparation Steps
  • Analyze standards and develop aligned learning targets.
  • Use characteristics of quality questions to brainstorm variety of questions that relate to learning target.
  • Decide which response formats go best with key questions.
  • Develop resources that go with selected response formats
Early Implementation Steps
  • Use selected response formats to encourage active participation of all students.
  • Have students reflect on how response formats are affecting their participation and attitude toward classroom conversations.
Advanced Implementation Steps
  • Poll students to find out which response formats they prefer for specific instructional formats.  Use their preferences to identify response formats that can be built into classroom routines.


5-relatedstuff

100: Reinforcing Effort & Providing Recognition

1-sources


2-what


Screen Shot 2016-05-09 at 3.23.22 PM


What research has to say about reinforcing effort:

  • Not all students realize the impact of effort.
  • Students can change their beliefs on the importance of effort.

Classroom Practices

  • Explicit practices
    • Teachers share stories of how effort carried the day when success did not seem imminent
    • Share examples (videos) from famous people who triumphed through effort
    • Share examples of effort from famous stories
    • Students recall times when they prevailed through effort
  • Use rubrics to track effort and achievement:
rubrics
  • Ask students to see correlation between effort and achievement variables
    • Ask students to reflect on what they learned about effort
    • Graph effort and achievement data
      • Achievement vs Effort
      • Achievement vs Time
      • Effort vs Time
    • Have students use graphs to notice patterns in their effort and achievement


What Research has to say about Providing Recognition:

  • Rewards do not necessarily have a negative effect on intrinsic motivation
    • Worst effect – giving praise for easy tasks can undermine achievement
  • Reward is most effective when it is contingent on reaching known performance standards
  • Abstract symbolic recognition is more effective than tangible rewards
    • Tangible awards = physical prizes, candy
    • Verbal praise is effective
    • Abstract rewards = recognition for reaching a performance standards
    • Tangible awards are still effective when tied to performance standards

Classroom practices related to Recognition:

  • Personal Best Honor Roll – students who met individual target goals made this honor roll regardless of whether or not they qualified for absolute grade-based honor roll
  • Pause, prompt and praise
    • Pause students in work
    • Prompt – have supportive conversation on how to improve work
    • Praise – After some time and evidence of improvement, congratulate student on their new found success
  • Symbolic signs of recognition
    • Stickers, stamps, ..
    • Make sure these tokens are given for meeting performance standards to create positive or no impact on intrinsic motivation

3-sowhat

Teaching about the importance of effort relates to building growth versus fixed mindsets in students.  Showing students how their efforts tie to results by tracking rubric stores and through recognition could reinforce beliefs that tie effort to success.


4-nowwhat

Preparation Steps

  • Gather stories (articles, videos) about people who triumphed through effort
  • Gather goal setting and tracking tools such as the Effort & Achievement Rubric (see above)
  • Design lessons on the importance of effort and its connection to external results (achievements) and internal results (brain development)

Early Implementation Steps

  • Implement lessons about importance of effort – incorporate model stories, discussions, and opportunities for students to tie lessons to their own lives
  • Use Effort & Achievement Rubric and a Task chart to record effort and achievement scores daily over a period of time
  • Create summary graphs of effort and achievement shorts:  achievement vs effort, achievement vs time, effort vs time
  • Have students identify and reflect upon patterns in summary charts

Advanced Implementation Steps

  • Ask students what strategies and practices do they want to incorporate into their daily habits and routines as a result of achievement / effort tracking
  • Experiment with different ways for recognizing student effort
  • Use student feedback to identify most effective ways for recognizing student work – incorporate these into classroom routines
 5-relatedstuff

98: Coaching Conversations

1-sources


3-sowhat


Screen Shot 2016-05-09 at 3.36.58 PM


  1. Hear the problem or issue fully.
    • Ask questions to determine what happened, when it happened, why it happened.
    • Reflect back content and emotions without giving advice.
  2. Get more details.
    • Ask more questions to find out:
      • duration of problem?
      • what’s been tried already?
      • who’s been affected?
      • what does everyone think the problem is?
      • anything work at all (even part time)?
    • Reflect back content and emotions without giving advice.
  3. Honor their ideas for a solution.
    • Ask questions to help him, her or them describe their possible next steps
      • What should be done next?
      • Who might benefit?
      • How long will next step(s) take?
      • What resources do you need?
      • How will you know if it’s working?
      • What are the merits of various solutions?
  4. Ask if they want your advice.
    • If not, confirm what they will next.
    • If they really need but don’t want it, offer it.
  5. Give your advice and make a plan.
    • Don’t just give the answer – create a mentoring moment
    • Think aloud (making thinking visible).
    • Explain considerations for choice
    • Explain why you selected choice
    • Explain what was considered and ruled out and why
    • If one exists, explain impact of a similar experience you’ve had and what you would’ve done better now that you know more
    • Explain what things they did not consider in their choice – unintended consequences, impact on stakeholders, resources needed, time needed, skills needed, etc.
  6. Plan
    • Decide on a next step
    • Decide when they will check back with you
    • Decide how they will know if next step is working


4-nowwhat
Coaching conversations are a critical tool in managing teams during PBL projects.  Teams will sometimes reach an impasse and will need the assistance of a facilitator to think through a problem.  Observing the steps above will help teachers guide students through the process of analyzing, brainstorming, evaluating, and planning possible solutions to their team problems.


4-nowwhat
Preparation Steps
  • Prior to needing to facilitate these conversations, offer up the Coaching Conversation as one of a selection of extra support tools that teams can use when they are feeling stuck or overwhelmed.
  • Teach students what are the purpose and format of Coaching conversations.
  • Observe teams to identify if any teams might need a coaching conversation.
Early Implementation Steps
  • If a team requests (or is perceived to be in need of) a coaching conversations, facilitate one using the steps listed in the WHAT section.
  • After the conversations have students reflect and provide feedback on how the session went.
  • Set up a plan to implement and evaluate next steps.
  • Check in on teams to see if their next steps worked.
Advanced Implementation Steps
  • Teach students how to have coaching conversations with their team mates.  While scaffolding this skill provide: a checklist of steps, modeling of steps, and practice role play opportunities.
  • After observing the steps being modeled or role played, ask students to brainstorm situations that may require coaching conversations.
  • To help students be more effective listeners during coaching conversations, look at ideas in here and here.
5-relatedstuff

97: Building Empathy

1-sources


2-what


Screen Shot 2016-05-09 at 3.41.28 PM


Empathy:
  • Ability to understand people
  • Accurately hear unspoken feelings, thoughts and concerns of others
  • Seeing other people’s perspectives
Expressed and Unexpressed Feelings:
  • Challenges:
    • Not all feelings are spoken
    • People aren’t always aware of how they feel
Johari Window:
johari
  • Quadrant 1 Tips (Top left, Feelings are known to self and expressed)
    • Listen for blinking (feeling) words
    • Respond compassionately and attentively to feeling words
  • Quadrant 2 Tips (Bottom left, Feelings are known to self but unexpressed)
    • Observe body language
    • Ask questions related to perceived feelings
    • Put yourself in other’s shoes
  • Quadrant 3 Tips (Top right, Feeling are unknown to self, but expressed = Blind spot)
    • Ask person if he would like feedback and use SSBIR method
    • Be sensitive.  Don’t pry.  If needed, ask probing questions in private
    • Observe body language
  • Quadrant 4 Tips (Bottom right, feelings are unknown to all)
    • Ask questions
    • Put yourself in other’s shoes
Carkuff model:
  • Listen deeply by paraphrasing what was just heard without asking questions or giving advice
 
4 Levels of Listening:  For more listening tips, go here.
  1. Paraphrase content
  2. Paraphrase feelings
  3. Paraphrase feelings and content
  4. Paraphrase feelings, content and meaning
Star Listening:
  • Mostly at level 3 or above
3-sowhat
In team interactions, not all important emotions are expressed.  Teaching the Johari Window to students and related strategies can help students to practice empathy towards team members that are feeling emotions that are either unknown (but impactful) or difficult to express.  Teaching students how to actively listen and demonstrate empathy will help them build rapport with their team mates and to improve their shared trust and collaboration.


4-nowwhat

Preparation Steps
  • Research more strategies relating to showing empathy for different states in the Johari window
  • Develop visuals, handouts and scaffolding activities to teach students how to actively listen during different Johari window states
  • Develop learning targets (long term and supporting) that relate to skillful listening
Early Implementation Steps
  • Implement scaffolding lessons prepped above – include modeling, guided role playing, small / large group discussions and reflections
  • Have students reflect on how they felt when they were demonstrating and receiving strategies related to building empathy
  • Have students communicate with their team mates on how they can better read each other’s feelings and what questions help them best communicate unexpressed emotions
Advanced Implementation Steps
  • Have students reflect over time on how practicing empathy building strategies affects their understanding of teammates and team morale
  • Ask students to use their reflections over time to uncover habits they would like to develop to continue to build empathy with others
5-relatedstuff

96: Building Rapport & Listening Skills

1-sources


2-what
Screen Shot 2016-05-09 at 3.51.08 PM

Thinking Instead of Listening:

  • We can speak at 150 words / minute
  • We can think at 450 – 600 words / minute
  • Fast thoughts can create a distracting back chatter that makes listening challenging
  • Covey – We don’t listen to understanding; we listen to reply.

7 Barriers to Listening:

  1. Rehearsing a response:
    • mentally practicing to say your part
  2. False reassurances:
    • nod head like you’re listening, but you’re really looking for an opening to speak
  3. Cliches:
    • offer false cliches to appear like you’re paying attention
  4. Misdirected quotes:
    • ask questions that divert person from what they were saying before understanding it
  5. Not focusing:
    • paying attention to details outside the conversation
  6. Daydreaming:
    • paying attention to inside thoughts rather than conversation
  7. Selective listening:
    • catch a few words and pretend to listen

Good Listening Skills:  For more tips for building listening skills, go here.

  1. Don’t talk
  2. Nod head occasionally
  3. Softly look at person without staring
  4. Move away or look away from distractions
  5. Open body posture – don’t cross arms, don’t look at watch
  6. Give brief verbal acknowledgements – “Really”, “Wow”, “Interesting”, …
  7. Pace responses – if you give too may they’ll think you’re getting impatient or bored
  8. Ask clarifying questions

Building Rapport:

  • Listening – see above
  • Make deposits into emotional bank account:
    • deposit actions include: asking for ideas, listening, acknowledging their ideas, providing resources, etc
    • withdrawals include: asking for favors, negative feedback, etc.
  • Find things shared in common besides work
  • Be aware of attending behavior (how you look and act while you listen)
    • if your attending behavior includes off-putting stuff like frowning – make an effort to fix it
  • Match and mirror their communication style, learning style, or problem solving approaches
3-sowhat
Our brain is wired in such a way that good listening is a challenge.  Practicing good listening skills enhances communication and builds rapport.  Learning how to practice skills that build rapport will help one be a more charismatic leader and team player.  Teaching and practicing listening and rapport-building skills will help teachers and students to interact in ways that make deposits into persons’ emotional bank accounts.


4-nowwhat

Preparation Steps

  • Design lessons and related resources that teach students how to improve their listening and rapport-building skills.

Early Implementation Steps

  • Early on in the year and in projects, facilitate workshops and activities that build students’ listening skills and the rapport they feel for each other.
  • While scaffolding these skills – offer modeling, practice opportunities, and encouraging feedback.
  • Have students reflect on how practicing these skills is affecting their team’s morale, relationships, and communication.

Advanced Implementation Steps

  • Periodically have students deliberately practice listening and practice building rapport.
  • Have students reflect on what makes these practices challenging and what they can improve in order to make their efforts feel and be perceived as more sincere
5-relatedstuff

95: Giving Feedback (SSBIR)

1-sources


2-what


Screen Shot 2016-05-09 at 3.57.28 PM


Center for Creative Leadership Model for Giving Feedback (SSBIR):
  • Set the Stage: Intention / readiness to listen:
    • Ask if now is a good time to share feedback
    • Prepare listener for feedback
  • State the Situation:
    • What, where, when of the situation
  • State the Behavior:
    • Report facts (not interpretations, judgements) about behavior
  • State the Impact:
    • Most important step
    • Describe how behavior is affecting situations, time, money, and stakeholders
  • Resolution:
    • Ask how to resolve situation
    • Ask how to prevent future occurrences
    • If behavior is good, ask – how can we continue or enhance this?
When to give feedback:
  • Frequently
    • Easier to reinforce behavior
    • Start with positive feedback
    • Put money in emotional bank account
  • Timely
    • While experience is fresh
    • Don’t wait till experience or project is done
    • Can give feedback as they approach goals
    • Put money in emotional bank account
  • Development opportunity
    • Communicate opportunities to achieve goals
  • Solve performance problems
    • After there is money in the emotional bank account
    • Help listener arrive at strategies that will improve performance
More feedback tips
  • If it’s important, make an appointment for feedback
  • Be sensitive to power imbalance (choose neutral location to mitigate this)
  • Keep it simple
  • Leverage their strengths
  • Prepare feedback to fit listener’s communication style
  • Offer suggestions and support
  • Get their feedback about the feedback
3-sowhat
Giving constructive feedback is an important skill for teachers to have in order to set and manage high classroom expectations.  This is also an important skill to teach to students so they can communicate in ways that set and manage high expectations for their project teams.  The SSBIR method is a process that can be practiced by teachers and students in order to give both positive and negative feedback.


4-nowwhatPreparation Steps

  • Create visuals and role-play situations for SSBIR method
  • Create visuals and handouts for feedback methods and tips
  • Practice using SSBIR method in classroom and team management situations

Early Implementation Steps

  • Model and role-play SSBIR method with student teams.  Have each student practice being the speaker and the listener in the process.
  • Have students reflect on practice sessions with SSBIR method and predict when they will use this method in the future to give both positive and negative feedback.
  • Stage times for teams to have meetings dedicated to SSBIR feedback cycles so that students can practice giving each other constructive feedback.

Advanced Implementation Steps

  • Make frequent constructive feedback a part of team management routines.
  • Have students reflect on the SSBIR conversations and offer suggestions for how they can be better speakers and listeners during these conversations.
  • Have students document the next steps that emerge from SSBIR conversations and add these to their team’s goal setting documentation.
5-relatedstuff

73: Writing Workshops

1-sources


2-what


Screen Shot 2016-05-09 at 6.00.49 PM


Main components of writing workshops
  • students write during workshops that occur during class
  • teachers observe and give individual feedback
  • teach writing skills in a step-by-step manner
 
Reasons to Run Writing Workshops
  • ensures that students get writing done
  • diagnostic – learn what students are succeeding at and not
  • individualize instruction
  • can be more efficient than whole group instruction
  • model discipline specific thinking patterns and writing styles
Play by Play:
  • Building engagement, choice & individual goal setting:
    • students list possible writing topics they’d like to explore
    • teachers assign topics based on their interests and to ensure class-wide variety in topics
    • students conduct preliminary research to narrow down writing topic
    • student complete individual goal setting sheets that list specific content and writing goals they’d like to achieve in the project
  • Students working independently:
    • students conduct more research on color-coded notecards that categorize types of information and that record summaries and resources
    • students create outlines and draft pieces while waiting for conferences
    • set norms for independent work so that conferences can occur simultanously
      • write need-to-knows on sticky notes and place them on designated board
      • if you finish writing early, work on editing and revising
      • use low voices and sit close to thought partners
      • go to writing resource area for more ideas if you get stuck
  • Brief, Focused Teaching & Modeling:
    • assign a thinking sheet that outlines how to think / draft a small section of writing piece
    • conduct a mini-lesson on contents of thinking sheet
    • also support mini-lesson with modeling
    • can assign thinking sheets, teach mini-lessons, and model other key features of the writing pieces
    • could use tree diagrams and other graphic organizers to represent and outline arguments
  • Teacher Student Conferences and observations:
    • doesn’t instruct on right and wrong – instead asks questions that get students to make connections, justify arguments, etc.
    • can be short – 2-3 minutes and focused
      • commit to a learning target (writing or content) and focus feedback and inquiries on that focus to keep meetings targeted and short
    • could address any idea that students need help
    • possible prompts –
      • what are you working on?
      • how is it going?
      • what help do you need to move forward?
      • tell me more about why you …
      • what else do you know about …
      • how are you achieving your goals?
    • incorporate individual goal sheets – lists skills students want to master in current project
    • incorporate rubric
      • highlight rubric together or go over student highlighted rubric
      • give feedback specific to the rubric
      • use a rubric reflection sheet with columns: rubric criteria, successful or not, evidence, next steps
    • another way to share feedback
      • take notes on post-its while working the room
      • place on student work during work time or during conference times
    • storing conference notes
      • write on sticky notes that start on clipboard
      • move to student work
      • after it is used by student, move to a notebook that has pages for each student
  • Writing Folders:
    • keep work organized in writing folders – contain note cards, drafts, outlines, brainstorm ideas, individual goal sheets, peer review sheets, etc 
  • Share the Results:
    • conclude with oral presentations to share findings
Making time:
  • focus writing assignments on topics that involve big subtle ideas that are need to be taught over time
  • use writing workshop format for other types of problem solving – e.g. solving real world math problems, writing lab reports, etc


3-sowhat
See Reasons for running writing workshops above.


Teaching students how to write within discipline-specific genres is tricky.  The elements of the writing workshop can be used to scaffold key features of writing pieces, guide students during work time and give specific formative feedback on work.  Incorporating student goals and student choice into the work builds student engagement, agency, and ownership of the work.


4-nowwhat
Preparation Steps
  • Develop thinking sheets and mini lessons and gather models to scaffold key features of the writing piece
  • Develop overarching topic or essential question that can be used to stimulate and focus student-geneterated topics and questions
  • Develop assessment sheets – could have columns for rubric criteria, successful or not?, related evidence, next steps
  • Plan logistics and gather resources – writing folders (physical or online), sticky notes
    • Tech Note: Google keep might be a good substitute for conference sticky notes because they can be shared with students and organized by tags and students can check off items in the list as they complete them.  Google keep may be good for storing student goals for similar reasons.
Early Implementation Steps
  • Run writing workshop that focuses on 1 to 2 elements of writing piece.  See elements listed above for details:
    • build engagement though some student choice
    • conduct mini-lessons, provide thinking sheets and model each feature (1 at a time)
    • facilitate independent work time – focus work time goals and communicate norms
    • meet with students in conferences and record feedback
    • organize work in writing folders
Advanced Implementation Steps
  • Make writing workshops part of work time routine in multiple projects
  • Track writing samples over several projects and use these to help students reflect and set progressive writing goals


5-relatedstuff