Meeting in the Middle

This is Article 1 in the Meet Me in the Middle series of blog articles.  I haven’t updated my blog recently, but I’m hoping this new series will help me to:

  • Process my growth as a middle school teacher:  This year, I’m starting my 12th year of teaching and only my 2nd year of teaching middle school students.  I’m an old and new teacher at the same time.
  • Share things that are working:  Enough things worked last year that I agreed to try again and enough things have worked already this year that I’m not regretting my choice.
  • Share problem solving associated with getting strategies to working levels:  I have a tendency to make rapid changes to solve sticky problems and then to quickly forget the original trauma.  This selective memory has probably extended my teaching career, but it has also erased key rationales for strategies.  I hope this series will help me to remember the problems and solutions in constructive ways.

In my first week of school, I got to do DOUBLE the normal Week 1 ice breaker activities with my students because I teach the same students Math in the morning and the same students Science in the afternoon.  This is the first time I’ve taught students with this schedule type and I really like how it affords us more opportunities to scaffold academic and soft skills in shorter periods of time. In Week 1, here are my favorite things we did to build the culture of the classes.

#1 – 4 Corners
Students moved to 1 of 4 colored corners in response to 6 questions that related to their learning preferences, recreational preferences, and personality types.  Once they landed at their stations, random characteristics (birthdays, height, thumb size, laugh volume, etc) determined who acted as facilitator and scribe for that round.  The scribes updated 4 Corners summary sheets to include the names of the people who chose that corner, the corner title, and reasons why they selected that corner topic. The facilitators called on people gathered in each corner to ensure that all students got their ideas recorded on the summary sheets.  The summary sheets gave me some great holistic information about the things my students like and why they like them.

The final 4 Corner question guided students to choose their Compass point.  After completing the summary sheet, I had them create name tents color-coded by Compass point. Then, I took group pics of students with their name tents.  The color distributions in the group pictures gave me some hints about the compositions of my classes. I studied these pictures everyday until I learned their names by Week 2.

#2 – Getting to Know You Quizzes

Last year I saw this activity idea in a #teach180 post after I had nearly completed the ice breaker phase of back to school activities.  I created a 6 question multiple choice quiz about myself and gave students time to guess the answers. I introduced myself while going over the key, then I gave students time to create 6 question multiple choice quizzes about themselves on the back of the handout.  I spent the week spying on them and trying my best to answer all the quizzes correctly. Some of them added questions that allowed me to learn surprising things about them that I probably wouldn’t have found out till much later in the year.

In Week 2, I handed back the quizzes and the students graded my responses and highlighted the correct responses on the questions I got wrong.  This year I set a record and managed to complete one quiz with only one wrong. The students really enjoyed grading me. While they graded my work,  I got to model positive responses to passing and failing quiz scores. I placed the graded quizzes in my composition notebook dedicated completely to my students in 2018-2019.  

#3 – Norm Brainstorming Carousel

To help students build both accurate and student-friendly norms, I had them rotate through an 8 round brainstorming carousel.  I set up 10 stations, 2 per Core Value, that had 8-box brainstorming sheets. I got students to meet new people by using random playing cards to determine their groups and their first station.  Each rotation was 3 to 5 minutes. After each brainstorm session, I had students rotate clockwise so they had to build off the work of previous groups to continue unpacking the Core Value.

  • Box 1: Write down the dictionary definition of the Core Value that makes sense for school.
  • Box 2: Use the thesaurus to write down as many synonyms as possible of the Core Value.
  • Box 3: Write a student friendly definition for the Core Value.
  • Box 4:  Look up inspirational quotes related to the Core Value.
  • Box 5: Write down examples of this Core Value that occur in school.
  • Box 6: Write down non-examples of this Core Value that occur in school.
  • Box 7: Write a long norm relating to this Core Value to guide our work (5 to 10 words)
  • Box 8: Write a short norm relating to this Core Value to guide our work (3 to 5 words)

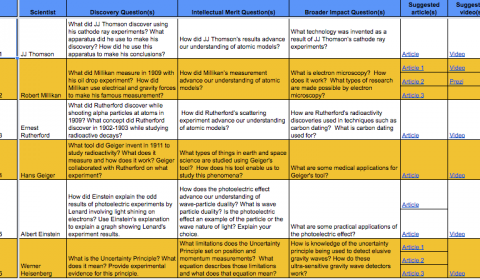
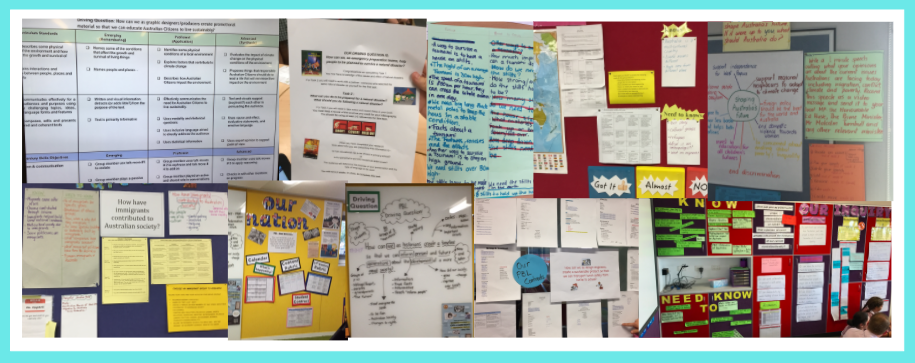
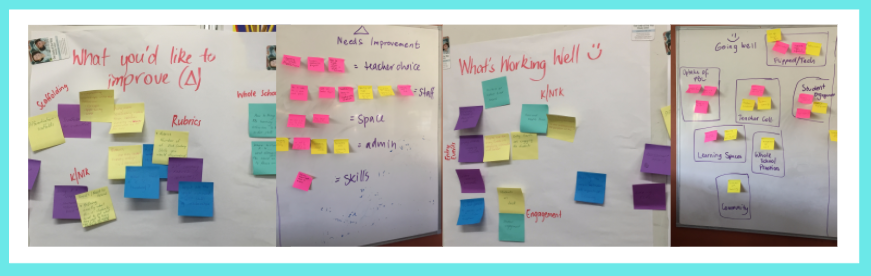
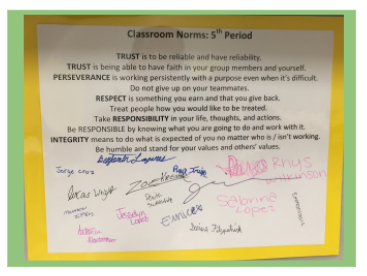
On the following day, I placed the short and long norms on voting sheets and had students vote for their top norm for each Core Value.  I was impressed that all of their possible norms were written in student friendly language, they related to the Core Values, and they did not use the actual Core Value words in the norms.  See below:

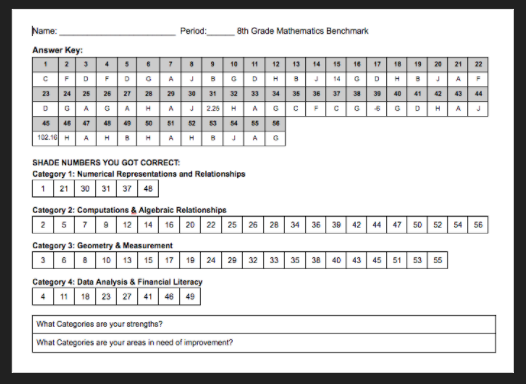
#4 – Syllabus Scavenger Hunt

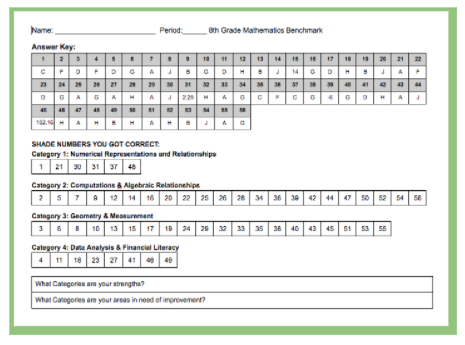
I placed a 10 multiple-choice question Scavenger Hunt on the back of my syllabus.  The questions guided students through a close read of the policies and course info on the syllabus.  After the students completed it, we went over the answers and they corrected their responses with a highlighter.  While we went over the key, I let students share their wonderings about the coming year and I shared some frank advice on what they need to do to be successful this year.

Happy List: Parramatta Edition


Over my spring break, I was VERY fortunate to have the opportunity to visit and exchange ideas with 9 amazing campuses in the Parramatta Diocese in Parramatta, Australia.  After five days of school visits and workshops, my brain is full of an overwhelming array of memories, snapshots, ideas, and exchanges.  There are too many details to capture in my typical On the Map accounts which in the past have tended to synthesize my ARIE trips in more-or-less chronological day-by-day entries of my PBL adventures.  Instead of capturing this trip in this way, I have decided to describe how this trip has enriched my Happy and my Hack Lists.  This article will describe the additions to my Happy List.  After I’ve had a few days to reflect on my notes, I will write another article that digs into the things I’m adding to my Hack List as a result of this wonderful trip.


The most important beautiful and happy memories I gathered at each campus involved students who were happy to learn.  Student engagement was very high at every campus I visited.  Students were very enthusiastic while telling me all about their work.  Several students gave me impromptu workshops on elements of Project-Based Learning (PBL) and on the specific things they were learning in their projects.  A ten-year old taught me about high modality words while explaining to me how she was using them to make her PSA script more persuasive.  Several teams practiced their presentations with me and asked for my feedback.  One team tried to present twice to me so they could immediately apply their feedback.  At one campus, PBL has raised student engagement enough to increase their attendance from around 60% to over 80% over the course of the project with several days at 100%.  When I saw this data and heard about the challenging context of this campus, I cried because it hit me that PBL was impacting these hard-to-reach kids in meaningful ways and our work had a little part in that.


In every campus, there was evidence of PBL documentation in all classrooms.  All classes had wall displays with Knows and Need-to-Knows, rubrics, group contracts, driving questions, and other artifacts (sample products, past products, workshop summaries, etc.).  I was really happy to see Knows and Need-to-Knows lists that were quite messy because they had been clearly updated over the course of the project.  These appeared in class walls and in students’ work areas.  I saw evidence of some amazing PBL systems that were infusing the seeming chaos of PBL with content and 21st century skills learning.  I observed and heard some great accounts on how students were using group contracts as tools to organize their teamwork and hold their teammates accountable.


At every campus, I met dynamic, hard working, thoughtful and professional staff members who were giving PBL a real shot.  All teachers had designed and facilitated at least one project.  Some teachers were already on their 3rd project even though we are still in the first term of the school year.  There was clear collaboration among teachers who were together navigating the challenges of PBL.  Teachers were already committing to the hard work involved in preparing PBL units because of the engagement and deeper learning they were observing in their classrooms during their projects.


The teachers were very thoughtful and forthcoming while sharing their successes and their challenges.  It was really validating to hear how much each campus had to celebrate and to commiserate over our shared PBL struggles. We spent time exchanging strategies in order to better implement Knows & Need-to-Knows lists and rubrics and to improve  Content & 21st century skills scaffolding and assessments.  It was exciting to brainstorm new strategies to improve these PBL elements.  


The hospitality at each campus was really beautiful.  Another week of their wonderful tea times and I might have struggled to fit into my business clothes.  One student was so excited by our visit that he bought us Vegemite.  After our Vegemite picture was posted, other campuses gave us other food gifts to counterbalance the odd acquired taste of Vegemite.  The people at each campus were so friendly and warm – truly some of the nicest people I’ve visited during my ARIE trips!


I’m also grateful that I got to work with the great ARIE team.  I don’t have many pictures of them because we had to separate ourselves into smaller teams in order to visit our 25 partner campuses.  Instead I have tons of pics of Ray and I touring Parramatta since he was my observation partner at most of my school visits.  We had a wonderful time that gave me lot of ideas and that filled me with a lot of inspiration to take back to my students next week.  What a wonderful way to recharge and get ready for the final stretch of the 2016-2017 school year!  


Thank you to all the Parramatta leadership team and to all the Parramatta schools that hosted me (St. Francis’s, Holy Family at Edenton, Holy Family at Luddenham, St Aidan’s, St Matthew’s, Our Lady of the Way, St Oliver’s, St. Bernadette’s, and Xavier College).  My mind and heart have been enriched by our exchange – thank you very much!


p.s. A special thanks to Tim for taking time out to show me and Ray a kangaroo family on our way to one of our school visits and for all his wonderful insights that added texture to our observations.

Project Management: Personalization

Personalization is designing PBL units to meet students’ individual needs and preferences.  Systems that incorporate personalization promote:

  • Flexibility in End Products
  • Flexibility in Scaffolding
  • Flexibility in Assessments


Flexibility in End Products


Student Choice in Product Topics

Teachers can allow for flexibility in end products by giving students choices in their end product formats and topics.  In the Emerging Technologies project, students were able to choose any one of the NEA Engineering Challenges as the topic of the grant that satisfied the rubric below.

To support research into their choices, the Integrated Physics and Engineering teachers, Dr. Trinidad and Mr. Fishman, prepared the following Google Sheet to make students aware of possible choices and related resources.


Student Choice in Product Formats

Students can also be given choice over product format.  Students satisfied the rubric criteria below by either creating a sports science video or a sports science magazine article:


Flexibility in Scaffolding


Differentiated Curriculum Charts

Creating differentiated curriculum charts is one way teachers can enable student choice while scaffolding content objectives.  Differentiated curriculum charts give students choices on the learning activities they will use to develop mastery of content.  To read more about how to create differentiated curriculum charts, read this related blog article.

To see a sample differentiated curriculum chart, click the example below:


Flexibility in Assessments


Grade Cascades

Teachers create flexibility in the assessment process by offering students multiple opportunities / methods to demonstrate mastery of content.  One way Dr. Trinidad honors the fact that different students learn at different paces is to use grade cascades.  When students take tests, they can earn a grade cascade by passing the test.  If they pass the test, Dr. Trinidad replaces all related scaffolding grades (including ZEROES) with the grade on the test.  If students fail the test, they have until the end of the grading period to attend tutorials to prepare for a test retake and then take a second version of the test.  Students who succeed in the test retake also have their grade cascaded to related assignments.  Having a long retake period and applying the grade cascade helps Dr. Trinidad assign grades to students that honor the fact that some students need more time and more exposure to content to develop mastery.  The grade cascade system also rewards students who do not complete practice sets because they do not need as many repetitions to understand how to solve problems.  These students can recover points by demonstrating on tests that they fully understand the content.

Project Management: Inquiry

Inquiry is formulating relevant questions to gain information and knowledge.  Systems that leverage inquiry to build student engagement promote:

  • Living Versions of Knows & Need-to-Knows lists
  • Professional Work Cycles that Promote Inquiry
  • Use of Student Observations / Data to Teach Abstract Concepts
  • Use of Models to Explore Work Criteria


Living Versions of Knows & Need-to-Knows lists


K/NTK’s & Workshops

During project launches, students generate Know and Need-to-Know lists.  Throughout the projects, teachers can promote inquiry by encouraging students to update their knows and need-to-knows prior to and after learning activities.  Teachers can demonstrate that they value students’ need-to-knows by recognizing the need-to-knows they are planning to address in upcoming workshops and by designing special workshops in response to need-to-knows.


Entry / Exit Tickets

Another way to generate knows and need-to-knows is to use entry or exit tickets that ask students to write down on sticky notes things that are now clear to them as a result of an activity and things that continue to be muddy after the activity.  For more related ideas, read this blog article.


Professional Work Cycles that Promote Inquiry


Professional Work Cycles

Professionals regularly use work cycles that promote inquiry.  Examples include:

Teachers can use these processes to organize their project calendars around inquiry-based work cycles that are used by real professionals.  


Use of Student Observations / Data to Teach Abstract Concepts


Data Collection Activities

Early in Dr. Trinidad’s Algebra 2 projects,  students gather data related to the driving question.  Later in the project, students learn methods to analyze this data and draw valid conclusions from it.  The early data collection phase enables students to get engaged through hands-on experiences in the project.  It also builds their intuition for the sizes of realistic solutions to the equations that model their project phenomena.


Hands-On Activities

Science teachers at CINGHS also use hands-on lessons to introduce and review abstract concepts.  Prior to discussing quantum mechanics, student experienced the energy released in electron interactions by doing an emissions lab.

Following this lab, Dr. Trinidad facilitated an interactive workshop on wave particle duality.


Use of Models to Explore Work Criteria


Highlighting Model Work

Teachers can help students to apply inquiry in order to better understand high quality work by leading students through activities that have students examine and critique model products.  In the highlighting activity below, students used a color-coded rubric and sample grant proposals to analyze grant segments that exemplified parts of the grant rubric.  They highlighted each segment according to the section of the rubric it demonstrated.  Then they added a number to each highlighted segment that corresponded to related rubric criteria.

For more details on how to use model work to create lessons that examine product criteria, read this related blog article.

Project Management: Collaboration

Collaboration is the ability to be a productive member of a team using communication, leadership, and initiative to attain common goal. Systems that scaffold collaboration promote:

  • Effective student roles and responsibilities
  • Group and Individual Accountability
  • Development of Students’ Collaboration Skills Over Time


Effective Students Roles & Responsibilities


Sample team roles:

Examples of students roles in groups include:

  • Team Leaders: help students set and track team /individual goals
  • Proof-Reader: check the quality of student work against the rubric
  • Materials Manager: learn how to check out, use, and return project equipment
  • Group Facilitator: help students observe the norms in their group contracts
  • Communications Liaison: help teams hold discussions that include meaningful contributions from all team members and help teams ask teachers for clarification and help as needed

For related reading on roles in math groups, you can read this related blog article.


Scaffolding team roles:

Teachers can train students on these roles in many ways including:

  • Facilitating discussions to brainstorm actions students will take while serving in roles
  • Mini-workshops with students about responsibilities associated with their roles
  • Short reflections that ask students to describe how acting in their roles impact their teams


Class officers

In addition to team roles, students can assume leadership roles within their classes.  Each six weeks, several classes at CINGHS elect class officers.  Examples of class officers include:

  • Facilitators who:
    • Go over the daily agenda with the class at class start,
    • Lead some class discussions, and
    • Lead class activities when the teacher is absent
  • Time Keepers who:
    • Answer questions about the timing of activities
    • Periodically announce how much time is left in class
    • Limit the lengths of class activities
  • Grade Managers who:
    • Use period task completion charts to remind students to turn in late work
    • Gather student work on grading days
    • Email reminders to students who need to complete late work

These officers are elected by their classmates at the start of each six-weeks grading period.  If they are not impeached for poor service, they act in their role for an entire six weeks.  They usually receive extra credit in exchange for their hard work.


Group and Individual Accountability


Group contracts:

One tool that promotes group and individual accountability is a group contract.  See linked example below.  In group contracts, students describe their goals and the norms and strategies they will engage in as a team to meet those goals.

Some contracts include a firing process.  Students who do not meet team agreements can be penalized with warnings that can eventually result in the firing of the student if he or she does not improve their contributions to the team.  A student who is fired needs to complete the project on his or her own.


Group Logs:

Students working in teams can set daily goals in a Group Log.  The group contract linked above has a group log template on the back of the contract.  When introducing the group log to students it is helpful to model how to set specific helpful daily goals.


Collaboration rubrics & evals:

Students can use collaboration rubrics to complete complete collaboration evaluations for their teammates.  These evaluations provide feedback students on specific collaboration skills.  Prior to completing collaboration evaluations, it is sometimes helpful to have students reflect on the contributions, strengths and challenges of each of their teammates.  They can share some of the highlights of their reflections with their teammates using Critical Friends language (I likes …, I wonders … , Next Steps ….). This discussion can prepare students to assign fair collaboration scores to their teammates and can provide students with specific feedback that explains why their scores are high or low.


Development of Collaboration Skills Over Time


Face-to-Face Warm-Ups

Teachers can include Face-To-Face prompts in regular warm-ups at the start of class in order to scaffold students’ collaboration little by little over time.  Sample Face-To-Face prompts include:

  • Discuss one thing your team did well yesterday.  How can you continue or improve on this thing to make your team even more successful today?
  • Discuss one thing your team did poorly yesterday.  What can you do today to eliminate this team challenge or distraction?
  • Share one positive thing each team member has contributed to the team and share one thing they can focus on to improve their collaboration.


Workshops involving Role Playing:

Students can practice handling challenging collaboration situations by role playing difficult situations and consulting with each other and other teams on positive ways to resolve the situation.  Situations they can role play and then brainstorm how to resolve include:

  • A team member is too bossy
  • A team member is not engaged
  • A team member does not communicate his or her ideas about how work should be divided
  • A team member is struggling to contribute due to many absences

After students act out the situations, students should come together to discuss what they noticed and to discuss possible resolutions to the situation.  Teachers can help students apply their discoveries by using their suggestions to create a Collaboration Strategies list that describes potential ways to resolve common group problems.


Workshops Involving Team Building Games:

Students can play ice breaker games that require students to interact in teams while playing fun games.  For suggestions, you can visit  wilderdom.com/games.   Teacher can facilitate discussions about the ways teams succeeded (and did not) while playing the games.  Students’ observations can be compiled into anchor charts that list actions that promote good and poor teamwork.  Later in projects, students and teachers can refer back to these lists to look for strategies on the positive lists and to redirect team members using examples from the negative lists.


Workshops on Technology Tools that Promote Collaboration


Collaboration Tech Tools

Students can be coached on how to use technology tools that promote good collaboration.  Examples include:

  • Google calendar – students can use this app to setup team reminder notifications for upcoming deadlines
  • Google keep – students can use this app to share and update checklists of team To Do’s


Project Management: Agency

Agency is developing a growth mindset over time and taking ownership of one’s learning.  Systems that scaffold agency promote:

  • Growth Mindset Culture
  • Student Generated Next Steps
  • Growth of Students’ Self Knowledge and Related Strategies
  • Development of Students’ Organization Skills over Time


Growth Mindset Culture


Growth Mindset Activities

It it worthwhile to spend the first week of school doing activities that jumpstart a growth mindset culture.  To see specific activities relating to mathematics that promote growth mindset, visit the Week of Inspirational Math activities.   Also, you can check out this related blog article.


Norm Building Activities

One worthwhile first week activity is to have students work together to brainstorm and refine classroom norms that promote growth mindset.  In the CINGHS Algebra 2 and Integrated Physics & Engineering classes, the students generated norms that focused on the school’s Core Values: integrity, responsibility, perseverance, trust and respect.  To see a sample set of norms, check out the linked image below:


Norms in Team Contracts

Throughout the year, Dr. Trinidad has students reflect on the norms by selecting 3 norms each project to unpack and focus on in their team contracts.  


Student Generated Next Steps


Next Steps Prompts

Students who take ownership of their own learning know how to generate, enact and track next steps and they know how to request help from teachers as needed.  Teachers can cultivate these skills by designing prompts that ask students to:

  • Request workshops related to Need-to-Knows
  • Plan next steps related to project feedback
  • Plan next steps related to making up late work or revising project work.


Zap Chart

The following ZAP (Zeroes Aren’t Possible) chart was used by students to analyze what assignments they needed to improve in order to bring up their grades.  The chart also helped them to set-up a plan to make up that work over the course of one school week.


Growth of Students’ Self Knowledge and Related Strategies


Learning Style Inventory Quizzes

Early in the school year, students taking math classes at CINGHS take a learning style inventory quiz to identify their top learning styles.  Then they research strategies that go with their top learning styles.  The quiz results and the suggested strategies are stored in the front of their interactive math notebooks.


Agency Self-Assessments & Reflections

Students can use Agency rubrics to reflect on their strengths and challenges in regard to agency.  They can submit their agency scores via Google form to a teacher who can use the data to identify class-wide strengths and gaps.  The teachers can use this analysis to design activities that help students overcome their agency challenges.  These activities can encourage students to:

  • reflect on the  things they may gain by trying new things in their agency gaps
  • brainstorm and research strategies that can help them overcome agency gaps
  • set and meet agency goals that counteract agency gaps


Heat Maps

After benchmarks, students complete Heat Maps (see linked example below).  Students color in boxes that correspond to correct responses on the benchmarks.  The boxes are arranged into categories that enable students to see patterns that show their academic strengths and their gaps.  Students can use this knowledge to request workshops and activities that help them overcome their gaps.


3 Color Practice Tests

Prior to taking tests, students in Dr. Trinidad’s math and physics classes take a 3 Color practice test.  They take the practice test under test conditions (independently and silently) using their first color.  Then, they change colors and use their notebooks to add responses and corrections to their answer sheet.  Then, they use the final color to correct their practice test work using a test key.  The colors applied to each problem help students to understand what types of problems they need to study (or not) while preparing for upcoming tests.


Access to Practice Set Keys

Students in Dr. Trinidad’s math and science classes are assigned practice sets that are always due at the end of school weeks.  When students finish practice sets early, they can request practice set keys and use a second color to correct their work.  Dr. Trinidad grades this corrected work as if it’s perfect work because she values the lessons students learn when they compare their work to model work.


Development of Students’ Organization Skills over Time


Notebook Organization

Students taking science and math at CINGHS maintain detailed interactive notebooks.  To help students access the information in their notebooks, teachers regularly teach students how to update notebook tables of contents that show where all notebook resources are located in the notebooks.


Project Google Folders

Students also learn how to organize electronic versions of their student work by following course standards for maintaining Google folders.  In Algebra 2 and Integrated Physics and Engineering, students are required to have course folders that contain sub-folders that are dedicated to each project in the courses.


Graphic Organizers

To further help students organize their student work, teacher ofen design graphic organizers that help students organize the their workshop notes and their research.  See linked examples:


ARIE in Almaty, Kazakhstan

Friday, February 17, 2017 to Sunday early morning, February 19, 2017:


Friday afternoon, February 17, Stephanie Ehler and I flew out of the Austin Bergstrom Airport and started our long trip to Almaty, Kazakhstan via Washington, D.C. and Frankfurt, Germany.  At each stopover, we were lucky enough to have just enough time to reach our next gate for the next  boarding.  I spent most of the flights unconscious.  At one point I fell asleep before we were allowed to adjust our seat backs and Ehler watched me sleep with my head lolling forwards and backwards.  She adjusted my seat for me when this was allowed and I had no idea until she told me.  During my few hours of consciousness, I outlined the DCTM manual on STAAR testing and read a few chapters in a brand new book from Summer, Norse Mythology by Neil Gaiman.  This book seemed really appropriate for my trip towards a country in the middle of a very cold, snowy winter.


We finally arrived in Almaty between 2 and 3 am Sunday morning, February 19.  We passed through Customs and found our luggage with no problems.  A driver met us and drove us to our hotel.  I was very happy to find that our hotel, the Sherapark Inn was very clean, comfortable and fancy.  Nearly all the people working in the hotel’s guest services looked Asian, but spoke Russian.  That combined with the way my key turned on the power in my hotel room made me feel like I was in a cold, Eastern European version of China.  Due to all my sleep on the planes, I was only able to sleep a couple hours before our lunch meeting with our hosts at 1 pm later that day.  During the hours I was awake, I drafted this blog article.


Sunday, February 20, 2017


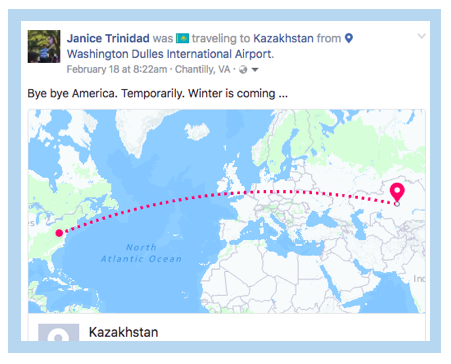
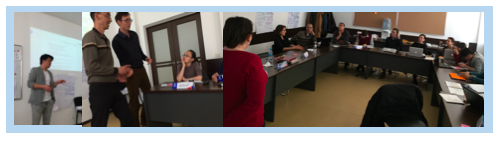
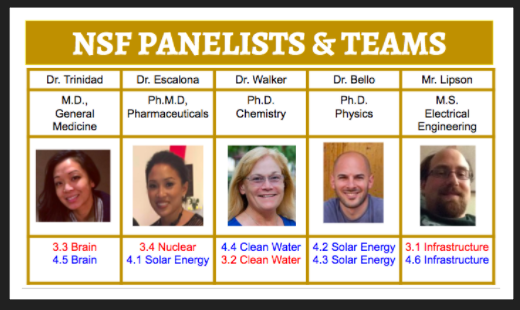
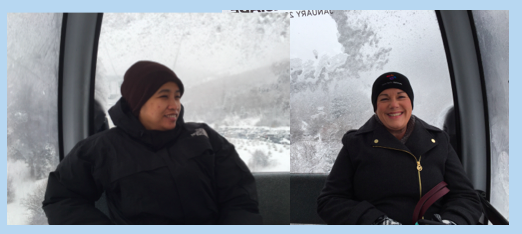
At 1 pm, we met our main hostess, Tánia, and our driver in the hotel lobby.  They drove us to a sky resort within the Mahalangur Range.  This mountain range is famous due to Mount Everest.  On the way to the resort, we learned a little about Tánia’s school.  It is a private secondary pilot STEM school that will serve approximately 100 students when it opens.  When we arrived at the resort, we look a sky lift up the mountain and met with our translators, Arái and Ardák, at a nice restaurant decorated like a wooden hunter’s lodge.


At the restaurant, Stephanie and I tasted horse meat for the first time.  It was part of a delicious salad we ate at the start of a large lunch.  We also drank hot expresso and thyme and ginger tea.  These beverages were so soothing up on the cold cold mountain.  We ate a delicious cheese-filled flatbread and also another good dish with lamb, sauce, and plain flatbread.  Unfortunately, our inner fat kids, Kimmie and Sheila, were not up to the task of making significant progress in all our lunch courses.  We ate until we were stuffed and there was still plenty of food left.


While eating, we got to know a little about Tánia, Ardák, and Arái.  Our translators are cousins who grew up in Almaty and who speak very good English due to schooling abroad in Switzerland and Vancouver, Canada.  Both looked Asian adding to my sense of being in a cold Russian version of China.


After our lunch, we went for a short, brisk walk around the resort.  It was cool to be surrounded by so many skiers.  If the slopes didn’t all look like black diamonds and if it hadn’t been about 20 years since I’d last skiied, I’d be tempted to try again.


We took the ski lift down with our hostesses and then drove back to the hotel.  I was so jetlagged and full that I was passed out for nearly the whole car trip back to the hotel.


Back at the hotel, Stephanie and I rested before meeting again to plan Day 1 of the ARIE training.  During my rest time, I did some physics problems for fun from Shaum’s Outlines in College Physics.  I also finished drafting this blog article.


To prep for our work meeting, Stephanie ordered room service like a boss.  She ordered fruit, mushroom soup and a fancy ham and cheese sandwich with fries.  The cream of mushroom soup was outstanding!  She went all out on the room service because the exchange rate made all the food very reasonably priced.  After eating, we looked over our Day 1 visuals and planned who would lead each session: we scheduled Stephanie to lead the Project Launch while I would lead the Project Ideation session.  After we settled this, I spent some time in her room grading and publishing this blog article because her internet was working faster than in my room.


When I returned to my room, I found out that the internet still worked well, so I finished grading all my students’ grant proposals.  I had to leave fairly detailed comments because I will not be able to give them in person feedback prior to the end of the trimester due to this trip.  I updated the linked rubric chart above so that students could visually see what rubric parts they earned full (green square) and partial (yellow square) credit.  Later I will copy paste the scores hidden behind these squares via Conditional Formatting into companion score sheets in order to generate my students’ project grades.


Monday, February 20, 2017 – Day 1, ARIE Almaty Training (Project Launch & Project Ideation)
We opened Day 1 of the ARIE Almaty training by facilitating a compass icebreaker activity.  Participants divided themselves into 4 groups: North (risk taking people of action), South (compassionate includers), East (big picture people), and West (color-coded detailed people).  Each group discussed their personality type’s strengths and challenges.  We discussed the importance of recognizing other people’s differences and how these can be leveraged to strengthen teams.  Early on they recognized the benefits of having teams composed of a variety of compass points.  We suggested that they facilitate similar teambuilding activities with their students in the future to guide them to similar realizations about teamwork.


After this ice breaker, Stephanie facilitated a Project Launch session.  She introduced the driving question and asked teams to read over the project challenge rubric carefully.  Then the participants divided into into small teams and started compiling their Knows and Need-to-Knows based on the driving question and the rubric.


The teams came up with fairly detailed lists of Knows and Need-to-Knows.  It was clear that they had already started reading about project-based learning (PBL) because their Knows column included things such as: the 6 A’s, 21st century skills, scaffolding, creativity, and team work.  They had a wide variety of Need-to-Knows that included questions about: student engagement, entry event organization, project calendaring, assessments, selection of project themes & topics, 21st century skills, mixing PBL with traditional teaching, appropriate levels of content, and peer assessments.  I tried an experiment and placed a symbol that looked like a red paperclip next to items that would be addressed in the session following Project Launch, Project Ideation.


After lunch, we started a session on Project Ideation.  All teams worked very hard during the work sessions built into this interactive workshop.  During these sessions, participants selected their standards, brainstormed project roles, contexts, products, and audiences, and drafted driving questions. At the end of Day 1, participants gave each other Critical Friends feedback (I Likes, I Wonders, and Next Steps) on sticky notes.


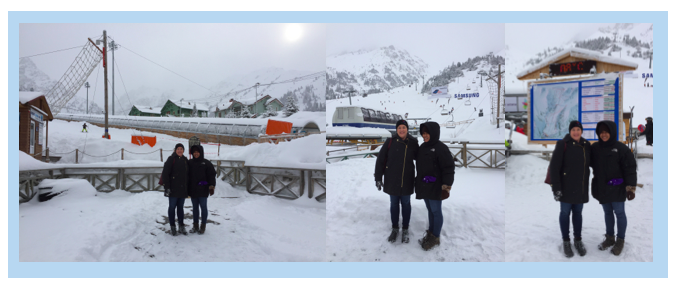
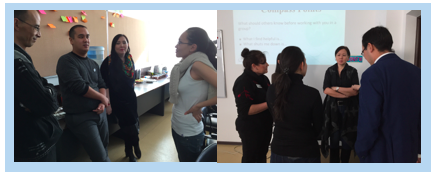
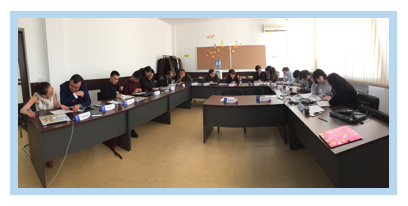
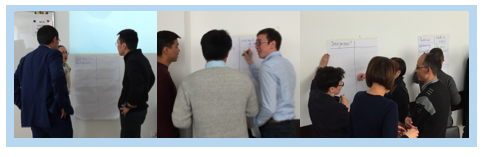
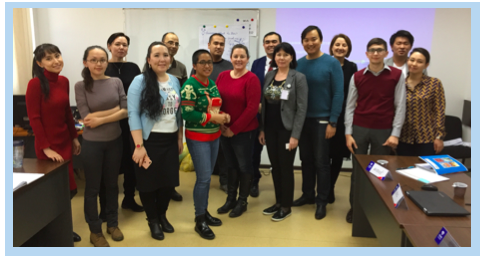
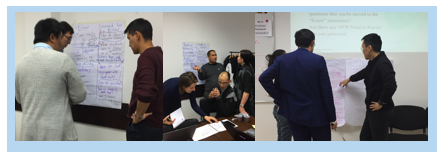
Then they updated their Knows and Need-to-Knows to include their new learnings and new questions after one day of training.  We pointed out that the items labeled with a red paperclip symbol were items we hoped to get to in the Ideation session.  Several participants indicated that they had learned things related to these items by crossing these out and updating their Knows lists with related items.  Some participants came to us with follow-up questions relating to the red-paperclip items that were only lightly touched during the Ideation session.  I liked how the paper clips held me and Stephanie accountable to our session goals.  They also helped us to make early course corrections when participants helped us realize when we hadn’t communicated as clearly as we had intended.


Tuesday, February 22, 2017 – Day 2, ARIE Almaty Training (Rubrics, Calendaring Scaffolding & Assessments)

 
We opened Day 2 with a hands-on activity intended to show participants the value of rubrics.  The participants divided into teams and created marshmallow houses.  Nearly all the houses included walls and rooms made of additional materials not supplied by us. I’d never seen ARIE participants add so many extra materials to their houses.  I wonder if the cold climate in Almaty made them treat the house walls and roofs as essential items.  Several minutes into the building session, Stephanie secretly took aside a couple participants and handed them a rubric to guide the building of their product.  Their responses to this new tool were mixed.  Some felt that this new assessment stifled their creativity.  Nonetheless, they played along.


After the building time, the teams tried to assign grades to each other’s houses.  During these grading sessions, some of the non-rubric teams discovered the rubrics that they didn’t have.  Following the feedback sessions, we held a full group discussion about how rubrics can serve as tools for students and for teachers.  The participants were quick to point out how rubrics could add consistency and remove subjectivity from grading products.  They also noticed that the rubrics sometimes stifled student creativity and wondered whether it might be worthwhile to withhold the rubric from students until after the early brainstorming phases of the project.


Following this activity, we facilitated a session on how to create Rubrics.  Once again, our participants applied the knowledge in the workshop with a lot of focus and work ethic.  By lunch time, every team had fairly detailed rubrics that included several rows of rubric criteria aligned to several different learning objectives / standards.


After lunch, we facilitated a session on how to integrate assessments and scaffolding into project calendars.  After the participants had used their work time to build a project calendar, we ran an activity to get them up and moving again.  The participants, organized in 3 teams, competed in a game called, Don’t Blow the Kings.  Their team’s mission was to blow all the cards off their tables except for the 4 king cards.  After the activity, we shared observations related to each team’s collaboration strategies and discussed how these connected to challenges and strategies used by typical PBL teams.  We closed the day by letting participants update their Knows and Need-to-Knows.  Once we again, we held ourselves accountable by labeling items related to calendaring, scaffolding, assessments and rubrics with a paperclip symbol.  The follow-up discussions around these labeled items helped us to wrap up the day by sharing more strategies and clarifying key points with participants.


Wednesday, February 22, 2017 – Day 3, ARIE Almaty Training (Entry Events, Project Management, Work Time)


In the morning of Day 3, we covered different types of entry events.  Then we gave participants time to outline their entry events.  Prior to lunch, we ran a casual version of Critical Friends to provide participants with feedback on their entry events.  In the afternoon of Day 3, we facilitated a beta version of our brand new, revamped Project Management session.  In the new session, the students explore resources related to 4 aspects of project management: agency, collaboration, inquiry and personalization.  These 4 were selected because improving students’ levels of agency and collaboration makes them more effective at completing projects.  Improving the levels of inquiry and personalization in projects makes students more motivated to complete projects.  Building systems that improve student efficacy and motivation leads to projects with more student engagement.  In the future, we will expand on this beta version of Project Management 2.0 by adding more resources to each station and by creating passport stations that enable facilitators to hold small group workshops on each aspect of project management.


Thursday, February 23, 2017 – Day 4, ARIE Almaty Training (Critical Friends, Open Q & A Sessions)


During the early morning and early afternoon of Day 4, we held formal Critical Friends sessions to provide participants with feedback on their projects as a whole.  Stephanie acted as facilitator and I was the timekeeper.  In these sessions, we held them to a strict version of the protocol so we could limit the lengths of the sessions and prevent them from becoming defensive trial-like sessions.  The participants as a whole presented a wide range of very creative projects that spanned many disciplines.  Some of their project products included: investment portfolios, shadow plays, budgeting apps, mineral maps of Kazakhstan, fountains, startup business products, and books about traditional Kazakh games.


Following the Cortical Friends sessions, we held an open Q & A session with the participants.  Because the staff are highly involved in the design of their school they asked a broad variety of questions that included questions about PBL and about school design and logistics in general.  At the close of this session, our gracious hosts surprised us with many Thank You presents.  They were each very beautiful and thoughtful.  They gave us beautiful flash drives and journals covered with traditional Kazakh designs.  They gave us really neat paper weights that were apples made of a onyx.  They also got us poster renderings of some of Saulé’s artwork.  My piece of art was a collage that compared a famous rendering of a Kazakh tribeswoman with a painting by Vermeer.  Vermeer is one of my favorite artists so this gift was uniquely apropo to my art tastes.


Amazing Almaty Highlights:


Throughout the training days, Tánia thoughtfully provided us with many opportunities to visit beautiful tourist attractions in Almaty.  She arranged for us to eat at great restaurants for many of our lunches and dinners. Every meal we ate was delicious.  We enjoyed horse meat more than we expected.  We got to taste horsemeat that was grilled, boiled, and in sausage form.  All forms were very tasty.


On our last day in Almaty, she arranged for us to take a walking tour of the city with an American ex-pat named Dennis who is the author of the Walking Almaty blog.  Dennis took us to the most famous Orthodox church in the city that is inside the Park of 28 Panfilov Guardsmen.  He took us inside the church and explained its history and details about its construction.  Then we walked with him to the Green Bazaar and tasted Kazakh snacks: dried apricots, almonds, cheese, and camel’s milk.  We ended the tour by shopping for souvenirs in a shop connected to a famous chocolate factory.


Overall, this trip was very beautiful.  It was filled with many happy memories of working hard and playing hard.  We are grateful for all the hard work of our wonderful hostess, Tánia, and her amazing cohort of teachers and university partners.


Post-Script: Hello, my name is Stevie


Throughout the trip, I was seriously jet-lagged.  On the night, we revamped the Project Management session, Stephanie caught me typing with my eyes closed while bobbing my head wildly about like Stevie Wonder.  She dubbed the sleepy, semi-productive version of myself, Stevie.  In nearly every car ride, Stevie took over and I passed out between all our beautiful Almaty destinations.  Here’s a picture of Stevie in action.


A Tale of Two Projects: Week 2 IPE Emerging Tech (NSF Project)

This blog entry describes what my students and I did during Week 2 of the Emerging Tech (NSF Grant) project.  The events in this blog entry took place at the same time as the events in this article.  As a pair, these describe what a PBL teacher does while running two projects in two different preps at one time.  To see accounts on earlier or later weeks of these projects, go here.


Week 2, Day 1 IPE Emerging Tech (NSF Project):


During Day 1, I was not available to work directly with the students because I was at a training related to my responsibilities as Campus Testing Coordinator.  The students started work on informal presentations on physicists who had contributed to our understanding of nuclear phenomena and quantum mechanics.  The students delivered these presentations on Day 4 of this week.

Each team was assigned a different physicist.  To start preparing students for a grant they would write several weeks later, the research questions for each physicist focused on the research of the physicist, its intellectual merit, and its broad impact.  The assigned physicists and related questions for teams 1 to 6 are shown in this linked image.  I provided them with at least 3 age-appropriate and accurate sources to research the questions to streamline their research process.


Each team was also given a template slide deck that limited teams to 3 slides per scientist (see linked template).  The template also constrained students to mostly images and very limited text on the slides.  The bulk of their responses to the research questions were hidden in the slides’ speaker notes sections.


Later on Day 1, I finalized a lesson for Day 2 of this week by analyzing test bank questions related to TEKS on nuclear phenomena and the weak nuclear force.  I found that my workshop needed to focus on types of radiation (alpha, beta, and gamma) and their relationships to nuclear forces (weak and strong) and various technology.  They also needed to introduce half-life and how to use half-life to select appropriate isotopes for different types of technology.  I designed a graphic organizer that included an embedded half-life chart and questions that asked students to interpret the chart to select isotopes for different technology applications – see Day 2 handout.


Week 2, Day 2 IPE Emerging Tech (NSF Project):


Early on Day 2, I made some minor adjustments to my visuals for the upcoming Nuclear Workshop because I needed to look up specific radioactivity values that corresponded to harmless and harmful levels of radiation and their effects.  I typically outline and draft lesson plans and related resources several days ahead of time and then refine them until the day before (or day of) the actual lesson.


Later on Day 2, I facilitated a workshop on Radioactivity with the IPE classes.  In this workshop, we introduced healthy and dangerous levels of radioactivity and used these thresholds to interpret the harmfulness (or harmlessness) of different types of radioactive technology.  We introduced the idea of half life and used specific half lives to discuss whether or not various isotopes were safe (or not) for consumer use.  We also introduced 3 types of radioactive processes (alpha, gamma, and beta) and discussed their connections to nuclear forces and technology applications.  After the workshop, students had time to answer the questions on the graphic organizer and to continue developing their presentations on nuclear / quantum physicists.


Later on Day 2, I finished grading revised reports from the previous IPE project on Rube Goldberg machines.  In this project, students built and tested Rube Goldberg devices in order to investigate conservation of energy and conservation of momentum.


Week 2, Day 3 IPE Emerging Tech (NSF Project):


Day 3 was the final work day that students had to prepare for their informal presentations on nuclear / quantum physicists.  In the warmup, we practiced using the half life chart to select the appropriate isotopes for specific technology applications.  During the warmup discussion, I was able to repeat and model correct thinking relating to interpreting the half lives of isotopes in the context of emerging technology.


While the students worked on their slides, I started contacting potential panelists in order to provide feedback to students during Week 5 of the project when students would draft their grant proposals.  I drafted a recruitment letter that summarized the project logistics and the types of support the student needed.  I linked the recruitment letter to a Google form that gathered information on volunteer panelists’ degrees, areas of expertise, and availability.  By the end of this week, this work yielded 5 panelists, a great number to support 10 student teams.  If you’d like to volunteer to be a panelists at CINGHS, click the linked form above.


Also during student work time, I ordered equipment from the UTeach department that related to an upcoming emission spectra lab.  I thought this equipment was critical to give students hands on experiences related to modern physics and to give students a break from a project featuring lots of online research and very few hands-on research activities.


My co-teacher and I prepared for presentations the following day by setting up Google Forms to gather peer grades on collaboration and oral communication.  I created a set of note sheets for capturing our teacher notes on teams’ presentations on quantum and nuclear physicists.  To prepare for our notebook grading day later that week (Friday, Day 5), we decided what assignments we would grade for that week and how many points we would assign to each assignment in each of our class’s learning outcomes (Oral Communication, Written Communication, Collaboration, Agency, Knowledge & Thinking, Engineering Content, Physics Content).


Week 2, Day 4 IPE Emerging Tech (NSF Project):


Early on Day 4, I decided to create an experimental tool to keep students in the audience of presentations more engaged.  I created a graphic organizer that students could use to take notes on other teams’ presentations.  I showed this tool to my co-teacher, Mr. Fishman, and shared a related idea: why not let presenting students’ stamp the parts of the graphic organizer related to their presentation so they could get real time feedback on how well they communicated their key points and also hold their peers accountable for taking good notes?  He was willing to try it.


The experiment was a success.  The students seemed to really enjoy stamping their peers.  Also several students insisted on making their peers improve their notes prior to stamping their papers so the level of accountability was kept high throughout the note-taking activity.  In addition to note-taking, students in the audience evaluated the presenters on their oral communication skills.  Meanwhile, my co-teacher and I took notes on their presentations relating to the rubric so we could use our notes to supplement what we would later gather from reviewing their slides and their hidden speaker notes.  Sometimes students say more than they write, so we use both our notes from what they say and what they write to evaluate their presentations and related research.


Later on Day 4, I used pivot tables to analyze data gathered via Google Form to generate peer grades relating to collaboration and oral communication.  I typed out my presentation notes in order to create a graphic organizer that summarized the key points delivered by all teams in both class periods.  I shared these notes with students the following day so they could learn from students in both periods.  See linked notes on tne left.  At the end of Week 4, the students used these notes and other notes to take an open notebook test on nuclear physics, quantum mechanics and biotechnology.


 Week 2, Day 5 IPE Emerging Tech (NSF Project):


On Day 5, we switched gears by introducing emerging (and ancient) examples of biotechnology.  We opened the class with a discussion on a Washington post article on the creation of pig-human embryonic chimeras.  After this introduction, Mr. Fishman led the class through an introductory workshop / discussion on biotechnology.  Students were so open with their opinions and prior knowledge of biotechnology that the 1-day workshop spilled over into the following day.


Week 2, Day 6-7 IPE Emerging Tech (NSF Project):


On Saturday morning, I checked the file revision histories of report documents to check which students were in danger of not meeting the final report revisions deadline.  I called the homes of all students who needed extra reminders and parental support to meet this important deadline.  Later on the day, I held online office hours to support students working on their report corrections.  While doing this, I gathered and re-formatted sample grant summaries that students would eventually analyze to learn the style of writing related to their grant proposals.  I also created a test on Nuclear Physics and generated the question sheet and bubble sheets for this test.


On Sunday, I graded the final revised versions of the students’ engineering report from the prior project (the Rube Goldberg project).  I also graded students’ presentations from earlier in the week using my presentation notes and also considering all the written texts and images on students’ slides and their speaker notes.  Using our IPE tool, the rubric chart (see linked Google Sheet), I was able to grade their presentations fairly quickly and enjoy the rest of my weekend.  The presentations were easy to grade because most of the students had done the assignment perfectly or nearly so.  I think the pre-selected articles, the specific research questions and the verbal feedback on the slides given throughout the week had really helped the students create quality products.


For more grading tricks, go here.  To continue reading  about this project, go here.


#EdublogsClub 7: 8+ Ways to Grade Smarter (Not Harder)

Grader Smarter (Not Harder) Context:

Who is Dr. T and why does she value grading smarter?

  1. I’m a physicist by training who loves to gather, analyze, and leverage data.
  2. I’m a human being who NEEDS to have a life and can’t be bothered with grading all weekend.

4 Guiding principles for Designing Smart Grading Systems:

  1. Sustainability – Grading systems should NOT overtax teachers or students.  See #2 above,
  2. Feedback cycles – Students need to experience multiple feedback cycles to grow.  Students need to receive specific, timely, high quality feedback and use that feedback to improve their understandings and their deliverables.
  3. Mastery – Grades need to reflect student mastery of content OVER TIME.
  4. FlexibilityGrades need to honor the fact that different students require different amounts of work to develop content mastery.

8+ Grade Smarter (Not Harder) Tips:

METHOD 1: Maintain / ingrain simple turn-in procedures

My students turn in work in only 2 ways.  These 2 ways have been practiced since the start of the school year so my students earn very few zeroes due to missing work.

  • Interactive NotebooksMost informal work is glued into their notebook and annotated in their notebook table of contents to that each item is easy for teachers and students to find.

  • Google Docs / Folders – Students create a team Google folder for each project.  All their electronic products are stored in there.  I link all their folders and all their key electronic deliverables to a header of a rubric chart (see linked image below).  Having all the links in one place minimizes the time I spend looking for student work.  


METHOD 2: Recruit / train  student leaders to help with follow-up logistics

One of my class officers in each class period is a grade manager.  He or she uses weekly task completion charts  to personally follow-up with students who are following behind on assignments.  Students are more comfortable getting grading reminders from their peers.  I’m more comfortable not doing it.


METHOD 3: Make / maintain feedback visuals


I have found that my students respond well to colorful visuals that give them a sense of how far they are to completing assignments.  When possible, I create visual cues related to assessment feedback such as:

  • Stamping notebooks: Teenagers will do anything for a stamp.  If you tell them they need 8 stamps on a lab by the end of the class period to earn 100%, they will complete the work early and hound you until you surrender and give them 12 stamps.


  • Rubric charts: Big project deliverables are graded using rubrics.  I create rubric charts (see linked example below) to chart student progress.  Each column represents a team.  Each row represents a rubric item.  Yellow squares = partial credit; Green squares = full credit.


METHOD 4: Put computers to work

  • Rubric scoring sheets: The yellow / green squares in my rubric charts are numbers between 0 and 10 disguised by Conditional Formatting.  I use Rubric Scoring Sheets (see linked example) to convert those stamp scores into the actual grading scores.  I can’t be bothered with all the tedious arithmetic associated with this – especially because schools in the New Tech Network grade students on 5+ learning outcomes.  I let the spreadsheets do the arithmetic heavy lifting.

  • Auto grading in Google Sheets:  Conditional statements can be programmed into Google sheets to assign scores to multiple choice responses that are gathered from students using Google Forms.  If you don’t know how to write conditional statements, you can use Flubaroo.


METHOD 5: Promote student self-assessment

  • 3 Color Practice Quizzes:  Prior to tests, my students take 3 color practice quizzes.  They take the test in testing conditions (independently, silently) using 1 color that represents what they can do with their brains only.  Then they open their notebooks and add more to the practice quiz using a second color.  Then they request a key and update their practice quiz using a third color.  By the end of this exercise students know what they need to study (and not) to prepare for the real test.

  • Access to Keys:  Students who finish practice sets early can request a key.  Then they can use a second color to fix their solutions using the key.  I give them perfect credit if they correct their own work with the key because students learn a lot when they compare their work to model work.
  • Heat Maps:  Students analyze major assessments using heat maps (see linked example).  They color squares that represent questions they got right.  The squares are organized into categories.  Students can use the patterns in the categories to identify their strengths and gaps.  


METHOD 6: Provide feedback in class, in person


I have found that students respond better to real time, verbal feedback than to written feedback given after deadlines.  I set aside time during project work days to meet with each team and give them verbal feedback on their products.  Students almost always improve their products in response to this real time feedback.


METHOD 7: Set aside 1 day per week for updating gradesno more, no less 


Throughout the week, I give students multiple modes of quality feedback (stamped work, verbal feedback, Q&A, rubric charts, access to keys). All this feedback is provided during class time.  ONCE a week I collect all notebooks and convert all those stamps into grades.  On days other than my grading day (Friday afternoons), I give students feedback and then request that they send me reminder emails to update their grades on my grading day.  Grading once a week means students have time to bring their notebooks up to speed over the course of one school week.  Once a week grading also means that I don’t get hounded by daily requests to update grades and that I only need to do my least favorite thing in teaching once per week.


(Note:  If you grade less than once per week, you risk losing the favor and support of some of your most formidable and helpful allies – helicopter parents.  The weekly updates provide them with just enough feedback to support their students to meet their family’s standards of greatness.)


METHOD 8:  Cascade the Grades!


When students take my tests, they know that they can earn a grading miracle.  If they pass the test, I replace all related assignment grades (including ZEROES) with the grade they got on the test.  This rewards students who need lots of time to develop mastery because I allow retakes on tests until the end of the grading period.  The grade cascade creates a backdoor for these students to earn a grade that reflects the mastery they gained LATER than their peers.  This policy also rewards students who know they only need to complete parts of the practice sets to learn all the material.


Because my tests are the only deliverables students complete without support from me and their peers, I value these grades as the ones that reflect individual content mastery the most.  This is why I have no qualms cascading these grades down to related assignments.  This grading policy motivates my students to study very hard for my tests and encourages them to come in for after school tutorials to prepare for test retakes.  This policy also limits the amount of late work I need to grade to update students’ grades.  


BONUS TIP:  Recruit help

For my grant writing project on emerging technology, I recruited the following panelists to review my students’ first drafts of their grant proposals.

And wow, the quality and the quantity of feedback that each team received was REALLY UPPED A NOTCH.   I’m excited to see how my students respond to this feedback.

During their work days, I posted the visual above on the board to inspire my students to work harder.  I also did not forward their drafts to the panelists until the teams tried everything in the project rubric to avoid wasting panelists’ time.  The students responded well to the requests for more work in order to impress their panelists.


Related Reading:

This book is great. 

Here are my notes on this book: 10: Grading smarter, not harder

A Tale of Two Projects: Students’ Perspectives

How is learning mathematics in a Project-Based school different from learning math in a non-Project-Based school?

  • Learning mathematics in a project-based school makes math so much easier to actually learn, because the teachers really care and take their time to teach us. We also get to learn with others and learn how to cooperate with them as a group to make a great, successful project.
  • Learning mathematics at a Project-Based school is way different than learning math from a non-Project-Based school because you get to put the math to the test. The way we learn math at Cedars isn’t a normal worksheet with math problems and you just do it. It has many elements to it that can teach you how math in fact is used in daily life and is a very important tool to know. Using math in real life or job like situations helps get me more enthusiastic about learning math, these projects teach me that math isn’t useless at all and isn’t just needed for college and school.
  • I never thought I would do projects based on math, I thought you could on do projects in science honestly. I feel we get to apply math to real life things and see how math correlates with a lot. For example, it applies to ballistics and running.
  • Learning mathematics in a project based school is more fun to learn because you are always in a group to talk with and they can help you if you’re stuck. The first days involve learning the new material and then you get started on the project. If your group or more people don’t remember how to use a equation then you can tell the teacher to do a workshop. There isn’t a lot of homework. Learning math in a non project based school is boring. You sometimes can’t talk, always need to be taking notes, it’s really boring that sometimes students fall asleep. The teachers give you a lot of homework. Learning math a project based school is better, like right now we are making parachutes to see how long it can stay in the air. Once we get our data we need to get the time and how long it lasted in the air.


What was your favorite math project so far?  Why did this project work for you?

  • My favorite math project was actually the one we just finished. It was called sports science and we had one of our team members run on a track while another one of our members chased them with an iPad. It was really fun and funny. We got to compare Usain Bolt with our member that ran and calculate the velocity, acceleration, and create the regression equation.
  • My favorite math project is the one that I’m currently in now. The project is about building a parachute and calculating square root functions that model the hang time of the custom built parachute using both technology and your brain. I like this project because it’s very hands on, I enjoy first-hand experiences, I tend to learn best from them. With this project you get to build, which is always fun, and test your parachutes, then proceed to calculate the free fall hang time. This isn’t a simple worksheet with boring pre-written numbers that don’t change, with this project you get to watch what you built and collect data like real mathematicians and scientist do! While gathering data we will have to average it out before doing to hang time equation known as: “t=the square root of: 2xh/g”. Also even though we’re not done with this project, I can still tell that this will work great for me, due to the fact that I already know the hang time equation and we’re not 1 full day into this project yet!
  • My favorite project was the NERFallistics project. Because it wasn’t too complicated until towards the end but I knew how we were applying the math and I had fun doing it in the process. (Note: In the NERFalistics project, we gathered NERF trajectory data and used polynomial functions to model it.)
  • My favorite math project was the maze project because it was fun making maze and seeing other people’s mazes. It helped find the right equation to use in desmos, because I was able to get the right lining by moving it left,right,up or down. Desmos helps me a lot because I am able to get the right numbers for the equation.


Make a list of good teaching / learning strategies that you’ve experienced in ANY OF YOUR classes and describe why these are helpful.

  • I learn very well when I get constructive criticism from my teachers and classmates. My teachers sometimes make us write out “Next Steps” for other people’s projects after they’ve presented them, so they can get feedback on how they can make their project better.
  • PBL, is:
    • number 1. In every class all we do for work is projects, doing projects gives you the first hand experience and it’s never easy. It makes you think and have to look for things for yourself just like how you would in the real world, nothing is handed to you, the teachers provide an opening question/statement and the rest is up to you. It sounds hard at first but everything is definitely very possible to find if you work for it!
    • For number 2, it would be how teachers never say anything straight forward. Just like how I listed in the first one, all projects start off with a base question or statement. When given these, you have to answer it on your own, the teacher’s last resort is to give you the answer to anything. This is helping all of us at this school get very prepared for college life where nothing at all is handed to you, it also helps with confidence in yourself too! Knowing that you are capable of finding any information that you put your mind to is very reassuring, and can help a lot on the daily basis.
  • I like how with Algebra 2 and Physics we get to have a practice test before we take the actual test to prepare us better. It is helpful because then I will know what I need to cover to pass the test. In P.E. we get to pick whatever physical skill/sport we actually want to learn. This is helpful because I don’t have to be forced into playing some sport or game I don’t want to, I get to decide what I do physically that I feel comfortable. I like how we do a bunch of different styles of learning integrated together so that everyone’s learning styles is met and helpful because I get my learning style needs met and what I’m taught stays in my head better.


What advice would you offer to a teacher who is new to Project-Based Learning?  Explain why your advice is important to the success of teachers and students.

  • I would say just try to be really patient and give us kids your time. I’ve learned that patience really is the key, because if you’re not patient with your peers it causes more conflict, than there needs to be. I love project based learning, because I feel like I really get what I’m learning and I always feel very successful after doing a presentation I took my time and effort in doing.
  • My advice is, take everything slowly. Ease into everything, do not provide answers first, always do that last because getting your students to think and getting their brains working always helps. Another thing that would help is, not providing a rubric as soon as a new project is launched. In college you don’t get rubrics immediately handed to you, so this will help with forming outlines, and preparation. This helps me personally a lot because you get to make the learning style that is best suited for you, sometimes having a rubric can throw you off and make you work in one fashion, without a rubric you can form your own outline, go to whatever websites you wish, watch videos, everything that suits your learning style and gets the research/job done!
  • My advice is don’t get into a project that’s too complicated for the students unless and to make sure the students have the skills to finish the project. Like if they don’t know how to construct a rocket at all, to do a demo or do a big workshop on it. And while getting into this style of teaching, have fun!
  • Getting students to work in a group is a good idea because everybody knows different ways to solve a problem and they help each other out. Giving out handouts and do one problem with them and letting them do two on their own so they can know how to do it. Doing workshops helps the students remember how to use the equation.


To see more blog articles related to these projects go here: A Tale of Two Projects.