CINGHS Week 3: September 6-9, 2016

Week 3 School-wide Events:
wk3-gamenight


Week 3 featured our very first Game Night.  About a dozen students stayed after school Friday to play video games, games with foam dart guns, etc.  They enjoyed each other’s company and also pizza.  Game Nights will be a regular event occurring roughly every other Friday at CINGHS.  In addition, our school is starting an eSports club so that students can be a part of a team that plays video games competitively.


Week 3 in Algebra 2:
wk2-alg2


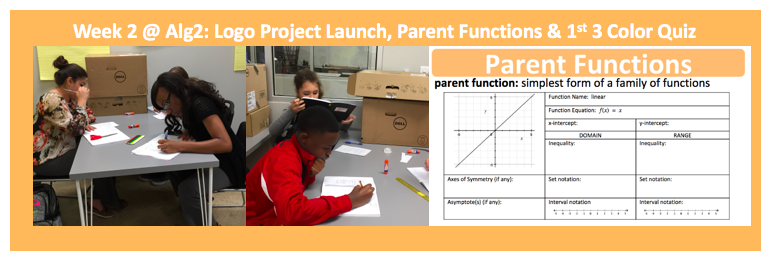
During Week 3, students interviewed Laura Hayden, a graphic designer who works for National Instruments, using FaceTime.  They asked Laura all of their Need-to-Knows related to logo design.  The students had many great questions about the processes graphic designers use to design effective logos.


During the week, I allowed students to use self-pacing to differentiate the class according to students’ individual needs.  Some students completed extra practice on parent functions and their properties (domain, range, axes of symmetry, asymptotes).  Students who were already comfortable with parent functions moved on early to workshops and practice sets dealing with inverse functions.


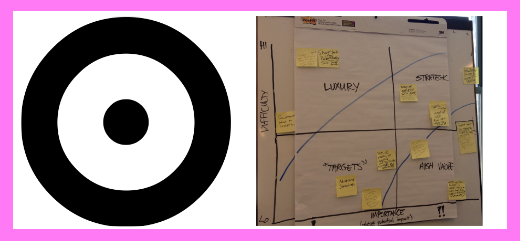
By the end of the week, the students were introduced to decision matrices so they could use this tool to select the brainstorming sketch that their team would develop into their amusement park logo.


Week 3 in Integrated Physics & Engineering (IPE):
wk3-ipe


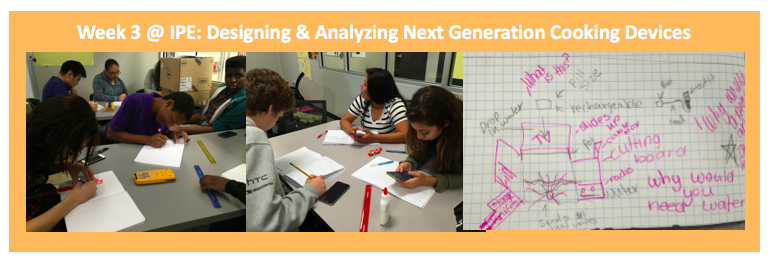
In IPE, we continued exploring the Design Process by applying the following steps toward the design of next generation cooking devices: Define the Problem, Specify Requirements, and Identify Solutions.  The students created summary problem statements for the project (Define the Problem).  They analyzed the project design brief and rubric to create lists of project constraint and requirements (Specify Requirements).  They conducted background devices on old and current versions of their team’s cooking device (Identify Solutions).  They compared the old and current devices to identify improvements and to get ideas on new improvements that could be made to create their next generation devices.  They also created several brainstorming sketches in a Quick Draw activity.  Then they elaborated on each other’s favorite sketches in a Carousel Brainstorming activity.


Also, during Week 3, we introduced the Heat Equation and used it to analyze the required heat in several cooking scenarios.  Students voluntarily chose to attend follow-up small group workshop on the Heat Equation when they found practice problems challenging.  I like how students are starting to advocate for themselves by choosing to attend optional workshops to sharpen their skills.  At the end of the week, the students took a 3-color quiz on Heat Transfer mechanisms and the Heat Equation.  They used 3 colors to show what they were able to do with (1) their brains only, (2) with notebook assistance, and (3) with workshop assistance.  Many students were able to excel at the quiz with only 1 or 2 colors.


Week 3 in 8th Grade Math:
wk3-8thgrmath


During Week 3 in 8th grade math, we continued to explore club data using more statistical tools.  We introduced a new spread value: mean deviation.  We practiced calculating it first on small data sets.  Then we started discussing methods for calculating it for large data sets so they would know how to analyze data sets that included the opinions of all the students in our school.  By the end of the week, the classes collaborated to create a survey that was completed by the entire student body that gathered data on students’ interests on a variety of clubs.

120: Design Rationale Products

1-sources


2-what


Screen Shot 2016-05-09 at 12.56.11 PM


  1. Concept Poster
    • Post illustrating main points of a new ideas
    • Purposes:
      • Communicated future vision
      • Build a business case
      • Gain support from stakeholders
      • Provide road map for moving forward
    • Preparation steps:
      • Identify new idea to introduce
      • Assemble a team and drawing materials
    • Implementation steps:
      • Develop name and tag line for concept
      • Write short summary of idea
      • Include descriptions of key stakeholders
      • List few features and benefits
      • Illustrate concept with big picture or diagram
      • Add timeline for developing solution
      • Draft layout and final poster
    • Helpful hints:
      • Make first draft quickly – don’t over think
      • Display posters to rally enthusiasm
    • Sample process:
      • Purpose: Coming up with clear solutions, summarizing main points and polling opinions of others
      • Steps:
        • Round Robin (Making)
        • Concept Poster (Making)
        • Visualize the Vote (Understanding)
    • School applications:
      • Students can create these early in a poster while launch enthusiasm is still high and ideas abound.  They can post these up in a gallery walk for early feedback on their proposed products and solutions.  These can remain on the wall throughout the project.
      • Teachers can create concept posters as entry docs for projects and post on walls of classroom throughout project.
  2. Video Scenario
    • Short movie showing new concept in use
    • Purposes:
      • Communicate future possibilities
      • Communicate what concept in action looks like
      • Gain support from stakeholders
      • Inspire team
    • Preparation steps:
      • Identify new concept to represent
      • Assemble small team
      • Create storyboard of future scenario
      • Write detailed script
      • Collect prototypes, people, props, etc
    • Implementation steps:
      • Record video or take still shots of each scene
      • Edit footage 2-5 min
      • Record and overlap narration
      • Post final movie online for convenient viewing
    • Sample process:
    • School applications:
      • Teachers can use this process to create entry videos for projects
      • Students can use this process to create product videos that illustrate key processes in content they are studying
  3. Cover Story Mock-Up
    • mock news article describe successful future of a new idea
    • Purpose:
      • Show successful future state
      • Promote shared vision
      • Gain support from decision makers
      • Inspire your team
    • Preparation steps:
      • Identify concept to promote
      • Assemble team and drawing materials
    • Implementation steps:
      • Select relevant magazine and draw masthead
      • Write a newsworthy heading and subheading
      • Draw an illustration of new concept
      • Write first paragraph of story
      • Draw supporting illustrations inside the spread
      • Include callouts, quotes, and sidebar stories
    • Helpful hints:
      • Make it realistic
      • Circulate magazine to rally enthusiasm
    • Sample process:
      • Purpose: Think of a lot of ideas, narrow down options, tell others concept, invite feedback
      • Steps:
        • Creative Matrix (Making)
        • Importance / Difficulty Matrix (Understanding)
        • Cover Story Mock-up (Making)
        • Visualize the Vote (Understanding)
    • School applications:
      • Teachers can use this process to create engaging entry docs for projects
      • Admin can use this process to communicate vision for the school year to teachers
      • Students an use this process to communicate a hopeful vision for their upcoming school year
  4. Quick Reference Guide
    • Short document summarizing the key principles and elements of a proposed solution
    • Purposes:
      • Summarize rationale for design
      • Promote key principles
      • Provide specs
      • Support proper implementation
    • Preparation steps:
      • Identify design in need of documentation
      • Assemble team that created design
    • Implementation steps:
      • Ask them to communicate the design intent
      • Summarize guiding principles of design
      • Indicate standards for color, format, font, etc
      • Provide library of design templates and patterns
      • Package the specs in a concise manner
      • Prepare a small booklet and/or online reference
    • Helpful hints:
      • Keep it short – 10-12 pages
      • Make guide clear enough for implementation
    • Sample Process:
    • School applications:
      • Students can create this as a product for projects that have them research, develop, test, and refine processes
      • Teachers can create this product to provide students with guides for key academic skills such as – how to take notes, lab report writing process, how to set/track/refine goals, etc.
3-sowhat
The design rationale strategies help designers convey enough about the features and rationale for products to draw in stakeholders and to guide future design steps.  Teachers can use these strategies to generate enthusiasm for projects and to communicate useful classroom skills and routines.  Teachers can design products that have use some of the design rationale products as preliminary and/or final products.


4-nowwhat
Preparation Steps
  • For teacher use:
    • Decide tasks / problems that could benefit from design rationale strategies (examples: create entry docs, creating writing process guides, etc)
    • Select design rationale method(s) that will can help generate the most useful product
    • Design scaffolding that helps students discuss and make use of design rational product
  • For student use:
    • Identify points in projects where developing a design rationale product will be a useful activity
    • Design resources to help guide students through developing design rationale products.  See above.
Early Implementation Steps
  • For teacher use:
    • Use design rationale products to communicate & generate enthusiasm for strategies, visions for upcoming projects, etc
  • For student use:
    • Scaffold activities aimed at creating and gathering feedback on design rationale products
    • Follow-up with more design activities.  See hyperlinks above for ideas.
Advanced Implementation Steps
  • For teacher use (understanding students):
    • Observe how students use design rationale products to learn how to develop better designs for similar future products
  • For student use (understanding stakeholders for project):
    • Have students reflect on design rationale products – how did it work?  what assumptions were challenged? what new things were learned? what new ideas were inspired? how can this approach be used in other settings?
5-relatedstuff

119: Modeling & prototyping

1-sources


2-what


Screen Shot 2016-05-09 at 1.01.14 PM


  1. Storyboarding
    • Series of images showing key elements and interactions of a new scenario
    • Purpose:
      • Shows concept in action
      • Visualize the future
      • Gain support from decision makers
    • Preparation steps:
      • Identify idea to develop
      • Create poster with 10-12 empty panes
      • Assemble diverse team
      • Provide drawing materials
    • Implementation steps:
      • Draft storyline
      • Determine setting and main characters
      • Draw key frames for future scenario
      • Add descriptive captions to each drawing
    • Helpful hints:
      • Explain ideas to others
      • Get inspiration from comic books
      • Use variety of angles (panoramic, close up)
    • Sample process:
    • School applications:
      • Teacher can use this technique to storyboard upcoming projects and upcoming activities with tricky logistics
      • Students can use this technique to brainstorm experiments, essays, reports, videos, etc
  2. Schematic diagramming
    • Outline of structure & essential components of a system
    • Purposes:
      • Shows structure of proposed solution
      • Work out functional details
      • Build shared understanding
      • Inform future design activities
    • Preparation steps:
      • Identify an idea or concept to develop
      • Assemble a diverse team
      • Gather drawing materials
    • Implementation steps:
      • Determine basic elements to include
      • Render each element SIMPLY
      • Compose elements in clear way
      • Adjust size and weight of things for emphasis
      • Arrange overall diagram in an orderly manner
    • Helpful tips:
      • Avoid realistic pictures
      • Keep it skeletal
      • Use grid structure to line things up
      • Use color sparingly
    • Sample process:
    • School applications:
      • Can use this to redesign complicated school systems such – professional development systems, systems that promote school culture
      • Can use this to design system of activities that scaffold skills over the long term such as scaffolding agency and collaboration
      • Students can use this to create a visual for a complicated system of arguments in a large research paper
  3. Rough & ready prototyping
    • rapid model of concept that mimics its appearance and function
    • Purposes:
      • Communicates shared vision of future product
      • Test ideas quickly
      • Iterative improvements
    • Preparation steps:
      • Identify concept to develop
      • Assemble small design team
      • Gather basic materials
      • Consider what to learn from prototype
    • Implementation steps:
      • Build rough model of concept
      • Simulate as much functionality as possible
      • Create readable and realistic content
      • Label incomplete areas
    • Helpful hints:
      • Apply good craftsmanship but don’t aim for perfection
      • Be resource – incorporate found objects
      • Use role to simulate interactions
    • Sample process:
      • Purpose: Envision new solution, test it early
      • Steps:
    • School applications;
      • Students can build rough & ready prototypes in the context of design projects to test their ideas before committing to a more developed product (or they can end the project at the prototype phase and test it and reflect on what they learned)
      • Teachers can use this process to develop model products for projects
  4. Appearance modeling
    • Refined model of ideas that emphasizes visual styling (not function)
    • Purposes:
      • Consider aesthetics
      • Reveal emotional qualities
      • Provide vision for future
      • Gain support from stakeholders
    • Preparation steps:
      • Identify concept to develop
      • Assemble small design team
      • Decide what to learn from model
      • Consider range of visual and emotional qualities
      • Assemble palette of colors and sample materials
    • Implementation steps:
      • Develop sketches to show possibilities
      • Hone in on a few treatments to refine detail
      • Draw realistic renderings of concepts
      • Produce models showing finished effects
    • Helpful hints:
      • Consider using 3-D printing
      • Use scaled-down model to show environment
      • It it’s a digital interface, place it on an actual device
    • Sample process:
      • Purpose: explore emotional and visual attributes of a concept
      • Steps:
    • School applications:
      • Students can go through the steps above to create appearance models for project products and can test these to learn about their emotional and visual impact
      • Teachers can use this process to develop model products for projects


3-sowhat
Quick prototyping and testing can teach teachers and students how to bring ideas to life and how to use data to refine them.  It can use fast iteration to show people how to take and leverage controlled risks.


4-nowwhat
Preparation Steps
  • For teacher use:
    • Decide tasks / problems that could benefit from fast prototyping (examples: create model products to illustrate expectations, etc)
    • Select modeling method(s) that will can help generate the most useful prototypes
    • Design scaffolding that incorporates models to communicate and discuss expectations
  • For student use:
    • Identify points in projects where prototyping will be a useful activity
    • Design resources to help guide students through selected prototyping activities.  See above.
Early Implementation Steps
  • For teacher use:
    • Use models to communicate and discuss project expectations and to help illustrate project rubrics
  • For student use:
    • Scaffold activities aimed at creating and test prototypes
    • Follow-up with more design activities.  See hyperlinks above for ideas.
Advanced Implementation Steps
  • For teacher use (understanding students):
    • Compare / constrast student work with teacher-generated prototypes in order to identify teacher and student strengths and areas of improvement.
    • Used what was learned from comparing teacher and student models to design scaffolding activities that help students become more efficient at skills that are gaps
  • For student use (understanding stakeholders for project):
    • Have students reflect on prototyping strategies – how did it work?  what assumptions were challenged? what new things were learned? what new ideas were inspired? how can this approach be used in other settings?
5-relatedstuff

118: Concept Ideation

1-sources


2-what


Screen Shot 2016-05-09 at 1.10.09 PM

  1. Thumbnail Sketching
    • Series of small drawings that explore new ideas
    • Purposes:
      • Generate quick ideas
      • Promote divergent thinking
      • Encourage sharing of ideas
      • Make iterative improvements
    • Preparation Steps:
      • Identify exploration topic.
      • Assemble team and drawing materials.
    • Implementation Steps:
      • Ask each team member to work independently
      • Each person focuses on one aspect of the topic and draws pictures of possibilities.
      • Then each person focuses on another aspect and draws more possibilities.
      • Group discusses sketches
      • Pick a subset to refine with additional sketching
    • Helpful Tips:
      • Encourage visual thinking
      • Not perfect drawings
      • Limit sketching round times
      • Refrain from editing early
    • Sample Process
      • Purpose: Explore large number of ideas and develop options to get quick feedback
      • Steps:
        • Thumbnail Sketching (Making)
        • Rough & Ready Prototyping (Making)
        • Critique (Looking)
    • School Applications
      • Teachers can use this technique to brainstorm project ideas and scaffolding ideas
      • Students can use this technique to brainstorm product ideas
  2. Creative Matrix
    • Brainstorm new ideas at intersection of distinct categories
    • Format:
      • Use columns for categories related to people (personas, market segments, problem statements)
      • Use rows as categories for enabling solutions (technologies, environments, policies, etc)
    • Purposes:
      • Generate large number of ideas
      • Promote divergent thinking
      • Develop new and usual ideas
    • Preparation steps:
      • Identify design challenge in need of new ideas
      • Set up grid poster (max 5×5)
        • Label columns – related to people
        • Label rows – related to solutions
      • Form teams
    • Implementation steps:
      • Instruct teams to ideate on the grid
      • One idea per sticky note
      • Limit time – 15-20 minutes
    • Helpful hints:
      • Draw pictures of ideas
      • Fill every cell of grid
      • Reward quantity
    • Sample process:
      • Purpose: Define a challenge and develop many quick ideas
      • Steps:
        • Statement starters (Understanding)
        • Creative Matrix (Making)
        • Visualize the Vote (Understanding)
        • Cover Story Mock-Up (Making)
    • School Applications:
      • Teachers can use this technique to facilitate an activity that has students brainstorm many strategies for building positive classroom environments
      • Teachers can use this technique to develop many project ideas that go with different course topics
      • Students can use this technique to develop many product ideas that go with a problem statement
  1. Round Robin 
    • Ideas evolve as they are passed from person to person
    • Purposes:
      • Get input from all team members
      • Diminish overbearing opinions
      • Generate new and unusual idea
    • Preparation steps:
      • Identify design challenge in need of new ideas
      • Created workshops (1 per person) folded into 4 parts
    • Implementation steps:
      • Instruct each person to write down challenge
      • Each person draws an unconventional solution
      • Then pass paper to the left
      • Write one reason why idea will fail
      • Pass paper to the left
      • Draft resolution to the critique
    • Helpful tips:
      • Limit time – 2-3 minute rounds
      • Encourage wild ideas
      • Invite discussion of new ideas
    • Sample process:
      • Purpose: refocus problem, develop fresh ideas and decide which ideas to develop
      • Steps:
        • Problem Tree Analysis (Understanding)
        • Round Robin (Making)
        • Visualize the Voce (Understanding)
        • Concept Poster (Making)
    • School applications:
      • Students can use this technique to generate product ideas to a design challenge
      • Grade level teachers can use this technique to develop grade level policies that support students
  2. Alternative Worlds
    • Using perspectives to help generate fresh ideas
    • Purposes:
      • See things from a fresh perspective
      • Leverage success from other domains
      • Generate new ideas
    • Preparation steps:
      • Identify topic
      • Recruit diverse team
      • Create list of analogous topics
      • Think about representative organizations
      • Select few alternative worlds to explore
    • Implementation steps:
      • Orient team to key characteristics of each world
      • Ask, how would _______ solve this problem?
      • Seek various ideas inspired by each world
    • Helpful tips:
      • Choose a world different from yours
      • Try to interview someone from alternative world
    • Sample process:
      • Purpose: Generating new ideas from alternative perspectives and visually conveying new concepts
      • Steps:
        • Alternative Worlds (Making)
        • Thumbnail Sketching (Making)
        • Concept Poster (Making)
    • School applications:
      • Students can use this technique to brainstorm products from the perspectives of real companies
      • Teachers can use this technique to design management strategies from the perspectives of real companies known for supporting innovation in their employees


3-sowhat
Brainstorming occurs in a lot of PBL projects.  Knowing several brainstorming techniques will allow PBL teachers to facilitate brainstorming in ways that feel fresh and that hopefully help students generate a lot of creative ideas.


4-nowwhat
Preparation Steps
  • For teacher use:
    • Decide problems that need new solutions (examples: project problem statements, grading policies, management policies, etc)
    • Select brainstorming method(s) that will can help generate the most useful solutions
  • For student use:
    • Identify points in projects where brainstorming will be a useful activity
    • Design resources to help guide students through selected brainstorming activities.  See above.
Early Implementation Steps
  • For teacher use:
    • Implement selected strategies for brainstorming.
    • Follow up with more design steps.  See above for ideas.
  • For student use:
    • Scaffold activities aimed at brainstorming new ideas.
    • Follow-up with more design activities.  See hyperlinks above for ideas.
Advanced Implementation Steps
  • For teacher use (understanding students):
    • Share new brainstormed ideas with students and check to see if they if any of the ideas appear useful and feasible to them.
    • Used brainstormed solutions to develop better projects, strategies, policies, etc.
  • For student use (understanding stakeholders for project):
    • Have students reflect on brainstorming strategies – how did it work?  what assumptions were challenged? what new things were learned? what new ideas were inspired? how can this approach be used in other settings?


5-relatedstuff

117: Problem Framing

1-sources


2-what


Screen Shot 2016-05-09 at 1.27.27 PM


  1. Problem Tree Analysis
    • Graphic for exploring causes & effects of a particular issues
    • Purposes:
      • Untangle complex problems
      • Reveal causes and effects
      • Build shared understanding
      • Provide directions for problem solving
    • Preparation steps:
      • Identify problem statement
      • Recruit diverse group of stakeholders
      • Gather team around flip chart or whiteboard
    • Implementation steps
      • Write focal problem in the middle of the space
      • Ask team to discuss causes (roots)
      • Write possible causes below the focal problem
      • Ask team to discuss effects (branches)
      • Write various responses above the focal problem
      • Discuss and decide which to focus on
    • Helpful hints
      • Acknowledge and discuss direct vs. indirect causes
      • Note that some effects are routine and some are rare
      • Take a quick poll to decide focus area
    • Sample process:
      • Purpose: Discern focus of a problem and direct research to learn more
      • Steps:
        • Problem Tree Analysis (Understanding)
        • Affinity Clustering (Understanding)
        • Walk-a-Mile Immersion (Looking)
    • School applications:
      • School team (grade level,  subject level) can use this method to unpack a grade level or subject level problem such as – students struggle to understand scientific method, large number of students struggling to pass classes, etc
      • This activity can be facilitated by a teacher to get students to unpack a project challenge or to unpack a class challenge such as – how to ensure entire class is successful, how to ensure that entire class feels engaged and feels sense of belonging, etc
  2. Statement Starters
    • Phrasing problem statements in ways that invite broad exploration
    • Purpose:
      • Challenge assumptions
      • See different perspectives
      • Provide direction(s) for problem solving
      • Invite divergent thinking
    • Implementation steps:
      • Identify targeted set of problems or opportunities
      • State each issue in the form a short phrase.
      • Add a starter to each phrase
        • How might we _______
        • In what ways might we ________
        • How to _____________
      • Pick the best statement started for each problem
      • Use the new phrasing as a basis for ideation
    • Helpful hints:
      • Consider adding a starter to a research insight
      • Don’t embed solutions into problem statements
      • Use voting to pick best problem statements
    • Sample process:
      • Purpose: look at problems from new perspectives and use new ideas to frame ideation activities
      • Steps:
        • Alternative Worlds (Making)
        • Statement Starters (Understanding)
        • Thumbnail Sketching (Making)
    • School applications:
      • This process can be used to design essential (driving) questions for projects.
      • This process can be taught to students to teach them how to generate better need-to-knows and to frame need-to-knows in ways that invite next steps
  3. Abstraction Laddering
    • Reconsidering a problem statement by broadening or narrowing its focus
    • Purposes:
      • Challenge preconceptions
      • Refocus problem statement
      • Build shared understandings
      • Provide direction for problem solving
    • Preparation Steps:
      • Identify initial problem statement
      • Make a laddering workshops (runs as blank spaces)
      • Write initial statement on middle run
    • Implementation Steps:
      • Move up the ladder by asking Why?
        • Consider options broader than the initial one
      • Move down the ladder by asking How?
        • Consider options narrower than initial one
      • Discuss which option to use for ideation
    • Helpful Hints:
      • Consider use of Statement Starters to reframe.
      • Take quick poll to decide which option is beset
      • In the end, initial statement might be the best
    • Sample Process:
      • Purpose: Framing problems to get key insights from stakeholders and translate findings into new solutions
      • Steps:
        • Abstraction Laddering (Understanding)
        • What’s on Your Radar? (Looking)
        • Affinity Cluster (Understanding)
        • Concept Poster (Making)
    • School applications
      • Can be used to refine project problem statements and essential (driving) questions
      • Can be used by students to personalize project statement and refocus/individualize project products and directions
  4. Rose, Thorn, Bud
    • Identifying things as positive, negative, or having potential
    • Purposes:
      • Codify research data
      • Invite input from team members
      • Facilitate productive discussion
      • Help identify issues and insights
    • Preparation steps:
      • Identity targeted topic
      • Assemble diverse group of stakeholders
      • Give each participant a pen and 3 sticky note pads (different colors)
    • Implementation steps:
      • Explain topic and color key
        • rose = pink (positive thing)
        • thorn = blue (negative thing)
        • bud = green (thing with potential)
      • Instruct each person to generate many data points
      • Include one issue, insight or idea per sticky note
    • Helpful hints:
      • Tell participates to offer multiple items per color
      • Resist temptation to describe solutions
      • Limit time frame of generating and discussing data
    • Sample process:
      • Purpose: Visualize existing situation, codifying parts of situation and prioritizing future possibilities
      •  Steps:
        • Heuristic Review (Looking)
        • Rose, Thorn, Bud (Understanding)
        • Importance / Difficulty Matrix (Understanding)
    • School applications:
      • Can be used to gather feedback from students during project reflections
      • Can be used to gather feedback from students on teaching style and classroom environment
      • Can be used to gather feedback from other teachers on upcoming projects


3-sowhat

Using multiple strategies for framing problems can help designers frame problems in ways that yield innovative solutions.  Teachers can use these strategies to refine project problem statements and to gather feedback on projects and classroom elements.  Teachers can facilitate activities that involve these strategies in order to gather peer feedback on project drafts, to personalize project statements, and to design Need-to-Knows that yield better next steps.


4-nowwhat
Preparation Steps
  • For teacher use:
    • Decide problems that need reframing (examples: project problem statements, classroom challenges such as ensuring greater success for all, etc)
    • Select method(s) that will can help reframe problems in most useful ways
  • For student use:
    • Identify points in projects where reframing problem statements is a useful activity
    • Design resources to help guide students through selected reframing activities.  See above.
Early Implementation Steps
  • For teacher use:
    • Implement selected strategies for reframing problem statements.
    • Follow up with more design steps.  See above for ideas.
  • For student use:
    • Scaffold activities aimed at reframing problem statements.
    • Follow-up with more design activities.  See hyperlinks above for ideas.
Advanced Implementation Steps
  • For teacher use (understanding students):
    • Share new problem statement with students and check to see if they yield more quality next steps.
    • Used reframed problem statements to run better projects or to design better strategies and policies.
  • For student use (understanding stakeholders for project):
    • Have students reflect on strategies for reframing problems – how did it work?  what assumptions were challenged? what new things were learned? what new ideas were inspired? how can this approach be used in other settings?


5-relatedstuff

116: Understanding Patterns & Priorities

1-sources


2-what


Screen Shot 2016-05-09 at 1.35.20 PM


  1. Affinity Clustering
    • Graphically sorting items according to similarity
    • Purposes:
      • Identify issues and insights
      • Reveal thematic patterns
      • Facilitate productive discussion
      • Build a shared understanding
    • Preparation steps:
      • Identify research topic
      • Gather data set
      • Record each item on a separate card or sticky note
      • Form a team of collaborators and pick a facilitator
    • Implementation steps:
      • Have one person describe, then place an item
      • Invite others to place similar items in proximity of that item
      • Repeat steps until all items are grouped.
      • Discuss and rearrange items as grouping emerge
      • Label final clusters
    • Helpful hints:
      • Don’t label clusters too early.  They may shift.
      • Look for opportunities to create subgrouping.
      • Consider color coding different types of data
    • Sample process:
      • Purpose: Evaluate and improve an existing system
      • Steps:
        • Heuristic Review (Looking)
        • Affinity Clustering (Understanding)
        • Importance / Difficult Matrix (Understanding)
    • School applications:
      • Analyze admit / exit tickets
      • Analyze parts / activities / policies that contribute to classroom and school-wide culture
      • Analyze parts / activities / politics that support key schooled initiatives such as AP test prep, state test prep, promoting STEM, SAT/ACT test prep, etc
  2. Bull’s-eye Diagramming
    • Using a target diagram to rank items in order of importance
    • Purposes:
      • Determine what’s most essential
      • Facilitate productive discussion
      • Build consensus
      • Help develop action plan
    • Preparation Steps:
      • Identify a project that requires prioritization
      • Make a large poster with 3 concentric circles
      • Label circles: Primary, Secondary, Tertiary.
      • Recruit team to conduct analysis
      • Gather data set
      • Divide data set into small units
      • Print each data item on small strips of paper or on sticky notes
    • Implementation Steps:
      • Debate the relative importance of each item
      • Plot the data on the target and set priorities
    • Helpful hints:
      • Size center ring to fit a limited number of items
      • Enforce a time limit on each round of deliberation
      • Remember that tertiary doesn’t mean irrelevant
    • Sample process:
    • School applications:
      • Prioritize learning targets (long term and supporting, academic and character) in a project as a precursor to designing scaffolding and assessments and project calendar
      • Prioritize learning targets (long term) over an entire year as a precursor to developing yearlong scope & sequence
      • Prioritize T-TESS dimensions prior to develop an action plan for improving key dimensions
  3. Importance / Difficulty Matrix
    • Quad chart for plotting items by relative importance and difficulty
      • Importance (x-axis), Difficulty (y-axis)
      • Lower Left Quadrant = targeted, easiest to realize
      • Upper Left Quadrant = luxurious, costly items with little return
      • Upper Right Quadrant = Strategic, large investments to get big results
      • Lower Right Quadrant = High value, yield high impact at low price
    • Purposes:
      • Quick prioritization process
      • Resolves differing opinions
      • Helps team develop plan of action
    • Preparation steps:
      • Identify project in need of prioritization
      • Make quad poster chart
        • Label axes – x-axis = Importance, y-axis = Difficulty
      • Form a discussion team
    • Implementation steps:
      • Plot items horizontally and vertically by their importance and difficulty.
      • Look for related groupings.
      • Set priorities
    • Helpful tips:
      • Give each item its own place on a relative scale
      • Listen carefully to deliberations around each placement
    • Sample process:
      • Purpose: Generating diverging ideas, converging on best one and moving forward with prioritized concepts
      • Steps:
        • Creative matrix (Making)
        • Visualize the vote (Understanding)
        • Importance / Difficulty Matrix (Understanding)
    • School applications:
      • Prioritize learning targets (long term and supporting, academic and character) in a project as a precursor to designing scaffolding and assessments and project calendar
      • Prioritize learning targets (long term) over an entire year as a precursor to developing yearlong scope & sequence
      • Prioritize T-TESS dimensions prior to develop an action plan for improving key dimensions
      • Prioritize scaffolding ideas for upcoming projects
      • Prioritize product ideas for upcoming projects
  4. Visualize the Vote
    • Quick poll of collaborators to reveal preferences and opinions
    • Purposes:
      • Rate and rank preferences
      • Reveal thematic patterns
      • Diminish overbearing opinions
      • Democratize decision making
    • Preparation steps:
      • Select subject of polling activity
    • Implementation steps
      • Announce criteria for voting
      • Give reviewers sticky notes as voting tokens
        • 1 token – overall vote
        • 2 tokens – detail votes
      • Presenters describe each concept
      • Everyone votes simultaneously
      • Tally the votes
      • Discuss what people voted for and why
    • Helpful Hints:
      • Use different colored sticky notes for detail votes
      • Place detail token on specific detail of a concept
      • Consider cumulative effect of detail votes
    • Sample process:
      • Purpose: Presenting new ideas, identifying best ones and developing these into detailed concepts
      • Steps:
        • Concept Poster (Making)
        • Visualize the Vote (Understanding)
        • Storyboarding (Making)
    • School applications:
      • Can be used as a tool to co-develop project calendars that involve multiple teachers
      • Can be used as a tool to help students vote on classroom norms and policies that will create the classroom culture that they need to succeed
      • Can be used as a tool to identify possible student preferences for upcoming project topics if you’re not sure which ones to develop into full blown projects


3-sowhat
Identifying and leveraging patterns helps designers identify what are good ideas, how are ideas related and which ideas are important.   There are numerous classroom applications for these strategies  – see School Applications above.


4-nowwhat
Preparation Steps
  • For teacher use (understanding students):
    • Decide research topics (examples: possible project topics, potential classroom policies & norms, etc)
    • Select method(s) that will help gather most useful information related to research topics
  • For student use:
    • Brainstorm research topics in projects that lend themselves to strategies aimed at identifying patterns & priorities
    • Design resources that help students prepare and implement methods.  See above.
Early Implementation Steps
  • For teacher use (researching students):
    • Implement selected strategies for understanding patterns & priorities.
    • Follow up with more design steps.  See above for ideas.
  • For student use:
    • Scaffold activities aimed at understanding patterns & priorities.
    • Follow-up with more design activities.  See hyperlinks above for ideas.
Advanced Implementation Steps
  • For teacher use (understanding students):
    • Share findings with students and have them reflect on whether or not the findings have any validity.
    • Develop interventions, calendars, strategies, activities, and routines that address verified findings.
  • For student use (understanding stakeholders for project):
    • Have students reflect on strategies for understanding patterns & priorities. – how did it work?  what assumptions were challenged? what new things were learned? what new ideas were inspired? how can this approach be used in other settings?


5-relatedstuff

115: Understanding People & Systems

1-sources


2-what


Screen Shot 2016-05-09 at 1.45.12 PM


  1. Stakeholder Mapping
    • Diagramming network of stakeholders for a given system
    • Purposes:
      • Focus on people above other factors
      • Guides plan for future research
      • Documents research findings
      • Builds shared understanding
    • Preparation steps:
      • Identify research topic
      • Recruit diverse team of collaborators
    • Implementation steps:
      • Generate very broad list of stakeholders
      • Draw a symbol of a person for each different type
      • Write speech bubble summarizing each person’s mindset
      • Draw lines with arrows connecting stakeholders
      • Label lines to describe relationships
      • Circle & label related groupings
    • Helpful hints:
      • Include broad range of stakeholders
      • Strike balance between breadth and relevance
      • Don’t represent groups of people in one symbol
    • Sample process: 
    • School applications:
      • Can use this mapping tool to map out dynamics that involve students, their clients, their parents, and teachers
      • Can use this mapping tool to map out stakeholders related to complicated school-wide initiatives such as designing professional development, school-wide supports (quads, after school tutoring, advisories), culture-building initiatives
  2. Persona Profile
    • Creating profiles that summarize mindsets, needs, and goals of key stakeholders
    • Purposes:
      • Focus on people
      • Deepen empathy
      • Summarize research findings
      • Challenge preconceptions
    • Preparation steps
      • Identify body of research
      • Determine set of archetypes to build in detail
    • Implementation steps
      • Write detailed description of each archetype
      • Give realistic names to archetypes
      • Include representative portrait of each archetype
      • Describe their distinguishing characteristics, needs and goals
      • Summarize mindset with a memorable quote
      • Compare 1-page summary for each type.
    • Helpful tips:
      • Avoid disrespectful stereotypes
      • Supplement text with illustrative diagrams
      • Improve visuals with an expert designer
    • Sample process:
      • Purpose: Conducting field research and looking for useful data patterns and conveying these in relatable forms.
      • Steps:
        • Contextual Inquiry (Looking)
        • Affinity Clustering (Understanding)
        • Persona Profile (Understanding)
    • School applications:
      • Can use this to create profiles of that represent key clusters of student needs so that they can be carefully considered during project planning
      • Can use this to create profiles for different types of collaborators and types of learners so they can be carefully considering while planning scaffolding activities for agency and collaboration
  3. Experience Diagramming
    • Mapping person’s journey through a set of circumstances or tasks
    • Purpose:
      • Summarize current state of a situation
      • Deepen empathy
      • Identify critical touch points
      • Inform subsequent design activities
    • Preparation steps:
      • Identify body of research
      • Select experience to document in detail
      • Determine a format (flow chart, map, timeline, etc.)
    • Implementation steps:
      • Hone in on a few key tasks
      • Decide which individuals to represent
      • List people, places, and things they encounter
      • Illustrate series of typical experiences using selected format.  See above.
      • Highlight critical points in journey.
    • Helpful hints:
      • Focus effort on existing situations
      • Use diagram to mark typical break points
      • Study behavioral patterns for potential insights
    • Sample Process:
      • Purpose: Gaining and evaluating firsthand knowledge.
      • Steps:
        • Walk-a-Mile Immersion (Looking)
        • Experience diagramming (Understanding)
        • Rose, Thorn, Bud (Understanding)
    • School applications:
      • Can be used to develop deeper understanding of how students navigate through projects – may illustrate possible stuck points which can suggest strategies to scaffold
      • Can be used to develop deeper understanding of how students of a specific grade level navigate through a typical school day and learn insights that can lead to useful advisory lessons
  4. Concept Mapping
    • Depicting relationships between various concepts in a given topic area
    • Purposes:
      • Identify research subject
      • Recruit diverse team
      • Create list of concepts related to topic
        • Think broadly, include people, places, and things
    • Implementation steps:
      • Arrange concepts in an orderly way
      • Draw lines with arrows to connect related concepts
      • Label the lines with words describing relationships
      • Circle and label related groupings
    • Helpful hints:
      • Use a very large whiteboard or working surface
      • Put concepts on sticky notes to make them movable
      • Use map as a living document – update it often
    • Sample process:
      • Purpose: Deepening knowledge in a domain and collaborate to generate fresh ideas
      • Steps:
        • Concept Mapping (Understanding)
        • Statement Starters (Understanding)
        • Round Robin (Making)
    • School applications:
      • Students can use this strategy to describe how their understanding of concepts related to key topic(s) are evolving throughout a project
      • Teachers can use this strategy to illustrate connection between standards and identify bridges to other contents that can lead to integrated projects


3-sowhat
The strategies for understanding people and systems help designers better understand their stakeholders – who they are, how they are related, what are their needs, how are these related, etc.  Teachers an use these strategies to make better sense of their observations of their students.  This deeper understanding can help them cluster their needs in ways that make planning more efficient.  Teachers can teach students these methods in order to learn more about themselves (such as their academic and collaborative interactions) and to make sense of stakeholders in the context of design projects.


4-nowwhat
Preparation Steps
  • For teacher use (understanding students):
    • Decide research topics (examples: student team interactions, student study habits, day-in-a-life of a student, student experiences/perceptions of projects, etc.)
    • Select method(s) that will help gather most useful information related to research topics
  • For student use (researching stakeholders for project):
    • Brainstorm research topics in projects that lend themselves to strategies aimed at understanding people and systems
    • Design resources that help students prepare and implement methods.  See above.
Early Implementation Steps
  • For teacher use (researching students):
    • Implement selected strategies for understanding people & systems
    • Follow up with more design steps.  See above for ideas.
  • For student use (researching stakeholders for project):
    • Scaffold activities aimed at understanding people & systems (preparation and implementation)
    • Follow-up with more design activities.  See hyperlinks above for ideas.
Advanced Implementation Steps
  • For teacher use (understanding students):
    • Share findings with students and have them reflect on whether or not the findings have any validity.
    • Develop interventions, calendars, strategies, activities, and routines that address verified findings.
  • For student use (understanding stakeholders for project):
    • Have students reflect on strategies for understanding systems and people – how did it work?  what assumptions were challenged? what new things were learned? what new ideas were inspired? how can this approach be used in other settings?


5-relatedstuff

114: 4 Evaluative Research Methods

1-sources


2-what


Screen Shot 2016-05-09 at 1.51.47 PM


  1. Think-Aloud Testing
    • People narrate their experience while performing a task
    • Purpose:
      • Reveals what people are thinking
      • Deepen empathy
      • Uncover opportunities for improvement
      • Lowers development costs through early discovery
    • Preparation steps:
      • Identify tasks to investigate
      • Recruit 6-9 participants
      • Schedule testing sessions for each participant
    • Implementation steps:
      • Introduce yourself and purpose
      • Remind them – We are not testing you.
      • Instruct them to perform each task while thinking aloud.
      • Take good notes.
      • Thank each participant.
    • Helpful hints:
      • Withhold question until end of test
      • Avoid temptation to demonstrate task
      • Mimic functionality if the design is still in process
    • Sample process:
      • Purpose: Rapid iteration (quick test, implement and improve solutions)
      • Steps:
        • Rough & Ready Prototyping (Making)
        • Think Aloud Testing (Looking)
        • Bull’s eye Diagramming (Understanding)
        • Schematic Diagramming (Making)
    • School applications:
      • Can use this method to research how classroom procedures are working out for students
      • Can use this method to gather data from students on how they experiences new activities for learning key processes
  2. Heuristic Review
    • Auditing procedure based on 10 reals of thumb for good design
    • Purposes:
      • Leverage good design principles
      • Identify problems quickly
      • Yields data in the absence of test participants
      • Shows improvement opportunities
    • Preparation steps:
      • Identify research topic
      • Assemble a team with multiple perspectives
      • Select a small number of key tasks.
    • Implementation steps:
      • Get everyone familiar with 10 heuristics
        1. Match mental model
        2. Minimize perceived complexity
        3. Use consistent form, words and actions
        4. Provide sense of place
        5. Account for use and environmental constraints
        6. Anticipate needs
        7. Use clear and concise language
        8. Geed feedback about actions and status
        9. Prevent errors and provide graceful recovery
        10. Strive for appropriate and minimal aesthetics
      • Instruct participants to perform tasks with heuristics in mind
      • Give each reviewer a pen and sticky pad.
      • Have reviewers annotate issues they discover and cite each to a design heuristic.
    • Helpful hints:
      • Have reviewers initial their notes
      • Encourage clear communication
      • Discourage inclusion of solutions at this phase
    • Sample process:
      • Purpose: Evaluating and improving existing systems
      • Steps:
        • Heuristic review (Looking)
        • Affinity clustering (Understanding)
        • Importance / Difficulty Matrix (Understanding)
    • School applications:
      • Can use a simpler list of design principles and use this as an activity for students to evaluate proposed solutions to a project
      • A school team can use this activity to analyze the activities and policies that are supporting a targeted initiative
  3. Critique 
    • Forum for people to give and receive constructive feedback
    • Purposes:
      • Facilitate constructive discussion
      • Revel blind spots in design activities
      • Show improvement opportunities
      • Builds organizational alignment
    • Preparation steps:
      • Identify project and group of reviewers.
      • Pick time and place for session.
    • Implementation:
      • Presenters:
        • describe what has been done and why
        • provide clarification
        • invite suggestions from reviews
        • thank everyone for participating
      • Reviewers:
        • ask questions
        • start with warm (positive) feedback
        • end with cool (negative) feedback
    • Helpful hints:
      • Invite reviewers who didn’t do the project work
      • don’t wait for completeness to invite critique
      • ask for feedback often
    • Sample process:
      • Purpose: Developing, testing and advancing a concept
      • Steps:
        • Concept poster (Making)
        • Rose, Thorn, Bud (Understanding)
        • Critique (Looking)
        • Storyboarding (Making)
    • School applications:
      • Can use this activity to gather teacher and peer feedback on project drafts
      • Can use this activity gather feedback on project drafts prior to finalizing and implementing projects
  4. System Usability Scale
    • Short survey for quantifying usability feedback
    • Purposes:
      • Standardizes evals
      • Provides manageable numeric score
      • Helps with quick assessments
    • Preparation steps:
    • Implementation steps:
      • Conduct task-based usability test.
      • Administed SUS questionnaire after test.
      • Calculate total score for each questionnaire.
      • Average all scores.
    • Helpful hints:
      • Give participants a printed or online form.
      • Tell them to mark the center point if undecided.
      • Don’t allow them to think about each item for too long.
    • Sample process:
      • Purpose: Benchmarking and improving usable features of a current design
      • Steps:
        • Think-Aloud Testing (Looking)
        • System Usability Scale (Looking)
        • Affinity Clustering (Understanding)
        • Schematic Diagramming (Making)
    • School applications:
      • Can use this to gather data on school systems such as discipline system, T-TESS learning systems
      • Can use this to gather data on classroom systems such as grading policies, classroom management systems


3-sowhat
The Evaluative Research Methods can be used by teachers to gather feedback on project design.  These methods can be scaffolded for students to use in design projects.  Students can use these methods to gather feedback on their project designs before formalizing (building final versions) of their solutions.


3-sowhat
Preparation Steps
  • For teacher use (researching students):
    • Decide research topics (examples: student feelings/preferences on project design, late work policies, classroom norms, classroom routines, etc.)
    • Select method(s) that will help gather most useful information related to research topics
  • For student use (researching stakeholders for project):
    • Brainstorm research topics in projects that lend themselves to evaluative research methods
    • Design resources that help students prepare and implement methods.  See above.
Early Implementation Steps
  • For teacher use (researching students):
    • Implement evaluative research methods
    • Follow-up with understanding steps.  See hyperlinks above for ideas.
  • For student use (researching stakeholders for project):
    • Scaffold evaluative research activities (preparation and implementation)
    • Follow-up with understanding activities.  See hyperlinks above for ideas.
Advanced Implementation Steps
  • For teacher use (researching students):
    • Share findings with students and have them reflect on whether or not the findings have any validity.
    • Develop interventions, calendars, strategies, activities, and routines that address verified findings.
  • For student use (researching stakeholders for project):
    • Have students reflect on evaluative research methods – how did it work?  what assumptions were challenged? what new things were learned? what new ideas were inspired? how can this approach be used in other settings?


5-relatedstuff

113: 4 Participatory Research Methods

1-sources


2-what


Screen Shot 2016-05-09 at 2.04.27 PM


  1. What’s on your radar?
    • Plotting items according to personal priorities
    • Purposes:
      • Reveals what people are thinking
      • Shows people’s priorities
      • Challenge preconceptions
      • Yields docs that inform later work
    • Preparation steps:
      • Identify research topic
      • Make a large poster that looks like a radar screen
        • Include 3 concentric circles & 4-6 segments
        • Label circles: Primary, Secondary, Tertiary
        • Label segments by research subtopic
      • Invite group of stakeholders to be participants.
      • Provide sticky notes and pens.
    • Implementation steps:
      • Instruct participants on how to populate the radar screen
      • After they are done, have them explain their rankings
    • Helpful hints:
      • Limit plotting time to 15 minutes.
      • Allow participants to write in some segment labels.
      • Listen closely to participants’ Think Alouds and explanations.
    • Sample process:
      • Purpose: Deciding who to research, these using research to fuel new ideas
      • Steps
        • Stakeholder mapping (Understanding)
        • What on your radar? (Looking)
        • Thumbnail Sketching (Making)
        • Concept Poster (Making)
    • Classroom applications:
      • Can use radar to let students prioritize possible classroom norms
      • Can use radar to let students map out and prioritize interests that relate to major topics in a course in order to get new project ideas
      • Can use radar to let students categorize and prioritize their content & logistics knows and need-to-knows
  2. Buy a feature
    • Playing a game with artificial money to express trade-off decisions
    • Purposes:
      • Reveal what people value
      • Show how people deliberate
      • Uncovers latent and unmet needs
      • Yields documents that inform ensuing work
    • Prep steps:
      • Identify product, service or policy to focus on
      • Generate list of possible features.
      • Make playing cards for features that include
        • price
        • description of feature
      • Invite stakeholders to play the game
    • Implementation steps:
      • Give each player a set of cards with price tags.
      • Give each player a limited amount of fake money.
      • Ask them purchase features within the budget.
      • Ask them to explain their decision making processes.
    • Helpful hints:
      • Base pricing on actuals time and money costs of execution.
      • Listen for evidence of motivations & priorities.
      • Have participants make decisions in pairs.
    • Sample process:
      • Purpose: Discovering values stakeholders attach to feature and forming suggestions for improvement
      • Steps:
        • Buy a Feature (Looking)
        • Schematic Diagramming (Making)
        • Rough & Ready Prototyping (Making)
    • Classroom applications:
      • Can get students to play this game to show their preferences for different types of learning activities in an upcoming project to help refine project calendar
      • Can get students to play this game to prioritize assignment / late work policies to gather data to refine these policies
  3. Build your own
    • Express ideal solutions symbolically
    • Purposes:
      • Shows what stakeholders want
      • Uncovers latent and unmet needs
      • Challenges assumptions
      • Yields models for subsequent work
    • Preparation steps:
      • Identify product, service or policy to focus on.
      • Make a kit of representational blocks.
        • Include variety of shapes and symbols.
      • Invite stakeholders to participate.
    • Implementation steps:
      • Divide participants into pairs
      • Pairs work together to use kits to build ideal solutions.
      • Think aloud while they construct
      • Present final models.
    • Helpful hints:
      • Make units easy to build (magnets, velcro)
      • Limit building time (15-30 minutes)
      • Listen carefully as teams explain their wants and needs.
    • Sample processes:
      • Purpose: Prioritizing which elements to include in a participatory design activities and to engage stakeholders in analysis
      • Steps:
        • Bull’s-eye Diagramming (Understanding)
        • Build Your Own (Looking)
        • Visualize the Vote (Understanding)
        • Critique (Looking)
    • Classroom applications:
      • Can get students to do this activity in order to design ideal sequences of activities that build their agency & collaboration skills
      • Can get students to do this activity to share their ideas related to classroom norms and classroom culture
      • Can get students to do this activity to get a representation of how they’d like projects to run throughout the year
  4. Journaling
    • People record personal experiences in words and pictures
    • Purposes:
      • Accumulates research info over time
      • Reveals what people think and feel
      • Deepens empathy
    • Preparation steps:
      • Identify research topics.
      • Make kit of materials for record keeping – paper diary, blog, etc
      • Invite group of stakeholders to participate.
    • Implementation steps:
      • Explain the purpose and duration of study.
      • Distribute instructions and kits.
      • Include guide for capturing pictures and video.
      • Ask them to fill out journal and mail it back to you.
      • Perform exit interview with each participant.
    • Helpful hints:
      • Encourage people to use their own devices.
      • Send periodic reminders to fill out journals.
      • Provide postage for returning kits
    • Sample process:
      • Purpose: Collecting data from stakeholders that inform search for new ideas
      • Steps:
        • Journaling (Looking)
        • Rose, Thorn, Bud (Understanding)
        • Statement starters (Understanding)
        • Creative Matrix (Making)
    • Classroom applications:
      • Can gather data on how students are experiencing and growing during a project – can ask students to focus on feature of key interest such as successes, stuck points, useful strategies, etc


3-sowhat
Participatory research methods can be used to find out participants’ unexpressed needs.  Teachers can use these methods to learn about students’ habits, priorities, preferences, and interests.  Teachers can teach students these methods in the context of design projects.  Students can use these methods to gather data on their clients that they will inform how they design products.


4-nowwhat
Preparation Steps
  • For teacher use (researching students):
    • Decide research topics (examples: what are their interests, what learning activities do they prefer)
    • Select method(s) that will help gather most useful information related to research topics
  • For student use (researching stakeholders for project):
    • Brainstorm research topics in projects that lend themselves to participatory research methods
    • Design resources that help students prepare and implement methods.  See above.
Early Implementation Steps
  • For teacher use (researching students):
    • Implement participatory research methods
    • Follow-up with understanding steps.  See hyperlinks above for ideas.
  • For student use (researching stakeholders for project):
    • Scaffold participatory research activities (preparation and implementation)
    • Follow-up with understanding activities.  See hyperlinks above for ideas.
Advanced Implementation Steps
  • For teacher use (researching students):
    • Share findings with students and have them reflect on whether or not the findings have any validity.
    • Develop interventions, calendars, strategies, activities, and routines that address verified findings.
  • For student use (researching stakeholders for project):
    • Have students reflect on participatory research methods – how did it work?  what assumptions were challenged? what new things were learned? what new ideas were inspired? how can this approach be used in other settings?


5-relatedstuff

112: 4 Ethnographic Research Methods

1-sources

Looking Chapter in Innovating for People: Handbook of Human-centered Design Methods.  Pittsburgh, PA: LUMA Institute, LLC 2012.  Print

2-what


Screen Shot 2016-05-09 at 2.14.00 PM


  1. Interviewing:
    • Gathering information through direct dialogue
    • Purpose:
      • Gain info directly.
      • Deepen empathy.
      • Build credibility with stakeholders.
      • Challenge preconceptions.
    • Preparation steps:
      • Identify interview topic.
      • Prepare questions and recording equipment.
      • Set interviewee selection criteria.
      • Recruit interviewees.
      • Set times and dates for interviews.
    • Implementation steps:
      • Introduce yourself and interview purpose.
      • Obtain consent.
      • Start with easy steps, then draw out specifics.
      • Listen and take good notes.
      • Thank interviewee.
    • Tips:
      • Choose a location with few distractions.
      • Don’t put words into interviewee’s mouth.
      • Resist urge to analyze interview info at this phase.
    • Sample Process:
      • Purpose: Conducting field research, finding data patterns, and conveying insights in a relatable form.
      • Steps:
        • Stakeholder mapping (Understanding).
        • Interviewing (Looking).
        • Affinity Clustering (Understanding).
        • Persona Profile (Understanding).
    • Classroom applications
      • Can interview students who represent interesting patterns in student needs in order to plan interventions
      • Can interview students who seem uncomfortable or unfocused in the classroom and try to learn how to refine classroom culture to suit their needs
      • Can interview successful students to identify what strategies they are using to be successful
      • Can interview unsuccessful students to identify their stuck points and possible ways to support them
  2. Fly-on the-Wall Observations:
    • Conducting unobtrusive field research.
    • Purposes:
      • Reveal what people actually do.
      • Deepen empathy.
      • Challenge assumptions.
      • Build credibility with stakeholders.
    • Preparing steps:
      • Identify research topic.
      • Develop research plan.
      • Consider which people and activities to watch.
      • Choose location.
      • Obtain access and permission(s).
      • Prep materials for capturing what you see.
    • Implementation steps:
      • Observe.
      • Record findings in videos, photos and notes
    • Tips:
      • Blend in with background.
      • Take role of objective bystander
      • Change vantage points.
    • Sample Process:
      • Purpose: Using observations to inform ways of framing problems and to recruit right people for subsequent design activities.
      • Steps:
        • Fly on the Wall Observation (Looking)
        • Abstraction Laddering (Understanding)
        • Stakeholder Mapping (Understanding)
        • Round Robin (Making)
    • Classroom applications:
      • Can observe how struggling student interacts in your class and another class where they are more (or less) successful in order to identify stuck points, successful strategies and possible support
      • Can observe how a struggle team interactions in order to identify what warm and cool interactions they are having and to identify possible solutions that can improve their collaboration.
  3. Contextual Inquiry
    • Interviewing and observing people in their own environment.
    • Purposes:
      • Reveal what people actually do
      • Deepen empathy
      • Challenge assumptions
      • Build credibility with stakeholders
    • Preparation steps:
      • Identify location and people involved
      • Prepare questions and recording equipment
    • Implementation steps:
      • Introduce yourself and purpose.
      • Obtain consent.
      • Ask participants to perform tasks in a normal way.
      • Observe.
      • Ask questions at opportune moments.
      • Record findings in videos, photos, etc.
      • Thank each participant.
    • Sample Process:
      • Purpose: Conducting field research, visualizing discoveries and determining direction for ideation.
      • Steps:
        • Contextual Inquiry (Looking)
        • Experience Diagraming (Understanding)
        • Rose, Thorn, Bud (Understanding)
    • Classroom applications:
      • Can investigate how students solve content problems in order to learn about what strategies they are using (and not using) to be successful
      • Can investigate how teams set and implement goals in order to learn what collaboration strategies they are using and need to learn to be more successful
  4. Walk-a-Mile Immersion:
    • Building empathy through firsthand experience
    • Purposes:
      • Gain firsthand knowledge
      • Foster humility
      • Deepen empathy
      • Inform subsequent research
    • Preparation Steps:
      • Identify experience to replicate.
      • Choose performance tasks and activities.
      • Assemble materials for simulation.
      • Determine best location.
      • Obtain necessary access and permission.
    • Implementation Steps:
      • Conduct target tasks.
      • Do each activity as realistically as possible.
      • Note findings.
    • Sample Process:
      • Purpose: Conducting an immersion experience and using insights to set direction for problem solving
      • Steps:
        • Personal Profile (Understanding)
        • Walk-a-Mile Immersion (Looking)
        • Statement Starters (Understanding)
    • Classroom Applications:
      • Could use this method to try out upcoming classroom activities and search for possible stuck points and areas in need of revision
      • Could use a version of this method to understand the workload that students accumulate across a day and brainstorm strategies to help them manage that workload
3-sowhat
Ethnographic research helps researchers / designers investigate stakeholders in their natural settings.  The information gained from these observations can inspire innovative solutions to stakeholder problems and challenges.


Ethnographic research habits can be taught to students to help them gather information related to design projects.  Teachers can use ethnographic research to study students’ working and study habits and use that information to design interventions.


4-nowwhat
Preparation Steps
  • For teacher use (researching students):
    • Decide research topics (examples: how do students conduct research, how do they study, how do they set team goals)
    • Select method(s) that will help gather most useful information related to research topics
  • For student use (researching stakeholders for project):
    • Brainstorm research topics in projects that lend themselves to ethnographic research methods
    • Design resources that help students prepare and implement methods.  See above.
Early Implementation Steps
  • For teacher use (researching students):
    • Implement ethnographic research methods
    • Follow-up with understanding steps.  See hyperlinks above for ideas.
  • For student use (researching stakeholders for project):
    • Scaffold ethnographic research activities (preparation and implementation)
    • Follow-up with understanding activities.  See hyperlinks above for ideas.
Advanced Implementation Steps
  • For teacher use (researching students):
    • Share findings with students and have them reflect on whether or not the findings have any validity.
    • Develop interventions that address verified findings.
  • For student use (researching stakeholders for project):
    • Have students reflect on ethnographic research methods – how did it work?  what assumptions were challenged? what new things were learned? what new ideas were inspired? how can this approach be used in other settings?


5-relatedstuff