103: Nonlinguistic Representations

1-sources


2-what


Screen Shot 2016-05-09 at 3.08.03 PM


Research on Nonlinguistic Representations:
  • Using both linguistic and nonlinguistic (mental pictures, physical sensations, etc) modes of representation helps with better recall of knowledge
  • A variety of activities produce nonlinguistic representations:
    • creating graphic representations
    • making physical models
    • generating mental pictures
    • drawing pictures
    • engaging in kinesthetic activity
  • Nonlinguistic reps should elaborate on knowledge
    • power of elaboration can be enhanced by asking for explanations and justification
 
Classroom Practices:


3-sowhat
One way to create high challenge / high support (challenge zone) classrooms is to scaffold high expectations (not lower expectations) using message abundancy, i.e. amplifying content by using multiple representations for the same content.   Using both linguistic and nonlinguistic representations of content is a way to amplify content so that students have multiple opportunities to learn it.


4-nowwhat
Preparation Steps
  • Analyze how upcoming content is organized
  • Select the nonlinguistic representations that best connect to how content is organizer
  • Gather resources / write prompts that help students organize content in graphic organizers (or other nonlinguistic representations) that explicitly illustrate how content is organized
Early Implementation Steps
  • Use nonlinguistic organizers selected above as one of a variety of scaffolding methods for key content in projects
  • Have students discuss / write about the key connections that are illustrated inside nonlinguistic representations of content
Advanced Implementation Steps
  • Include an appendix in the back of students notebooks that contains commonly used graphic organizers and simple instructions that students can use to create their own graphic organizers
  • Using the graphic organizer notebook resources, have students supplement notes by selecting the graphic organizers that best illustrate the connections among information.


5-relatedstuff

88: Summarizing & Note Taking

1-sources


2-what


Screen Shot 2016-05-09 at 4.41.09 PM


Summary of Research on Summarization:
  • Summarizing involves deleting, substituting, and keeping information
  • The skills above require deep analysis of material
  • Being aware of explicit structure of information helps with summarization (another reason to scaffold academic literacy)
Classroom Strategies:
  • Rules-Based Strategies:
    • MODEL how to apply rules such as:
      • delete trivial info
      • delete redundant info
      • replace lists with grouping words that summarize lists
      • select or create topic sentences
    • Use Think Aloud strategy while modeling rules
  • Summary Frames:
    • Series of questions that highlight critical elements for specific types of info
    • 6 Summary Frames – click here to see related questions
      • Narrative
      • Topic-Restriction-Illustration
      • Definition
      • Argumentation
      • Problem/Solution
      • Conversation
  • Reciprocal teaching
    • Student arranged in teacher groups
    • Leader of group facilitates discussion in which students take a lesson or reading and
      • summarize the lesson/reading
      • question – ask questions about the lesson/reading
      • clarify – try to answer questions
      • predict – predict what they will learn or do next
Research and Theory on Note Taking
  • Verbatim note taking is the least effective method – recording everything makes it too hard to synthesize info
  • Notes should be viewed as living documents
  • Notes should be used as study guides for tests
  • The more notes, the better
Classroom Strategies for Note Taking
  • Provide models – notes taken by teacher
  • Present students with a variety of note-taking formats such as
    • Informal outline
      • subordinate ideas are more indented than big ideas
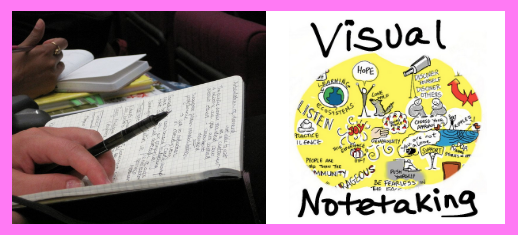
    • Webbing
      • sizes of circles represent relative importance of ideas
      • lines show relationships between ideas
    • Combinations
      • Combines webbing and informal outline (like a double entry journal)
        • left column = informal outline
        • right column = webbing
      • Also includes a horizontal strip at the bottom for summary statements
3-sowhat

Summarizing and note taking are powerful learning strategies.  Often these skills are un-scaffolded student activities and expectations.  Teaching students how to summarize and take notes can help them become more independent learners.

4-nowwhat
Preparation Steps
  • Pre-assess students’ note-taking and summarizing skills – identify their strengths and gaps
  • Identify which strategies (see above) could enhance students’ summarizing and note taking skills
  • Gather / prepare graphic organizers and visuals that go with selected strategies
Early Implementation Steps
  • Model (use think aloud and graphic organizers) summarizing and/or note-taking strategies
  • Give students opportunities to practice strategies
Advanced Implementation Steps
  • Have students reflect on the impact different note-taking strategies are having on their learning
  • Let students use their reflections to choose the most effective note-taking strategy that fits their learning style and preferences
5-relatedstuff

87: Identifying Similarities & Differences

1-sources


2-what


Screen Shot 2016-05-09 at 4.46.12 PM


Summary of What Research Says:  Things that improve student’s ability to understand and use knowledge:

  • explicitly identifying similarities and differences
  • asking students to identify similarities & differences
  • representing similarities & differences in graphic or symbolic form (see below for ideas)
Classroom Practice in Classifying Similarities & Differences:
  • Comparing
  • Classifying
  • Metaphors
    • Teacher centered
      • Need to help students realize that 2 items in metaphor are connected by abstract relationship
      • Teacher provides 1st element of metaphor and helps students identify abstract relationships
    • Student centered
      • Should follow teacher centered scaffolding.  See above.
      • Students are given first element and asked to come up with 2nd element and abstract relationship.
    • Graphic organizers
  • Analogies
    • Helps students acquire new knowledge by comparing them to more familiar things
    • Takes form A is to B as C is to D
    • Most complex form of identifying similarities and differences
    • Teacher centered
      • Teachers provide a lot of supporting structures such as
        • providing examples and asking students to explain why they make sense
        • present analogy with one missing item
    • Student centered
      • Students provide more elements than in teacher centered tasks such as
        • provided with 1st pair and they provide 2nd pair
    • Graphic organizers


3-sowhat
Identifying similarities and differences can help students build bridges between new and familiar knowledge.  Research has shown that identifying similarities and differences helps students deepen their knowledge and transfer their knowledge to new contexts.


4-nowwhat
Preparation Steps
  • Identify which concepts could be good to pair with identifying similarities & differences strategies
  • Gather and refine related graphic organizers and related examples of identifying similarities & differences strategies
Early Implementation Steps
  • Facilitate teacher centered activities at first to build specific skills related to identifying similarities and differences
  • Use timely descriptive feedback to help students reflect upon, explain, and refine the connections they are making with these strategies
Advanced Implementation Steps
  • Facilitate more student centered versions of identifying similarities & differences strategies activities after other activities have modeled and given practice opportunities to students on prerequisite skills
5-relatedstuff

82: Social Action Papers


Screen Shot 2016-05-09 at 5.08.42 PM


Social Action Papers
  • Any writing assignment that connects learning targets with real issues in the community
  • Uses:
    • Develop research and persuasive writing skills
    • Develop citizenship values and skills
    • Student learn how to use textbooks as reference tools
  • Play by play
  • Caveats:
    • Students may choose a topic / project whose scope is too big or too small
      • can resolve with feedback on proposals
    • Students can procrastinate
      • can resolve with milestone deadlines, in-class supported work time


3-sowhat
Social action papers can tie content to real issues.  The real relevance can make project more engaging to students.  Incorporating a real audience into the project can also raise the stakes and interest level of the project.


4-nowwhat
Preparation Steps
  • Find real audiences
    • Recruit a local partner as a resource or client for the project – they could be clients and/or sources of expertise
    • Identify connections to potential topics that can make students’ friends and families viable audiences
  • Research and gather resources that relate to genre of social action paper
  • Design resources / activities to help students select topics:
  • Research and prepare resources for scaffolding writing.  Related articles
  • Design a project calendar that includes:
    • Time to brainstorm, select, vet, and refine topic / product choices
    • Research time
    • Time to scaffold writing and related content
    • Milestone deadlines for writing stages
    • (if possible) Time to interact with real audience
    • Multiple reflection times
    • Critique & feedback lessons
    • Time to present to real audience
Early Implementation Steps
  • Implement resources prepped above.
  • Be flexible with students who are working with real clients / experts because their time lines may not match school time lines
  • Provide a lot of formative feedback and in class work time throughout the project
  • Schedule time to meet with and present to real clients
Advanced Implementation Steps
  • Build sustaining relationships with local organizations so that multiple cohorts of students can work for real local organizations
  • Use tools like Nepris or Ignite by DiscoverSTEAM to connect students with real clients / experts.
  • Scaffold students through a design process to create products that client really needs.  See Design Process articles.


5-relatedstuff

81: Multigenre Projects

1-sources


2-what


Screen Shot 2016-05-09 at 5.19.32 PM


Multigenre Project

  • Instead of one long research paper, students compose several shorter pieces focused on a single topic
  • Recommended related reading:
  • Uses:
  • Play by play
    • Getting started
      • Use preliminary research to help students pick a topic that genuinely interests them
      • Inspire and inform students by showing them models
      • Scaffold research processes
        • how to select valid sources
        • how to gather notes on researched information
    • Working the room
      • Have students choose from a LARGE menu of writing genres,  Putz has them pick 7.
      • Possible genres
        • Check out the book , too many to list here.  Plus the book has some pretty compelling examples of student work.
        • Would be neat if someone would take a large genre list and classify it by the 6 facets of understanding .  Then you could require students to pick 1 genre form each facet.  If such a chart exists or if you create one, please share.
      • Facilitate mini-lessons and distribute thinking sheets and show models that go with each genre
      • Allow students to select appropriate tools (apps, paper, fonts, etc) to represent their chosen genres
      • Require students to connect all 7 pieces into a coherent whole – logically sequence them and create transitions between them.
      • Students select a package to hold writing pieces that goes with topic.  (Note: These remind me of items from a McSweeney’s subscription)
    • Leverage the work
      • Individual students form teams and create a piece of reader’s theater than incorporates excerpts from all their pieces.
      • Self – assessments on the work –
        • How did you choose your genres?
        • What did you learn?
        • How did you connect your pieces into a cohesive whole?
        • Are you happy with your topic choice? why?
    • Challenges
      • Complicated project calendar
      • Need to prep resources for many writing genres
        • Could have students gather 3 examples from a new genre and find common features and use those for criteria to create writing piece
        • Could limit menu of genres to ones you already have prepped resources for


3-sowhat
Multi-genre products actively engage students to explore multiple types of understanding by having them write in multiple genres.  Each genre has different thinking and writing demands.  This type of project could be good for advanced PBL teachers and advanced students who need a different type of project to break up the monotony of commonly assigned products.  This can be used to explore and appreciate BIG IDEAS that have lots of layers.


4-nowwhat
Preparation Steps
  • Conduct more research than is in this article – see related reading above and the source book
  • Gather resources (mini-lessons, models, thinking sheets) for all the genres in the menu students will be allowed to pick from
  • Design resources to help students choose their topics:
    • Design an essential question that aligns to targeted standards and that students can unpack to choose a topic that interests them
    • If course standards permit, design a preliminary research / topic selection activity that will allow students to choose topic that interests them
  • Design project calendar that has:
    • Adequate research time (near start of project)
    • Milestone deadlines for genre types (middle of project)
    • Milestone deadlines for coherent whole (end of project)
    • Milestone deadlines for team product – reading theater piece (end of project)
Early Implementation Steps
  • Facilitate project using resources designed above
  • Provide A LOT of in class work time and in class feedback – see these articles for ideas – Critique / Feedback lessons and Writing Workshops
  • Facilitate self reflections and self assessments that help students become aware of how their writing and understanding are developing throughout the project and to help students set and achieve academic goals
Advanced Implementation Steps
  • Use  6 facets of understanding to create a genre menu that enables students to select one genre per facet of understanding.


5-relatedstuff

72: Writing to Learn (2 of 2)


2-what


Screen Shot 2016-05-09 at 6.05.20 PM


4 Writing to Learn (WTL) Strategies (for more WTL’s go here or here or here)


  1. Nonstop write:
    • students write nonstop in response to a prompt for set time (3-5 min)
    • write in sentences and paragraphs
    • focus on quantity, not on perfect grammar
    • uses:  varied, include by not limited to:
      • reflection
      • introduce material
      • recall material just covered or uncovered
      • build up student perseverance
      • practice for essay writing on timed tests
      • watch how thinking evolves over a project
    • Play by play:
      • start with shorter period of time and build to gradually build up student stamina
      • explain purpose of writing activity and how writing will be used
      • explain norms – silence write for entire period of set time
      • to alleviate writers block – give students 1-2 min to brainstorm what to write with a partner
      • quick class brainstorm on class visuals
      • reasons students may shut down before time expires:
        • putting thoughts to paper is a skill that needs to be practiced
        • continuous sentence and paragraph writing takes effort
        • requires students to expand on details until exhausted
      • work the room and encourage students to continue writing who stop early – ask for more examples and details
      • leverage the work:
        • use as conversation starters:
          • read aloud in pairs and discuss and report out findings
          • share in groups of 3-4 and identify common threads and report out findings
        • guided rereading – reread piece and look for:
          • sentences that get to heart of your message
          • examples that illustrate message
          • off topic and vague sentences
          • 3 favorite words
        • self evaluate writing style
          • rank how quickly one gets off topic
          • rank how well you keep writing for set time
          • number of words in entry
          • what do you need to do differently to meet later expectations (ex: min 150 word count)
  2. Reflective Write:
    • writing piece meant to get students to reflect on learning
    • uses:
      • pause and note what was learned and how learning occurred
      • situate learning in larger context
      • diagnostic tool – are students on track? what’s hard? how deep is their thinking?
      • process readings
      • gather thoughts for upcoming task
    • play by play:
      • model what reflective writing could look like, include:
        • reflections on mistakes and confusion
        • reflections on learning processes
      • read and analyze features of sample reflections from previous years
      • practice reflective writing on a simple common process
      • work the room
        • encourage individual students who struggle
        • if most struggle, stop work time and model again
      • leverage the writing:
        • follow up with one-on-one conferences on student thinking and struggles
        • use as conversation starters in reflective conversations
  3. KWL:
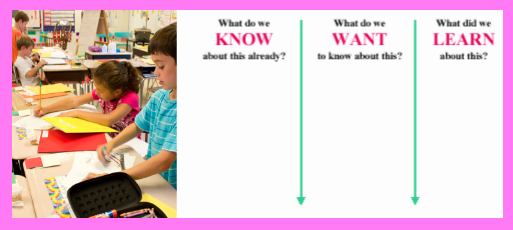
    • brainstorming used to drive instruction:
      • K – what do I know
      • W – what do I want to know
      • L – what have I learned
    • used throughout the project (note – another form of this is a Knows, Need-to-Knows and Next Steps chart)
    • uses:
      • expose and build on prior knowledge
      • expose need-to-knows and want-to-knows
      • expose misconceptions
      • review what has been learned
      • engage students in co-planning upcoming learning activities
    • play by play
      • prior to teaching a topic have students individually brainstorm everything they know about the topic
      • gather student ideas on flip chart in the K column – record all ideas, even misconceptions
      • can put question marks next to statements that contradict each other
      • students brainstorm list of questions about the topic in groups of 3-4
      • remind students they can ask questions that go with disputed ideas (ones with ?)
      • gather student ideas on flip chart in the W column
      • encourage students to nod heads if they have the same question being put on the flip chart
      • later in the project, have students brainstorm more questions – gather these in the W column
      • later in the project, have students brainstorm list of what they have learned – gather these in the L column
      • tips:
        • if students hesitate on the want to learn lists – ask them to predict what they are about the learn
        • do not use on topics that students have no prior knowledge of
        • prior to gathering whole class lists, ask students to share what they wrote in groups of 3-4 and come up with list of 5 common items and report these to the whole group share
        • could ask students to brainstorm next steps to learn what’s in the W column
  4. Teacher student correspondence:
    • teachers and students passing notes / letter over extended period of time
    • uses:
      • model writing
      • individualized texts
      • get to know students
      • gather feedback to target instruction
      • improve morale
      • deeper learning
      • build relationships with students
      • hear from students who don’t talk much
      • cues for guiding individualized instruction
      • cluster student needs for responsive teaching
      • self-assessments
      • classroom management
    • play by play
      • get students set time (~ 15 min ) to respond to prompts such as
        • how is the course going?
        • how can I help you be more successful?
        • anything you want to tell me about your life out of school?
        • what kind of things do you do outside of school?
        • what makes the course challenging?
        • what connections do you see between the course and your life?
      • alert students that you will alert the guidance counselor if they reveal things that need guidance counselor follow-up
      • write a short note back in response to each student’s writing
      • tips
        • do with one period a week to avoid getting overwhelmed
        • if individual letters take too much time – read all letters and write one long letter in response to all of them to the whole class, try to work all students input and questions into the letter


3-sowhat

Teachers can use a variety of Write-to-Learns (WTLs) to get students to actively process information in a variety of ways.  Teachers can use the non-stop writes to see how student thinking is evolving and to help students gather thoughts that can impact products.  Teachers can adapt the KWL steps above to facilitate more detailed and helpful Know, Need-to-Know, Next Steps discussions.  Teaches can use teacher student correspondence to model writing, convey caring, and build up moral and relationships.

4-nowwhat
Preparation Steps
  • Analyze standards and generate learning targets
  • Analyze behavior norms and student behavior and generate character learning targets
  • Use knowledge of content and students to Identify which WTL’s can be used to process information in ways that highlight useful connections
  • Develop prompts and tools related to selected WTL’s that target academic and character learning targets
Early Implementation Steps
  • Implement WTL’s.  See ideas above and also  herehere  and here.
  • Facilitate follow-up discussions and activities that make use of the WTL’s.
Advanced Implementation Steps
  • Have students reflect on WTL’s and try to identify which strategies are the most helpful.  Use their suggestions to build WTL routines that match their preferences.
  • For individual WTL’s – give students choice among several strategies that match their preferred modes of communication.


5-relatedstuff

68: Models, Critique & Descriptive Feedback

1-sources


2-what


Screen Shot 2016-05-09 at 9.25.15 PM


Key terms:
  • models:
    • exemplars that demonstrate key features of a genre
    • can be student work, teacher work or professional work
  • critique lessons:
    • lessons that define qualities of high quality work by analyzing models
    • aimed at improving skills of whole group
  • descriptive feedback:
    • forms: teacher-student conference, written comments, peer-to-peer feedback
    • precise constructive comments that help students improve quality of work
 
Tips for Building Safe Culture:
  • norm:  be kind, be specific, be helpful
  • be clear and encouraging
  • shape descriptive feedback with individual in mind
  • be aware, stop comments that are unintentionally or intentionally unkind
  • practice critiques on examples generated outside the classroom
Tips for Choosing Models:
  • models show students where they are headed
  • include examples of features tied to learning targets
  • gather good examples of student work from previous projects
  • file models by genre
  • create models if needed
  • use models from professional world
  • choose models that illustrate different approaches to the same assignment or different strong features
 Modeling with Weak Work
  • work must be anonymous
  • model respectful critique
  • has compelling, common flaws
  • can have a mixture of strong and weak elements
  • best examples are results of students who tried hard but had confusions that created specific problems
Critique Lesson Steps:
  • choose work samples that go with learning targets
  • students individually examine multiple samples and try to make sense of them  – what’s good, what’s confusing, etc.
  • students in small groups discuss what features were strong and provide evidence
  • teacher facilitates whole group discussion of models
    • gathers general observations
    • gathers observations that relate to learning targets
    • discusses which parts are strong/accurate and explains why with evidence
  • students in small groups brainstorm attributes of good work
  • teacher facilitates whole group discussion to synthesize their tips for producing strong work
Critique Lesson Tips:
  • target critique to specific features that tie to learning targets
  • clarity of learning targets should not prevent students from sharing unrelated surprises and discoveries
  • focus on content, concepts, skills, genre features, habits of scholarship
 
Possible Times to Implement Critique Lessons:
  • at start of project to introduce a genre
  • in middle of project during work time to support focused revision
  • just before presenting work to fine-tune final revisions
  • just before self and peer assessment sessions to teach students how to give effective feedback
  • after assignment is due to reflect on quality and set new goals
Facilitating Discussions Tips:
  • define sequence of discussion prompts that align to learning targets
  • structure time, set amount of time per section
  • define and assign discussion roles
  • define norms relating to participation and listening
Gallery Critique:
  • all students post work to examine
  • good for identifying good features and strategies
  • too many samples to analyze gaps
  • for written work – short excerpts of larger piece work best
  • Steps:
    • Introduce norms and goals
    • Post work
    • Silent gallery walk and take notes of strong examples
    • Discuss what was noticed
    • Discuss what’s working using specific examples and explanations
In-Depth Critique
  • single work is analyzed for what’s working and not working
 
Critique Facilitator Tips:
  • Strategically choose students for comments
  • Radiate enthusiasm and positivity
  • Offer compelling statements to build interest and add key points
  • Reframe student observations to make them more clear when needed
  • Guide discussion towards learning targets
  • Make sure students observe discussion norms
  • Have student rephrase vague statements for more clarity
  • Model good critique
  • Make clear that the work itself, not the author, is the subject of critique
  • Model use of “I” statements – “I think … “
  • Start discussion with warm feedback before moving to cool feedback
  • Frame ideas as questions whenever possible
  • Keep discussion moving at an energetic pace
  • Help students notice and remember key comments in discussion
  • Direct attention to important examples (if not mentioned)
  • Guide discussion towards specific strategies that meet learning targets
  • Display key ideas and strategies in clear specific language
  • Guide students to use academic vocabulary in discussions that go with learning targets
Features of Descriptive Feedback
  • Focused on growth of individual student’s skills and/or understanding
  • Typically a one-one-one teacher-student exchange
  • Rests on base of a strong positive teacher-student relationship
  • Includes strategic positive comments that make feedback easier to hear
  • Based on strong knowledge of students’ strengths, areas of growth, and goals
Continuum of How Students Hear Feedback
  • Blames teacher for being mean
  • Ignores feedback
  • Hears feedback but doesn’t know how to use it
  • Receives feedback, uses it but doesn’t meet goals
  • Receives feedback, uses it, reaches goals and can teach others
Planning for Effective Feedback
  • Know that students who are most likely receive to feedback well are already successful, see continuum above
  • Communicate belief in students’ ability to use feedback to meet high expectations
  • Teach students the language of critique related to learning targets
  • Consider good timing:
    • Provide enough time for students to use the feedback
    • Immediate feedback is best for factual knowledge
    • Time delay in feedback is better for more complex tasks
    • Provide frequent ongoing feedback on major assignments
  • Consider quantity:
    • Prioritize feedback related to  learning targets
    • Consider how much feedback individual student can take in at once
  • Written vs Oral feedback?
    • oral feedback while student is working is more effective and efficient
      • get students to paraphrase oral feedback
      • give within teacher-student conference
    • written feedback on a checklist, assignment sheet, or rubric
  • Group vs Individual feedback?
    • individual feedback conveys caring
    • whole group feedback is good for correcting a common error
  • Consider tone:
    • positive, constructive
    • suggestions not prescriptions
    • avoid pointing out what’s wrong without offering suggestions
    • avoid punishing tone
  • Aim for clarity:
    • student-friendly, specific
  • Keep Learning Target in mind:
    • connect feedback to how to improve on learning goals
    • avoid making it personal
  • Leverage comparisons:
    • use checklists or rubric with criteria to compare student work to
    • avoid comparing work to other students – can damage student motivation
  • Be aware of student perceptions of feedback
    • does student understand feedback?
    • does student feel safe and valued?
    • situate feedback within positive culture and positive relationships that value student-engaged assessment
  • Feedback Implementation Tips:
    • Teacher-Student:
      • plan and schedule conference times
      • be concise and clear
      • target one skill at a time
      • use student work to assess effectiveness of feedback
    • Peer and Self Feedback
      • teach students purpose and strategies for giving feedback
      • revisit learning targets often and check that students know how to recognize them in student work
      • model giving effective feedback
      • emphasize self over peer feedback – research has shown that the former is more effective
      • precede feedback sessions with whole group critique lessons that scaffold how to give effective feedback


3-sowhat
Models, critique, and descriptive feedback are tools for improving performance in school and in many other settings and professions.  Students can’t visualize quality work in a genre without having seen and analyzed examples.  Examining models makes standards real and tangible.  Critique and descriptive feedback help build a culture that promotes agency (effort develops skills).  They teach students how to achieve quality standards more independently.


`
Preparation Steps
  • Gather strong models that demonstrate key learning targets
  • Research activities aimed at identifying strategies for analyzing models, peer/self critiques, and generating quality feedback.  See above and literacy articles for ideas.
  • Build culture that values critique and constant improvement
Early Implementation Steps
  • Teach students how to be kind, specific and helpful in their feedback
  • Incorporate critique lessons and descriptive feedback into product scaffolding and benchmark days
  • Use learning targets to frame critique and descriptive feedback
  • Facilitate critique lessons using tips listed above.
  • After critique lessons have modeled effective feedback, facilitate peer and self feedback activities.  See tips listed above.
  • Provide ongoing individual feedback to students in short conferences.  See tips above.
Advanced Implementation Steps
  • Use practiced protocols to reflect on work during process of creation, right before presentations and after presentations
  • Use critique lessons to help students co-author or author rubrics for products
  • Use checklists of common pitfalls gathered over time to guide peer/teacher critique sessions
5-relatedstuff

51: Amping Up the Authenticity

1-sources


Note: This link will only work if you’re logged into Echo.  Sorry, non-New Tech readers.  If you’d like to get access to more related information, check out Kevin Gant’s blog at https://intrepidedblog.wordpress.com/


2-what


Screen Shot 2016-05-09 at 10.46.06 PM


Evolution of projects from towards more authenticity:  scenario based -> project world = real world


Characteristics & Challenges of Most Authentic Projects:
  • Project work = work of the world
  • Student products are used by people outside school
  • Students have more choice to define products
  • Not all standards can appear in all products
  • Can give all students opportunities to gain mastery of all learning targets in project scaffolding
  • Involves a provocative driving question that acts as a call to action for students to solve a real problem
  • Driving question can be resolved  by a wide variety of end products
  • Content authority ceded to experts outside the classroom
  • Time frame can get mushy for some products due to interactions with real clients running on schedules different from the school schedule


Related Useful tools:
  • Nepris 
    • Web-based tool that connects experts to classroom, teachers can post requests and repris matches experts to request
    • Heard that wait time is about 3 weeks
  • IGNITE by DiscoverSTEAM
    • Online platform that sets up secure communication platform between companies that want to interact with students and schools
    • Companies present projects to students that they want solved; if students develop solutions the companies can use, they can pay students
    • Teachers can work with companies to develop rubrics aligned to standards
    • All communication between students and companies is recorded and reviewed for quality and research purposes
    • IGNITE is FREE to schools because companies pay for it as a way to recruit American talent and to market their companies
    • Companies prefer to have a yearlong relationship with students – my idea to extend the interaction time with companies is to relay the company project through different courses;  project could start in ELA for initial research and writing processes, then move to a Science course for designing data studies and gathering data, then move to a Math class to analyze the data, then move to a Social Studies class or Audio Visual class to finalize conclusions and create products, etc
    • NOTE: This company is looking for PBL teachers to pilot their tool.  Contact them if you’re interested
3-sowhat

The more time teachers and students spend doing PBL projects, the more difficult it gets to make projects feel fresh and meaningful.   Facilitating real world projects is one way for advanced PBL teachers and advanced PBL students to frame learning within more relevant contexts and challenges.  Authentic problems can also give students exposure to careers they have not yet considered and give them a better idea of how real experts solve problems.

4-nowwhat
Preparation Steps
  • Extend your network – contact companies, university groups, and local groups of experts who do things that relate to your course
  • Build a database that contains potential contacts – see above
  • Contact them early – in the summer if possible – to see if there are problems they’d like students to solve or explore that could align to standards
  • Check if school has partnered with companies like Nepris or DiscoverSTEAM – if the partnership is there, learn how to use those tools and start using them expand your network
  • Plan Year at a Glance (Scope and Sequence)
  • Contact experts early to see if they can interact with students at the appropriate times in the year (or adjust your scopes & sequence as needed)
  • Develop templates (email and phone call) for students to contact experts
  • Develop tools that students can use to document their unique projects and their ties to key content and problem solving processes that are being uncovered in the classroom
  • Design scaffolding that supports real world project work and aligns to standards
  • Research and commit to a design process (or similar problem solving processes) that will organize the project and that students will use to solve project problems
Early Implementation Steps
  • Work with experts to support students with content knowledge and with formative feedback they can use to improve their understandings and products
  • Organize project around a common design process (or similar problem solving processes) that students will apply to develop different products of their choice
  • Implement class-wide scaffolding that ensures that all students have opportunities to learn targeted content
  • Be flexible with final product completion and final presentation dates as these may vary depending on their solutions and their clients
  • If possible – set a common proposal presentation date to review and give critical friends feedback on proposed solutions
Advanced Implementation Steps
  • Develop sustaining relationships with experts that enable different cohorts of students to gain exposure to real world problems that have better and better project design (if the opportunity arises to interact with same experts on similar projects form year to year)
  • Arrange for field trips that allow students to get close hand  exposure to experts and to gain experiences that can help them gather useful data related to their projects
  • For experts that like prolonged relationships with students, collaborate with other courses to extend project over time (see relay idea above)
5-relatedstuff

46: Six Facets of Understanding Question Stems

1-sources


2-what


Screen Shot 2016-05-09 at 11.04.57 PM


  1. Explanation:
  • What is the concept in ….?
  • What are examples of …. ?
  • What are the characteristics/parts of …. ? Why is this so?
  • How might we prove/confirm/justify …?
  • How is … connected to … ?
  • What are common misconception about …?
  1. Interpretation:
  • What is the meaning of …?
  • What does … reveal about … ?
  • How is … like …  (analogy/metaphor)
  • How does …. relate to me/us?
  • So what?
  1. Application: 
  • How and when can we use this (knowledge/process) … ?
  • How is … applied in the larger world?
  • How could we use … to overcome … (obstacle, constraint, challenge)?
  1. Perspective:  
  • What are different points of view about … ?
  • How might this look from …. ‘s perspective?
  • How is … similar to / different from … ?
  • What are the strengths and weaknesses of … ?
  • What are the limits of … ?
  • What is the evidence for … ?
  • Is the evidence reliable? Sufficient?
  1. Empathy:  
  • What would it be like to walk in …. ‘s shoes?
  • How might … feel about … ?
  • How might we reach an understanding about … ?
  • What was ….  trying to make us feel/see?
  1. Self Knowledge: 
  • How do I know …?
  • What are the limits of my knowledge about … ?
  • What are my blind sports about … ?
  • How can I best show … ?
  • How are my views about …. shared by … (experiences, assumptions, prejudices, values, style)?
  • What are my strengths and weaknesses in … ?
3-sowhat
The six facets of understanding can be used to scaffold and assess deeper levels of understanding targeted learning goals.  The question stems above can be used to design question prompts for scaffolding and assessments activities that use the six facets of understanding.


4-nowwhat
Preparation Steps
  • Analyze standards and determine which facets of understanding work best with standards expectations
  • Use question prompts above to help design assessments and reflection prompts related to focus facets
Early Implementation Steps
  • Use facet questions to give students formative feedback on their products and understandings so that students can refine these
  • Use facet questions as diagnostic questions to check if activities are supporting students and to finetune activities
  • Use facet questions to guide reflections and discussions about understanding learning goals
Advanced Implementation Steps
  • Use 6 facets sentence stems as a tool to help students generate better knows and need-to-knows during project launch and throughout the project
  • Convert question stems to sentence stems so that they can support student reflections on what they have already learned


5-relatedstuff

45: PBL Dilemmas & Resolutions

1-sources


2-what


Screen Shot 2016-05-09 at 11.10.24 PM


The dilemmas facing educators trying out the backwards design approach to unit planning are shared by educators trying out Project Based Learning (PBL).  The following lists some possible resolutions that can be used to confront naysayers (both outside and inside our own brains.)


Misconception: We have to teach to the test
Possible Resolutions:
  • Design authentic projects that are aligned to test standards
  • Use test blueprints to streamline curriculum so there is time to go for depth in key standards


Misconception: We have too much content to cover
Possible Resolutions:
  • Use projects to have students solve complex problems that make the connections between ideas and skills explicit and vital
  • Remember that teaching is not the same thing as learning
  • Use standards to streamline (not extend) the curriculum so there is time for depth
  • Use textbooks as references, not as the syllabus


Misconception: This work is hard and I don’t have the time.


3-sowhat
Standardized tests are limited measures of understanding.  Training for the tests is like training for a doctor’s physical instead of aiming for better health.  Research has shown that authentic assessments and pedagogy better prepare students for high stakes assessments than drill and kill methods.


The textbook is not the curriculum.  The TIMS test has shown that curricula that aim for depth over breadth teach more math concepts and skills.


It’s OK to start small.  Cook one gourmet per year or per semester and do it in collaboration with other teacher stakeholders.  Build with the help of other educators and refine using feedback from students.


4-nowwhat
Preparation Steps
  • Analyze and prioritize standards
  • Identify which standards clusters lend themselves well to authentic tasks and pedagogy
  • Design a project aground standards using backwards design template and standards.  If possible, collaborate with other teachers on this design.
  • If possible, review design with a student panel before launching project.
 
Early Implementation Steps
  • Launch and facilitate entire project.
  • Take notes on what’s working and not working during the project.  Use these tips to refine project.  Generalize this feedback in order to apply them to future projects.
  • If full blown projects are too intimidating, try designing and implementing inquiry based lessons.
Advanced Implementation Steps
  • Collaborate with other educators to build and refine a database of projects.
  • Design a PBL course that uncovers most standards using projects
5-relatedstuff