167: Assessing Skill in Application & Performance (1 of 2)

2-what
Screen Shot 2016-05-08 at 10.30.46 PM
  1. Directed Paraphrasing
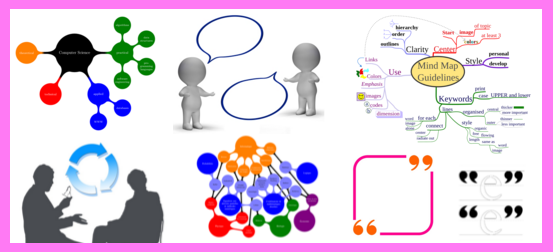
    • Description
      • Students paraphrase a part of a lesson for a specific audience
    • Purpose
      • Assess student ability to explain concepts in their own words
      • Assess how well students have internalized content
    • Step-by-Step Procedure
      • Select an important concept, topic, theory, etc that has been covered in class and that has outside classroom implications.
      • Determine a hypothetical realistic audience for a summary of the topic.
      • Try out directed paraphrasing for selected topic and audience.
      • Assign directed paraphrasing.  Be sure to explain;
        • the topic
        • the audience
        • purpose of the summary
        • length and time limits
    • Analysis Steps
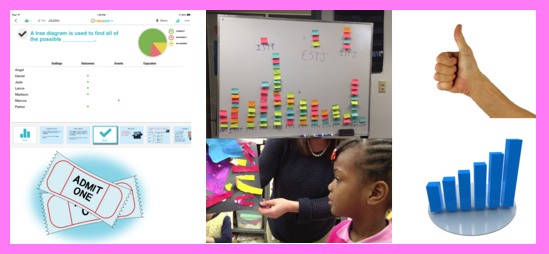
      • Divide up responses into 4 piles: confused, minimal, adequate, excellent.
      • Determine common characteristics of the 4 piles in regards to
        • accuracy of the paraphrase
        • suitability for intended audience
        • effectiveness in fulfilling its purpose
      • Circle the clearest and muddiest points in each paraphrase
    • Extension Ideas
      • Direct students to create directed paraphrases on the same topic for 2 different audiences with associated different purposes.
      • Ask students to keep a journal of directed paraphrases to summarize important topics in the course
      • Jigsaw readings and have students develop paraphrases to summarize these and then share them with students who analyzed different texts.
      • Get an appropriate expert that represents the audience to give feedback on the directed paraphrases.
      • Provide handouts with successful examples.
      • Give students warm and cool feedback on their responses.
    • Pros
      • Builds up students ability to comprehend and communicate content
      • Teachers can assess quickly if students understand content and make adjustments to future lessons
      • Emphasizes the relevance of specific concepts
    • Cons
      • Without strict length limits, these can be time consuming to create
      • Hard to establish good qualitative criteria for these
      • Paraphrasing skills can not improve without focused descriptive feedback.
    • Caveats
      • Select appropriate audiences in order to enhance the relevance of the assignment
      • First attempts may not include adjustments for selected audience
      • Use more than once so that teachers and students can learn from the process
  2. Applications Cards
    • Description
      • On an index card or small slip of paper, students provide a real world application for a selected topic
    • Purpose
      • Tie new knowledge (selected topic) with prior knowledge to create possible applications
      • Assess how well students understand and can apply content
    • Step-by-Step Procedure
      • Identify an important topic just studied in a course that has real world applications
      • Decide how many examples (1 to 3) and how much time (3-5 min) you will give students for this task
      • Assign task and hand out cards.  Emphasize that you are asking for “fresh” applications – not the ones mentioned in class.
      • Collect cards and let students know when they will receive feedback
    • Analysis Steps
      • Divide responses into 4 piles – great, acceptable, marginal, not acceptable
      • Find common characteristics of responses in each pile
      • Share 3 to 5 good examples and 1-2 marginal examples with the class.  Try to pick a selection that is varied.  Explain why good examples are accurate and why marginal examples are implausible.
    • Extension Ideas
      • Let students work in small groups to come up with application ideas
      • Encourage students to keep an applications journal – 2 min at end of each class brainstorming possible real world application of concepts covered that day
    • Pros
      • Simple way to gets students thinking about possible uses of what they are learning
      • Tying prior knowledge to content to create new applications creates memorable associations
      • Possibility of real world applications can get students more engaged in the course
      • Students can benefit from hearing about the best examples of applications (even more so than textbook examples)
      • Teachers get access to a new bank of applications to use in class examples
    • Cons
      • Can shift focus of class to more concrete level than teacher intends
      • Students not interested in applications may not see the point in this
      • Not all fields have easily definable real world applications
    • Caveats
      • Students who suggest bad examples may learn misconceptions from these.  Provide feedback to correct these misconceptions.
      • Engagement in examples may eat up more class time than intended
  3. Student-Generated Test Questions
    • Description
      • Students create model test questions and the correct responses to these
    • Purpose
      • Teachers can see what students think is the most important and most fair content to assess
      • Teachers can see how well students can answer their own questions
      • Teachers can adjust students’ expectations of the course if these prove to be unrealistic
    • Step-by-Step Procedure
      • Analyze an upcoming test to determine the types of problems it will include.
      • Write out specs for questions that will direct students to create test questions that align to the types of problems that will actually appear on the test
      • Decide how many questions students will generate (1 to 2 is plenty)
      • Explain what you want students to do, the purpose for it, when they will get feedback and how doing this will improve their performance on the upcoming test
    • Analysis Steps
      • Note the following for each:
        • topic
        • thinking level
        • clarity
        • difficulty
      • Look for helpful patterns in the categories above – what’s included? what’s missing
      • Share observations with the class – especially if the difficulty and thinking levels of their questions is lower than the expectations of the source
    • Extension Ides
      • Let students come up with questions in pairs or small groups.
      • May want to assign specific topics to specific groups in large classes – can do this alphabetically
      • Offer handout of student generated questions for test review and tips for how to prepare for the upcoming test
      • If the students are pre-service teachers – give them more specific feedback on their question design – especially on the thinking levels they used.
    • Pros
      • Students learn what they understand and not
      • Predicting test questions is a form of test preparation
      • Can avoid ugly surprises due to mismatches in students’ and teacher’s expectations of the course
    • Cons
      • Student who lack experience in creating questions may need to have this modeled.  May need trigger words or sentence stems to create good questions.
      • Students may try to get teacher to put easy questions on the test.
      • Some students may be disappointed if their questions are not included on the review or test.
    • Caveats
      • Do NOT promise to include student test questions on the actual test.
      • Unless students understand the purpose of the assignment, may view this as a thinly veiled attempt to get students to do teacher work.
      • May need to offer some grading credit to the assignment if creating it is time consuming.


3-sowhat
Applications cards and directed paraphrasing are assessments that build the connections between content and real world applications and audiences.  Creating these connections may get students to use their prior knowledge and content knowledge in ways that create memorable associations.  Tying content to real audiences and real products can get students more engaged in the content.


The student-generated test questions can help students start preparing for high stakes tests.  Analyzing students responses can help teachers become more aware of how his or her expectations match (or don’t match) the student’s expectations. Knowing this in time can help teachers make adjustments to lessons that help those expectations converge in time for the exams.


4-nowwhat
Preparation Steps
  • Analyze how learning targets connect with real products and real audiences.  Determine whether or not these relationships are engaging and important.
  • Select a strategy that emphasizes the type of connection between content and the real world (via audience or via product) that is the most engaging and helpful.
  • Create a model of the selected strategy.
Early Implementation Steps
  • Explain the expectations, purpose and criteria for the selected assessment.
  • Walk students through a sample assessment and describe the types of thinking that went into creating the model.
  • Assign the selected assessment.
  • Analyze the selected assessment using some of the analysis procedures described above.
  • Share key findings of assessment analysis with the class.
Advanced Implementation Steps
  • Expand the scope of the assessment using some of the extension suggestions describe above.
  • Expand the assessment into a Quick Writes or Writing to Learn activity.
5-relatedstuff

166: Assessing Problem Solving Skills (2 of 2)


2-what


Screen Shot 2016-05-08 at 10.39.02 PM


  1. Documented Problem Solutions
    • Description
      • Students document all the steps they applied to solve a problem.
    • Purpose
      • Assess how students solve problems
      • Assess how well students can communicate how they solve problems
      • Development student awareness and control of problem solving routines
    • Step-by-Step Procedure
      • Select 1 – 3 representative problems for students to solve.  If you select 3, you can pick:
        • one problem ALL students can do
        • one problem MOST can do
        • one problem that will challenge NEARLY ALL students
      • Document problem solutions for each of the problems.  Be sure to follow all the expectations you intend to set for students.
      • Give students time in class or assign problems for homework.
      • Explain that documenting the steps and their rationale is more important than getting the problem right.
    • Analysis Steps
      • Analyze steps in correct solutions and in solutions that had correct steps but arrived at the wrong answer
      • Try to diagnose the types of errors and wrong turns students took when arriving at the wrong answer
      • Distill what was learned to 3 to 4 key observations
      • Share observations with the class
    • Extension Ides
      • Assign a low and medium level problem as a diagnostic pre-assessment so you know how to start the next problem solving lesson
      • Create heterogenous teams and ask students to explain their solutions to each other.  Document mistakes and how students learned from these.
      • Ask students with strong solutions to present their solutions to the class.
      • Make this a regular part of homework. Example:  students document at least one problem in their homework set this way
    • Pros
      • Makes problem solving thinking processes visible
      • Makes students aware of a range of problem solving approaches
      • Promote content-specific metacognitive skills
    • Cons
      • Students may struggle at first to explicitly comment on their problem solving steps
      • Some mistakes are hard to explain
      • When students are solving problems at many varied levels, general feedback may not be helpful
    • Caveats
      • Model the skill a lot – especially in the beginning
      • Don’t expect very good solutions on the first couple tries
      • May need to give credit for responses because they are time consuming
      • Try not to get overwhelmed by grading but try to develop feedback insights that feed students at all problem solving levels
  2. Audio- and Videotaped Protocols
    • Description
      • Students create a video or audio recording of them solving a problem
    • Purpose
      • Assess in detail how well students solve problems
      • Assess how well students are able to communicate problem solving processes
    • Step-by-Step Procedure
      • Select or create a problem that is worth talking through: involves multiple steps and students can be expected to solve it
      • Decide whether to video or audiotape the solution – both can be done fairly easily with most cell phones.  Educreations is also a good tool for this.
      • Decide in advance what you will look for in responses and how you will assess them
      • Draw up a problem sheet with the problem and criteria for taping the solution.  Be sure to include time limits and what they are supposed to learn from the exercise
      • Make students aware of the types of feedback they can expect to get from their recordings.
    • Analysis Steps
      • Create a model solution.
      • Create a checklist that describes model solution.
      • Use the checklist to notice features that student solutions have right, incorrect, or are missing
    • Extension Ides
      • Ask students to work in teams to create individual recordings.
      • Provide students with a checklist for providing feedback on the videos and let students use it to give their teammates feedback.
    • Pros
      • Recordings are accessible and can be viewed multiple times.
      • Recordings can be stopped and rewound to focus in on key steps.
      • Students and teachers work closely together on problem solving processes.
      • Teachers gain insights on student’s problem solving points and can identify stuck points to address in class.
      • Students become more aware of their problem solving routines which gives them better control over them.
    • Cons
      • Takes time to create and assess.
      • Students can’t be anonymous.
      • Solutions will be diverse – hard to compare to other solutions.
      • Some students who are good problem solvers are not good at communicating their thinking.
    • Caveats
      • Time associated with this can’t be justified unless the skill being practiced is critical to the course or future employment
      • Students will expect a grade on this because of the time expended.
      • Teachers need to be open-minded to various valid solutions to problems.


3-sowhat
The solution documentation strategies describes in this article can be used to make students’ problem solving processes more visible.  Students can learn more about how they solve problems which can help change their processes as they learn new things.  Although these artifacts take longer to assess, teachers can learn a lot about students’ problem solving skills by evaluating these artifacts.


4-nowwhat
Preparation Steps
  • Analyze problem solving skills in upcoming projects.
  • Decide whether any of the problem solving skills are critical and subtle enough to be looked at closely.
  • If so, decide which of the strategies listed above you would like students to use to document their solutions.
  • Create a model solutions of the type your students are about to create.
Early Implementation Steps
  • Show students a model solution that demonstrates what they are about to create.
  • Emphasize the key features of the model solution and how these were created.
  • Give students time in class or outside of class to document solutions.
  • Analyze solutions using one of the approaches described above.
  • Share feedback with students.
Advanced Implementation Steps
  • Teach students how to use checklists to find common flaws in their documented solutions.
  • Have students reflect on the lesson they are learning as they correct flaws in their solutions.
  • If you repeat the strategy multiple times, have students reflect on how their problem solving routines are changing over time.


5-relatedstuff

165: Assessing Problem Solving Skills (1 of 2)


Screen Shot 2016-05-08 at 10.56.45 PM


  1. Problem recognition tasks
    • Description
      • Student classify problem by the type of problem each example represents.
    • Purpose
      • Student practice diagnosing problems.
      • Students practice recognizing different problem types.
    • Step-by-Step Procedure
      • Choose sample problems that are often confused but are distinguishable by different problem types.
      • Decide whether you will let students select problem types using matching or by keeping task open-ended.
      • Do a run-through with another teacher to make sure they agree with your classification of the problems.
      • Give students class time to classify the problems.
    • Analysis Steps
      • Tally number of incorrect and correct responses.
    • Extension Ides
      • Allow students to diagnose problems in small teams.
      • Encourage students to come up with parallel examples of each problem types.
      • Ask students to explain in detail what features to look for when selecting different problem types
      • Assign complex problems that go with multiple problem types and have students use excerpts to describe which parts go with which problem solving type
    • Pros
      • Quick way to assess students’ diagnostic skills
      • Can help students generalize problem solving types so they can apply these types to solve unfamiliar problems
    • Cons
      • Many real life problems involve multiple approaches – so it’s hard to relate them to this strategy
      • Diagnosing a problem correctly does not mean that you can fully resolve it
    • Caveats
      • May need to present simplified problems in order to limit diagnosis to one problem type
      • May need to model this skill because it is often not explicitly taught
  2. What’s the Principle?
    • Description
      • Students identify the principle needed to solve a problem
    • Purpose
      • Students practice associating basic principles to problems rather then learning how to solve problems in isolation
    • Step-by-Step Procedure
      • Identify basic problem solving principles that been taught in the course
      • Find or create sample problems that demonstrate these principles
      • Create What’s the Principle form for students to list the principle that goes with the numbered problem (can do this in google docs for easy of analysis)
      • Test assessment on another teacher to see if there is agreement on basic principles that go with each example
      • Give students class time to complete the What’s the Principle form
    • Analysis Steps
      • Tally number of correct and incorrect responses
    • Extension Ides
      • Provide students with the principles and have students come up with examples and non-examples for each
      • Give students only examples and have them diagnose the basic principles in each
      • Have students justify their choices with a sentence or two
    • Pros
      • Simple way to assess students’ diagnostic skills
      • Quick feedback on student’s ability to apply general principles to specific problems
      • Practice transferable problem solving skills
    • Cons
      • If students don’t understand purpose of assignment may view is as a lower order matching task
      • Skills in matching problems to general principles does not mean that students can fully solve problems
    • Caveats
      • Not good with beginners who lack experience to generalize principles to specific cases
      • Not good with advanced students who are more interested in gray areas where no general principles apply
      • May need to model this skill if it has not been explicitly taught for students


3-sowhat
Teaching students how to diagnose problems and connect them back to general problem types and principles is a valuable problem solving skill that is often not explicitly taught.  Completing diagnostic tasks can make students more aware of the features ands strategies needed or properly apply general types and principles to specific problems.


4-nowwhat
Preparation Steps
  • Expose students to several problem types and principles.
  • Develop sample problems that can be categorized by type or principle.
Early Implementation Steps
  • Model how to categorize problems by type or principle.
  • Give students time to practice this skills using one of the assessments above.
  • Analyze their responses and use these to develop responses that fine tune students’ abilities to correctly diagnose problems.
Advanced Implementation Steps
  • Use one of the extension activities described above.
  • Let students provide multiple appropriate answers to diagnose how more complex problems might be solved and provide reasoning for their answers.


5-relatedstuff

164: Assessing Synthesis and Creative Thinking Skills (2 of 2)

2-what


Screen Shot 2016-05-08 at 11.05.06 PM


  1. Concept Maps
    • Description
      • Students create drawings or diagrams that show connections between major and minor concepts
    • Purpose
      • Observable assessment of student’s schemata – webs of associates they hold for various concepts
      • Can compare teacher and student mental maps of content
      • Students build awareness and control over the connections they are making with content
      • Can assess prior knowledge
    • Step-by-Step Procedure
      • Select a concept that is central to content and has lots of conceptual associations
      • Practice making a concept
        • lay down primary connections
        • then lay down secondary and tertiary connections
        • draw lines connecting concepts with descriptions of the relationships on the line
      • Model how to make concept map in collaboration with students
        • think aloud while adding concepts and relationship lines to the map
        • ask for students to volunteer topics and relationships
      • Give students time to create concept maps of their own on a different topic
    • Analysis Steps
      • Compare student concept maps with teacher generated ones
      • Can code for or scan for similarities and differences in
        • primary / secondary / tertiary relationships
        • types of relationships among concepts and their descriptions
    • Extension Ides
      • Use large grid graph paper for concept maps so that students can reasonably use distance among concepts to represent their degree of relatedness
      • Assign concept map as a small group assessment
      • Ask students to write explanatory essays based on their concept maps
    • Pros
      • Backs up cognitive research on the value of being aware of one’s mental maps
      • Visual way to see students’ mental associations
      • Favors visual learners who are at a disadvantage at verbal assessments
      • Helps students be aware of mental associations and their ability to grow and change them
      • Can serve as a note-taking and pre-writing activity
    • Cons
      • Comparisons among student responses are difficulty to make
      • Non-visual learners may find this activity frustrating
    • Caveats
      • Clarify how to identify primary, secondary and tertiary relationships and how to use phrases to describe specific relationships by modeling how to make a concept map with students (use think aloud a lot while doing this)
  2. Invented Dialogues
    • Description
      • Students create dialogues between key characters or key people by using actual quotes or by inventing reasonable quotes to represent their points of view
    • Purpose
      • Students practice capturing the essence of other’s perspectives and styles of communication
      • Improve understanding of theories, controversies and opinions
      • Students practice creatively synthesizing, adapting and extrapolating beyond the material being studied
    • Step-by-Step Procedure
      • Select 1 or more controversial issues, theories, decisions, or personalities associated that are associated with important topics in the course and lend themselves to dialogue
      • Write a short model dialogue that goes with associated people and topics
      • Make transcripts of famous speeches, debates and correspondence available to students
      • Prepare a handout that includes instructions, guidelines for using quotes, expectations, etc.  Provide guidelines that show how to use quotes to create original dialogue.
      • Discuss your model dialogue with the class.  Describe how it meets criteria and guidelines.  Demonstrate through think aloud how you created the dialogue
      • Give time in class to start the dialogue.
      • Encourage students in teams to give feedback on dialogues by taking turns reading aloud dialogues and giving warm and cool feedback.
    • Analysis Steps
      • Can assess dialogues for several qualities
        • number and quality of key points
        • quality of reasoning in exchanges
        • degree to which speakers stay “in character”
    • Extension Ides
      • Have students work in jigsaw paris.  Each is responsible for one point of view and together they combines their research to create a dialogue representing multiple points of view.
      • Ask students to act out part of their dialogues live in class or in video.
      • Provide specific feedback on dialogues that will help students refine them to finished products.  See Writing Workshop article for details.
      • Convert key ideas in dialogues into essays
    • Pros
      • Draws on higher order thinking skills more than essays
      • A lot of room for student choice
      • Assess students’ knowledge of content and creativity skills
      • Can help students internalize theories
    • Cons
      • Hard and time-consuming for teachers and students
      • Students who doubt their creativity may balk at this technique
      • Students who are not used to writing balanced written pieces may need extra coaching
    • Caveats
      • Start with limited topics and modest guidelines
      • Don’t be too concerned if first products are not very convincing
      • Too many guidelines may stunt creative thinking
      • Describe how you thought through challenges while constructing your own dialogues to show students that struggle is normal and tips for overcoming struggle
  3. Annotated Portfolios
    • Description
      • Students create a collection of examples of creative work, supplemented with students’ own commentary of the significance of each selected example.
    • Purpose
      • Assess how students’s creative work aligns to the learning targets of the course
      • Students practice applying content to new contexts
      • Students build metacognition of how their work aligns with course goals
    • Step-by-Step Procedure
      • Choose one of the central topics or problems of the course.  Ask students to respond to that topic or problem with 2 of 3 work samples that demonstrate creativity.
      • Ask students to write how each work sample responds to the proposed topic or problem. If needed, provide sample annotations for students to use as models
      • Have students turn in their works samples and commentary in an folder, binder or envelope.
    • Analysis Steps
      • Portfolios can be assessed for several factors including:
        • Students’ creativity in resolving the topic or problem
        • Quality of synthesis in annotations in commentary
          • how well do these incorporate information related to course learning targets
    • Extension Ides
      • Use as an first draft for a final portfolio that students will submit after they’ve had time to respond to descriptive feedback
      • Encourage students to add work as the course progresses and update their annotations to show their growth
      • Let students develop their own focus prompt for the portfolio as long as it aligns with course learning targets
      • Arrange an exhibition to display portfolios.  See this article on Learning Fairs.  
    • Pros
      • Students can use images AND prose to show solutions to problems
      • Student select personally meaningful examples and connect these to course goals
      • Teacher learns what students value and appreciate
      • Can help prepare students to present their work to prospective employers
    • Cons
      • If it’s not carefully integrated into the course, students may see academic value in it
      • Take a significant amount of time to assess
      • Students may spend too much time selecting pieces and not enough time interpreting them
    • Caveats
      • Use guidelines to make portfolios more comparable
      • Link portfolio to a larger graded assignments to reward students for the time that goes into this


3-sowhat
The strategies above all require students to actively process and make personal connections with content in order to create new products.  They all build metacognition – knowledge of how one is learning a course.  Being more aware of the connections one is making can give one better control over these relationships so that they can be deliberately cultivated and changed.


4-nowwhat
Preparation Steps
  • Analyze central topics and problems in upcoming projects.
  • Decide whether or not any of the strategies above can be used to process the central topic or problem in ways that are helpful and meaningful.
  • Develop model products for the selected strategies.
Early Implementation Steps
  • Introduce the strategy by showing a teacher-created model and talking through how that model was created.  Be sure to model what challenges arose and what strategies were used to overcome these challenge.
  • Provide class time for students to work on the strategy and get timely teacher and peer feedback.
  • Assess products using rubrics if that’s practical.
Advanced Implementation Steps
  • Incorporate works into larger products that be featured in live displays of student work – especially the dialogues and the portfolios.
  • Adopt student’s favorite strategies into classroom routines.
5-relatedstuff

163: Assessing Synthesis & Creative Thinking Skills (1 of 2)

1-sources


2-what


Screen Shot 2016-05-08 at 11.14.45 PM


  1. One-Sentence Summary
    • Description
      • Students write 1 sentence summaries that answer the questions: Who does what to whom, when, where, how, and why?
    • Purpose
      • Students practice chunking info into concise statements
      • Summary format that is easy for teachers to scan and assess
    • Step-by-Step Procedure
      • Select important topic(s) to summarize.
      • Create 1-sentence summary of topic – first in sentence fragments and then combine into 1 sentence.
      • Model strategy for students
      • Give students at least 2x more time to write sentence as it took you.
    • Analysis Steps
      • Separate sentence fragments that answer questions with slash marks
      • Code responses: 0 = inadequate, Check = adequate, Plus =  more than adequate
      • Total codes for class to see where group as a whole is strong and where they need extra support
    • Extension Ides
      • Gather sentence fragment responses and full final sentence in a Google form for easy of analysis
      • Convert 1 sentence summaries into more complete 2-3 sentence summaries
      • Let students critique summaries in pairs or small groups
      • Use this strategy several times to summarize key points.  Then combine sentences into one paragraph that summarizes the project.
    • Pros
      • Quick and easy way to assess students’s ability to concisely summarize a lot of info
      • Students practice grasping complex processes and conveying them in everyday language
      • Info is easier to recall once it’s packaged in a familiar format, one sentence
    • Cons
      • If focus questions have multiple answers, 1 sentence format is too limited to adequately summarize processes
      • One sentence limit may oversimplify material
    • Caveats
      • .Don’t ask students to do a one sentence summary on a topic you haven’t tested with this strategy first
      • Choose focused topics that can be adequately summarized with one sentence
      • Encourage students to make sentences grammatically correct while being OK with sentence’s clunkiness
  2. Word Journal
    • Description
      • Student summarizes text with one word then writes a paragraph to explain why that one word summarizes the text.
    • Purpose
      • Students practice reading deeply and carefully
      • Students practice defending conclusions with textual evidence
      • Students practice type of concise writing needed to compose good abstracts
    • Step-by-Step Procedure
      • Choose assigned text
      • Decide what aspect of the text you want students to focus on (main theme, conflict, problem, etc.)
      • Try assignment out by coming up with one summary word and related paragraph.
      • If you find the text helpful and thought provoking, assign it to students.
      • Emphasize to students that the word choice is not as important as the quality of explanations and text evidence that support the word choice.
    • Analysis Steps
      • Affinity group their responses by their word choices and by their approaches to justifying their word choices.
      • Select 3-4 examples of approaches to be shared with the class.
    • Extension Ides
      • For early attempts at this strategy, can support students with a word bank of possible words.
      • Use a model to hold a discussion that helps students come up with criteria for assessing quality word journals.  See this article for more tips on how to do this.
      • Focus word journals by having students focus on one aspect of the reading.
      • Use this assignment to teach students conventions for writing abstracts.
      • Start class discussions on readings using the words chosen by students to summarize the texts.
      • Group students and have students read their word journals aloud and give descriptive feedback such as – What is the main idea of the word journal?  What is one piece of evidence that does not go with the main idea of the word journal?  What is one piece of evidence that needs elaboration to better support the main idea of the word journal?
    • Pros
      • Promotes active processing of reading
      • Encourages students to make personal connections with text and to justify their ideas with text evidence
      • Practice summarizing, remembering and communication info
    • Cons
      • Takes time to prepare and analyze
      • Without discussion time, value of assignment is limited
      • Anonymity of responses might help discussions
    • Caveats
      • Not a good strategy for texts that can only be interpreted one way – work with texts that lend themselves to multiple interpretations
      • May be challenging for students – can help overcome this gap with good modeling
  3. Approximate Analogies
    • Description
      • Students complete statements of the type: A is to B, as _______ is to _______ where A, B, and X are ideas in the course
    • Purpose
      • Assess student understanding of the relationships among words
      • Guided practice in making connections
      • Use familiar connections to formulate new ones
    • Step-by-Step Procedure
      • Select key relationship among terms that is important to understand
      • Create approximate analogies with that relationship of the form A is B as X is to Y. Aim to formulate analogies that bridge technical relationships with everyday relationships
      • If trial produces results that you think are helpful and accessible to students, try out assignment in class.
      • Show sample analogies and think aloud to model how to create them.
      • Give students class time to compose approximate analogies.  Not time consuming – 1 min / analogy
    • Analysis Steps
      • Divide analogies into piles: good, questionable, wrong
      • Look for logical, memorable funny responses to share
      • Analyze the wrong pile to get insights into misconceptions that need to be addressed later
    • Extension Ides
      • Leave less parts of the approximate analogies blank (A is to B as X is to _________ ) to focus the analogies
      • Invite students to label the type of relationship in the analogy such as: part-whole, cause-effect, exemplar-to-class, etc
      • Let students come up with several analogies in teams and compare/contrast them
      • Let students critique analogies in teams
      • Students can practice this strategy whenever they encounter new relationships in the course
    • Pros
      • Thinking about analogies builds skill of transfer
      • Builds stronger bridges between new material and prior knowledge
      • Challenging and fun
    • Cons
      • Can be frustrating if students can’t diagnose relationship in one part of the analogy
    • Caveats
      • May need to model this strategy for students who are unfamiliar with analogies
      • Students may make analogies that are so personal that they are hard for teacher to understand
      • Strategy favors students with larger vocabularies and broader reading experiences


3-sowhat
The assessments listed above double as active reading strategies that students can practice to process new learnings grasped in texts.  All of them produce deliverables that can lead to productive team discussions about content.  They all lend themselves to a variety of responses from the same prompt which can lead to interesting discussions about what big ideas and relationships students notice in texts and what textual evidence supports these interpretations.


4-nowwhat
Preparation Steps
  • Select assigned readings and/or learning activities
  • Decide which strategy students can use most effectively to process the reading or learning experience.
  • Trial the strategy to test if it’s worth doing and to practice modeling it for students.
Early Implementation Steps
  • Use samples and think aloud protocol to model how to do selected strategy.
  • Give students the appropriate class time to do the selected strategy.
  • Let students discuss their deliverables in small teams – they can compare/contrast their responses and give each other constructive feedback.
  • Analyze responses to see what students are grasping and what they are struggling to understand
Advanced Implementation Steps
  • Try extension ideas listed above.
  • Incorporate strategies that students enjoy into classroom routines.
5-relatedstuff

162: Before / During / After Reading Activities


2-what


 Screen Shot 2016-05-08 at 11.21.25 PM


  1. Vocabulary Tree
    • Focus
      • Building academic vocabulary
    • Description
      • Free form graphic organizer of a tree that shows how concepts and ideas are related
        • Trunk has key concepts
        • Branches has related ideas, information and concepts
    • Why do this?
      • Displays relationships among all the words in a unit
      • Build a single integrated picture of concepts in a unit
      • Develop better understanding of concepts in unit through their relationships to other known concepts
    • How it works?
      • Start with short list of words – 4 to 5 words.
      • Organize words in a tree
        • more important general words go on trunk
        • sub-categories go on the branches
      • Students continue to add words to their trees and they identify more key words while reading
    • Variations
      • Have students create a word tree for 1 word (given) on the trunk
      • Give students post-its – one word per post-it – and have them place the words on the tree visual.  Have them rearrange positions of the words as their reading reveals new relationships.
  2. Word Wall
    • Focus
      • Building academic vocabulary
    • Description
      • Wall display of key vocabulary terms for a project
    • Why do this?
      • Learn words by seeing them in use
      • Refer back to new language in a visible place
      • Support student’s comprehension of new vocabulary
    • How it works?
      • Model how to create word wall items by creating a few models of key terms
        • model how to put related information on the back of the card so that students can later interact with the cards by seeing if they know the information and then flipping the card to check their knowledge
      • Have students create more word wall items
      • Throughout the unit, conduct activities with words on word wall.  Examples:
        • Group words according to their similarities.  See List-group-label.
        • Rearrange words according to set categories.
        • Do your best to define words.
      • Add words as they are introduced in the project.
    • Variations
      • Have students guess the definitions of terms from a selection of definitions using root words
  3. KWL
    • Focus
      • Setting purposes for reading
      • Connecting to and building background knowledge
    • Description
      • Students generate lists of
        • K = what they already know
        • W = what they want to know
        • L = what they learned after reading
    • Why do this?
      • K – activate related prior knowledge
      • W – asking questions builds a purpose a reading
      • L – assess whether or not W goals were met and summarize new info
    • How it works?
      • Encourage students to brainstorm what they Know related to a given topic
      • Model how to create W questions.  Ask probing questions to help students generate questions.
      • Group and categorize items in K and W columns to build connections among questions and ideas.
      • While gathering L items, compare them to K and W items.  Note questions answered in W column and misconceptions clarified in K column.
    • Variations
      • Show an image to help trigger prior knowledge for K column. 
3-sowhat
These strategies can teach students how to use texts to clarify and enhance prior knowledge, to find relationships among words, to answer pre-prepared questions, and to build academic vocabulary.  Using these strategies can help students learn how to actively process texts in order to develop understanding.


4-nowwhat
Preparation Steps
  • Select readings that will students learn key information in upcoming projects.
  • Decide which strategies will help students most effectively process the targeted texts.
  • Gather materials related to the strategies.
Early Implementation Steps
  • Implement active processing strategy.  See instructions above.
  • Have students reflect on how strategy is helping them learn new information.
Advanced Implementation Steps
  • Incorporate students’ favorite processing activities into classroom routines.
  • Combine reading activities with Quick Writes or Write to Learn activities.


5-relatedstuff

161: Fifteen Quick Checks for Understanding

1-sources


2-what

Screen Shot 2016-05-08 at 11.34.20 PM


  1. Go-around
    • Teachers call on students in rapid succession to answer prompts with 1-2 word responses
  2. Whiteboards
    • Students write responses on white boards and hold up boards for teacher and peer scanning.
  3. Do now
    • A brief problem or task that students complete to show they are ready for the next part of the lesson
  4. Clicker checks
  5. Explain It
    • Teachers check for misconceptions by having students explain instructions for an activity to a peer or to the teacher
  6. Table tags
    • Students choose to sit at labeled tables with symbols that represent different readiness levels.
  7. Thumbometer or First to Five
    • Students can show confidence (or lack of) for a task by raising thumbs up, to the side or down or by showing number of fingers that corresponds to their level of confidence
  8. Glass, bugs, mud
    • Students label their understanding of concepts using glass (totally clear concepts), bugs (little fuzzy concepts), and mud (don’t understand or see concept)
  9. Sticky bars
    • Create a chart that shows levels of understanding.  Students post their name on a sticky note on the region that represents their levels of understanding.
  10. Learning Lineups
    • Students line themselves up on a continuum to represent their level of understanding of knowledge from novice to expert.  Also see Where do you stand?.
  11. Human bar graph
    • Label 4 lines by different levels of understandings.  Students form a human bar graph by standing on the line that represents their level of understanding.
  12. Scatterplot graph
    • Similar to human bar graph except represents level of understanding to a specific concept or problem.
  13. Hot seat
    • Students answer reflection questions placed on their hot seats.  Students not at hot seats agree or disagree with students’ responses.
  14. Admission and exit tickets
    • Students indicate readiness for next activity by answering questions (1 or 2) on small slips of paper. For more info, go here.
  15. Presentation assessments
    • Students present information and use methods to determine whether or not other students understood what they presented.


3-sowhat
Quick checks for understanding can help teachers see whether or not students are ready to move unto to new lessons.  These quick types of assessments gives teachers quick snapshots of student learning that can help teachers adjust lesson pacing and questions in real time.


4-nowwhat
Preparation Steps
  • In a scaffolding lesson, identify points when it will be good to check for student understanding.
  • Determine the quick checks that can quickly you can you best snapshot of student learning that can let you know if students are ready to move on or need more time and/or explanations.
Early Implementation Steps
  • Implement quick checks periodically during scaffolding lessons to direct students to process their learning and communicate their readiness levels.
  • Adjust pacing and levels of attention to specific students based on the data you get from quick checks.
Advanced Implementation Steps
  • Have pre-prepared activities (multiple advance points) that go with different readiness levels that emerge from quick checks.


5-relatedstuff

160: After Reading Activities


2-what


Screen Shot 2016-05-08 at 11.41.57 PM


  1. Where do you stand?
    • Focus
      • Taking and supporting a position
    • Description
      • Also called: Four Corners, Human Continuum, Living Likert Scale, Barometer, Human Bar graph, Peoplegraph
      • Students represent their opinion by where they stand in the room
      • Facilitate conversations with students who share and do not share the same opinion
    • Why do this?
      • Students practice:
        • offering interpretations of text
        • backing conclusions with evidence from text
        • debating view points in a social, kinesthetic activity
    • How it works?
      • After some reading, ask students to evaluate what they think using a question framed like: Based on all you have read about _________________, where do you stand?  Label different parts of the room for different opinions.
      • Give students time to review their notes and decide their opinions.  Let students know that they will use textual evidence to back their opinions once they pick a stance
      • Students take a stance.  They use their notes to explain to a partner who shared their stance what reasoning and evidence they used to come to that stance.
      • Ask several pairs to explain their positions to the entire class.
      • Fold the line in the middle such that students at extreme ends are now paired.  Prior to letting students debate their position, over guidelines for their debate conversations.  For example – students can take turns saying opening arguments and rebuttals.
      • Ask if any students have changed their positions as a result of debate with classmate.  Have him explain why/how opinion changed.  Have him move to new spot in room that represents new opinion.
      • Ask some pairs to describe how their debate unfolded and what types of evidence they would need to gather for a stronger future debate.
    • Variations
      • Have students stand in 4 corners of the room to represent different opinions
      • Students can arrange themselves in a pie chart or a bar chart.
      • Key thing is to plan conversations among students who agree and disagree ahead of time.
    • Related Reading
  2. RAFT essay
    • Focus
      • Recalling and summarizing
    • Description
      • Extended writing activity:  topic is assigned, students can choose RAFT items
        • R = role of writer
        • A = audience of writer
        • F = format of writing piece (letter, news article, poem, brochure, etc.)
        • T = more specific topic within the material
      • Can offer students content-specific choices for RAFT options
    • Why do this?
      • Students can dig deeper into content
      • Memorable activity that helps cement key ideas into minds
      • Students respond well to creative choice in their assignments
      • Good for highlighting several key ideas in a course
    • How it works?
      • Develop lists of options for each letter in RAFT.  Can research these ahead of time and/or brainstorm them with students.
      • Use think aloud and co-writing with class to model how to get started on sample RAFT assignment.  See Joint construction.
      • Allow for in class writing times and individual coaching sessions.  See Writing Workshops for ideas on what this could look like.
      • Share the writing online and in class.  Allow students to read aloud their essays to small or large groups in order to exchange ideas.
    • Variations
      • CRAFTS
        • C = Contexts
        • R = Role of writer
        • A = Audience
        • F = Format of text
        • T = Themes of text – rather than just address a broad topic, students make a claim about the topic
        • S = Structure of text – this deals with how ideas are organized in text
      • Students write context piece – use voice of chosen personalities to tell stories about them.
      • Represent more perspectives with other CRAFTS pieces.
      • Students read and digest 100+ pages of nonfiction materials while creating CRAFTS pieces.
    • Related Reading
  3. Password
    • Focus
      • Building Academic Vocabulary
    • Description
      • Students play Password game show to review vocabulary
    • Why do this?
      • Review content-specific vocabulary
    • How it works?
      • Students make a list of vocabulary words recently studied on chart paper
      • One student sits with back to list.  Team mates offer clues to help seated student guess the words on the list.
      • Teams take turns helping their player guess the words.  The team that can get their guessing player to guess all the words the fastest wins.
  4. Tweet the Text
    • Focus
      • Reading and summarizing
    • Description
      • Students work in pairs to craft 140-character summaries of key concepts in the text
    • Why do this?
      • Co-opt students’ texting / tweeting habit
      • Practice synthesizing texts into concise statements
    • How it works?
      • Assign a short selection of content-specific text
      • Students talk aloud in pairs to develop a tweet to summarize the text.  Can post on Twitter if school allows.
      • Discuss different summaries
      • Compose über tweet – one that has the most summary info
    • Variations
      • Use a short hashtag so it’s easy to find all tweets such #sum
    • Related Reading
  5. Exit and Admit Slips (Also see Minute Paper)
    • Focus
      • Reading and summarizing
    • Description
      • On post-it or small slips of paper, student respond to one or more of the following prompts:
        • one important idea learned
        • question
        • prediction of what’s to come next
        • thought about a character or idea in the text
      • Students can discuss their tickets in pairs and then as a whole group.
      • Teachers can affinity group their responses to notice patterns in what students understand and what they want more information about.
    • Why do this?
      • Short writing assignment that builds a bridge between learning activities that occur on successive days
      • Creates focus at the start or end of class
      • Teachers get a snapshot of what students are thinking that can inform future discussions and lessons
    • How it works?
      • Model how to perform activity using think aloud.  Stress how it’s OK to make struggles with learning the focal points of exit/admit slips.
      • Give students 2-3 min at the start or end of class to complete slips.  Can use sentence stems such as:
        • One thing I learned is ________
        • One question I have is _______
      • Now pass paper 3 spots in one direction.  Read slip carefully.  On the back of the slip, write a response to the original responses.
      • Can call on students to share their original responses and other students’ responses and tie these reactions back to the assigned text(s).
      • Don’t make these a grading burden.  Best to quick glance at them to notice overall patterns in what students are thinking and questioning.
    • Variations
      • Can use a provocative statement from one of the slips to start a class discussion


3-sowhat
These activities help students process texts in different ways.  They can use these strategies to practice developing conclusions that are backed by textual evidence, using reading to develop writing pieces that represent different perspectives, reviewing vocabulary, summarizing key ideas, and asking related questions of the texts.  Using these activities can teach students how to read more deeply and to process texts in ways that are close to methods using by experts in the discipline.


4-nowwhat
Preparation Steps
  • Select readings that will students learn key information in upcoming projects.
  • Decide which strategies will help students most effectively process the targeted texts.
  • Gather materials related to the strategies.
Early Implementation Steps
  • Implement active processing strategy.  See instructions above.
  • Have students reflect on how strategy is helping them learn new information.
Advanced Implementation Steps
  • Incorporate students’ favorite processing activities into classroom routines.
  • Combine reading activities with Quick Writes or Write to Learn activities.


5-relatedstuff

159: During & After Reading Activities

1-sources


2-what
Screen Shot 2016-05-08 at 11.49.47 PM
  1. Turn and Talk
    • Focus
      • Reading as Thinking
    • Description
      • Think Pair Share
      • Teacher pauses and gives students 1-2 minutes to discuss an issue in pairs
      • Gathers responses from the class
    • Why do this?
      • Draws out wait time so that all students have time to process question prior to gathering responses
      • Creates several learning processing breaks in lessons.  Also see writing breaks.
      • Great way to generate long lists of what students know or notice
    • How it works?
      • Model the strategy with a volunteer partner.  Discuss a topic suggested by a student for 1-2 minutes.  Ask students to share what they noticed.
        • Things to model:
          • good eye contact
          • facing each other
          • asking each other questions
          • staying on topic
          • listening to each other
          • building on each other’s comments
          • acting friendly
      • Make sure everyone is sitting next to their partner
      • Practice strategy with a short reading a several prepared prompts.
      • Fine-tune strategy by gathering strategies from students how to have good conversations and displaying these.  Can also research these conversational strategies by googling “turn and talk anchor charts”.
      • Repeat several times in class.  Be sure to gather responses after turn and talk time is done.
      • Monitor students while they are talking so you know who to call on to get a variety of interesting responses.
    • Variations
      • Use turn and talk time to give plus / della feedback on different pos-its and place these on the piece of work being assessed
    • Related Reading
  2. Word Meaning Graphic Organizer
    • Focus
      • Building academic vocabulary
    • Description
      • Students complete a graphic organizer in teams on a single vocabulary word
      • Graphic organizer has students record:
        • target word
        • topic where word is found
        • parts of word we recognize
        • examples
        • so the word means
        • why it’s important?
        • where is the word used?
        • How it connects with other words?
      • Different teams can work on different words and share their results in a gallery walk
    • Why do this?
      • learn word meaning through their connections with other words, ideas, concepts and information
      • gather all contextualized meanings for one word in one place
    • How it works?
      • Model how to complete the graphic organizer using think aloud.  Role play with a partner and use turn and talk before completing each box in the graphic organizer.  Emphasize that graphic organizer won’t be completed all at once.  It will take a couple discussions and readings to finish it.
      • Let students complete the graphic organizer (1 per team) – joint understandings may enable team to complete the entire graphic organizer
      • As students read, let them meet periodically to discuss what they read and add more information to the graphic organizer
      • Teams may handle 1 or more graphic organizers – depending on whether or not groups will share graphic organizers.
      • Put graphic organizers to work –
        • gallery walk
        • can use post-its to give peer feedback on graphic organizers
        • groups can compare graphic organizers to notice similarities and differences in what they annotated
  3. List-Group-Label
    • Focus
      • Building academic vocabulary
    • Description
      • Students are giving a list of vocabulary words and they cluster them into groups based on common characteristics.  Some words can appear in multiple categories
    • Why do this?
      • Learning meanings of words by seeing relationships (as opposed to in isolation)
    • How it works?
      • Give students working in team a long list of terms
      • Students group words and decide what to title groups
      • Can have students reread texts and see if better understanding of words improves understanding of the text
    • Variations
      • Display clusters on butcher paper around the room so they can be updated throughout the project
  4. Written Conversation
    • Focus
      • Sharing ideas, discussing, debating
    • Description
      • Students write notes to each about learning experiences
      • Also called write-arounds and dialogue journals
      • Can have students take and defend positions using evidence from the text
    • Why do this?
      • Class discussion where everyone is actively talking at once
    • How it works?
      • Students team up – up to 4 persons per team
      • Each student has a large piece of blank paper.
      • Describe the strategy – key points:
        • everyone is writing ALL the time – no one is watching while other write
        • write reactions to text (summaries, questions, surprising points, etc)
        • write reactions to other’s reactions to the text
      • Can provide question prompts to focus the writing or leave it open
      • Students start with an initial note to the persons on their team
      • After 1-2 minutes, papers rotate and students start writing a reaction to the note passed to them.
      • After rotations are done, have students circle  most interesting comments.  Then let them continue the conversation out loud.
      • Call on groups to share key comments.  Read aloud circles comments on papers.
    • Variations
      • Have students write notes while mimicking a specific person’s point of view (famous scientist, famous historical figure, etc)
  5. Second Helpings
    • Focus
      • Recalling and summarizing
    • Description
      • Students and teacher re-read a dense text multiple times
      • Make each rereading feel like a reward deep dive / dig
    • Why do this?
      • Dispel myth that readers who need to reread texts are “bad readers”; smart readers do this too with dense texts
      • Supplement understanding that’s gathered from a quick first read
    • How it works?
      • Go through first read of text and annotate to get gist of the information in the text
      • Reread the text with the help of prompt that reframes this second helping of the text.
        • Science example – reread to help you draw the process and make it a diagram
    • Variation:
      • Example – on orbital motion
        • read once for main ideas
        • second helping – read for information that can help you create visuals for orbital motion
        • third helping – read for information that can help you invent a device to deflect comets
    • Related Reading
3-sowhat
Using a variety of strategy to process information in texts can help students actively process texts and better learn the information in these.   Any of the strategies listed above can support students while they learn new concepts and vocabulary in the context of active reading.


4-nowwhat
Preparation Steps
  • Select readings that will students learn key information in upcoming projects.
  • Decide which strategies will help students most effectively process the targeted texts.
  • Gather materials related to the strategies.
Early Implementation Steps
  • Implement active processing strategy.  See instructions above.
  • Have students reflect on how strategy is helping them learn new information.
Advanced Implementation Steps
  • Incorporate students’ favorite processing activities into classroom routines.
  • Combine reading activities with Quick Writes or Write to Learn activities.


5-relatedstuff

158: During Reading Activities (2 of 2)


2-what


Screen Shot 2016-05-08 at 11.57.28 PM


For part 1 of During Reading Activities, go here.
  1. Coding Text
    • Focus
      • Reading as Thinking
      • Inferring, Interpreting, and Drawing Conclusions
    • Description
      • Students puts codes in margins of books (can do this on post-its for school and library books) that indicate type of excerpt.  For example
        • C = connection
        • ? = question or confusing point
        • ! = surprising point
      • Can supplement codes with reasoning
    • Why do this?
      • Speedier form of annotation
      • Gets students to stop, think and react to reading
      • Can annotate text quickly without breaking reading flow too much
    • How it works?
      • Choose codes that work well with subject area such as
        • Checkmark = confirms what you thought
        • x = contradicts what you thought
        • ? = puzzles your
        • ??? = confuses you
        • Star = very important item
        • ! = new and interesting item
      • Model how to code using a short text and think aloud protocol.  Be sure to explain purpose of coding while modeling the strategy.
      • Give students time to use the strategy.  And talk over their coding with a partner.
      • Call on students to share excerpts that go with specific codes.
        • Example – Who’d like to share an item that is new and interesting? (Has ! near it)
    • Variations
      • Can transfer some coded items to KWL charts
      • Can use codes that are specific to problem solving – use a code to set off relevant given information
      • Let students come up with their own codes
  2. Multicolumn Notes (Also see Double entry journal)
    • Focus
      • Inferring, Interpreting, Drawing Conclusions
      • Analyzing Author’s Purpose, Theme, Point of View
    • Description
      • 2 columns of notes
        • column 1 = summaries
        • column 2 = reactions to text such as questions, confusions, personal reactions, reflections
      • Also called a Double entry journal
    • Why do this?
      • Practice summarizing information
      • Practice reflecting upon and reacting to text
      • Balance summarizing with actively thinking about text’s meanings
    • How it works?
      • Model how to apply strategy using read aloud and think aloud protocols
        • show how to distinguish between major and minor points
        • how to paraphrase info in column 1
        • how to generate reactions that go in column 2
      • Using gradual release, continue modeling the strategy while the class works together to complete double entry journal
      • Then complete double entry journal in pairs
      • Then complete double entry journal as individuals
      • After small group or individual work time, have whole class share their notes
      • After students are familiar with strategy, you can vary content in two columns.  See Double entry journal article for other ideas for column labels
      • Continue to give students debrief opportunities to share their notes with other students
      • Assess note taking – look for common patterns in students’ strengths and gaps.  Praise students for what’s going well.  Model for students how to annotate the text in ways that address their gaps.
      • Vary these notes with other strategies because these are time consuming and can grow stale if overused.
    • Variations
      • In Science class, 3 column notes
        • column 1 = pictures, key ideas
        • column 2 = making predictions before she reads
        • column 3 = so what? column, ask reflection questions such as what if the variables were different?
      • In Social studides class, 3 columns
        • middle column = driving or provocative questions
        • left column = supporting evidence from text
        • right column = counterarguments
        • bottom of page = student’s conclusion
      • In Math class,
        • column 1 = graph, chart
        • column 2 = direct reading of info in graph or chart
        • column 3 = inferences and questions related to the graph
      • Also see Double entry journal article for other column label ideas
    • Related Reading
  3. Sketching My Way Through the Text
    • Focus
      • Visualizing Meaning
    • Description
      • Students draw a sequences of sketches, drawing, cartoons to represent key ideas in readings
      • Quick sketches not masterpieces
    • Why do this?
      • Visualizing meaning can be a powerful tool for developing understanding
      • Can reveal different perspectives
      • Can show how students see ideas evolving in a text
      • Good for representing sequences of events that represent changes over time (examples – plots, growth, historical events, biological processes, etc.)
      • Students are more likely to remember visuals they create themselves
    • How it works?
      • Model how to create quick sketches while summarizing and reacting to a text
        • make sure sketches are rough diagrams
        • emphasize that sketches should be quick and simple so they don’t eat up too much reading time
      • Let students try the strategy.  Circulate around the room and coach them as needed.
      • Let up drawing sharing modes
        • Physical drawings – post around the room and facilitate a gallery walk
        • Electronic drawings – gather in Padlet
        • Allow students to notice what points students drew in common and what points were uniquely noticed by different students
    • Variations
    • Related Reading


3-sowhat
Students can’t just be instructed to read texts deeply.  They need to be taught how to do this.  Using a variety of methods to annotate texts can teach students how to stop, think and react periodically while reading.  The annotation artifacts can also remind students at later times what was the key information they noticed and what were their key reactions to readings.


4-nowwhat
Preparation Steps
  • Select reading selections that will help students apprehend learning targets and develop products.
  • Decide which during reading strategy will best help students summarize and react to the information in upcoming assigned readings.
  • Select model texts (short) to model the selected strategies.
Early Implementation Steps
  • Model the selected strategy using short passages and think aloud protocol.  Be sure to provide key tips and the purpose for the strategy.
  • If the strategy is new and complex, use a gradual release method – model it first, do with the whole class volunteering next steps, do it in pairs and then do it individually.
  • Let students try out the strategy.  Circulate around the room and coach them as needed.
  • Facilitate discussions that allow students to share their annotations.
Advanced Implementation Steps
  • Use student feedback to determine which strategies they enjoy most and find most effective.  Incorporate these strategies into routines.
  • Use annotations to create written pieces.  See Writing to Learn and Quick Writes articles for ideas.


5-relatedstuff