157: During Reading Activities (1 of 2)

1-sources


2-what


Screen Shot 2016-05-09 at 12.06.25 AM


For part 2 of During Reading Activities, go here.
  1. Partner Reading
    • Focus
      • Sharing ideas, Discussing, Debate
    • Description
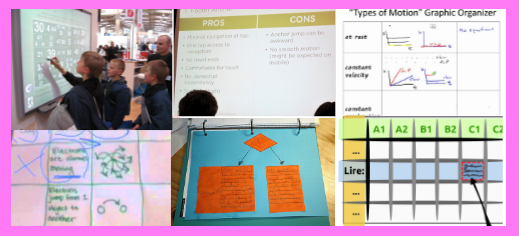
      • Partners side by side take turns reading a content-area text
      • Take turns per paragraph
      • In between paragraph discuss what they just read
      • This can be a warmup that transitions to individual silent reading
    • Why Use It?
      • Build up to more independent reading
      • Can help students understand dense texts
      • Can support students who are not year ready for careful independent reading
    • How Does It Work?
      • Select important chunk of content-area text and set aside 5-10 minutes of classroom reading time
      • Form pairs of students who can work together and have similar reading levels
      • Use a volunteer to act as a co-model while you model the strategy for the class.  Model reading aloud, taking turns at paragraphs, and pausing between paragraphs to discuss the text
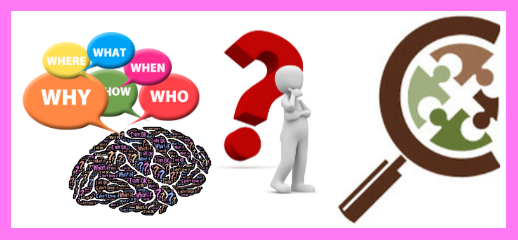
      • Possible Discussion questions:
        • What did the author say?
        • What were the big ideas?
        • Were there some hard words?
        • Is there anything we didn’t understand?
        • How can we figure it out?
        • What questions do we have?
        • What do you think we will come up with in the next paragraph?
      • After demo, let pairs begin reading. Circulate around the room and observe the pairs at work.   Coach pairs as needed.  Note patterns of confusion and address these in later lessons.
      • At close of activity, ask several pairs to share what their understandings and questions of the text.
    • Variation
      • Students can read in unison and discuss texts in between paragraphs
      • Students can read silently and discuss texts in between paragraphs
    • Related Reading
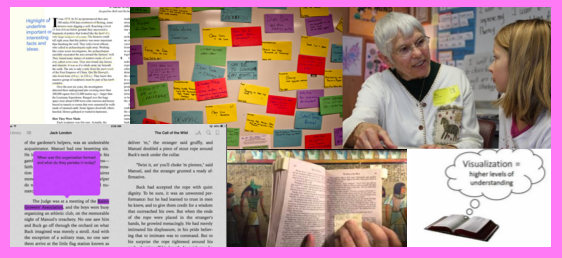
  2. Post-It Response Notes
    • Focus
      • Reading as Thinking
    • Description
      • Students periodically pause while reading text to think and react to text
      • Record thoughts and questions on post-it-notes
      • Post-it notes can be used in later discussions and writing assignments
    • Why Use It?
      • Helps readers slow down, focus and notice important parts of text
      • Creates concrete notes that can be referred to later
      • Can be rearranged to show different relationships among ideas in text
      • Relaxing form of note taking because post-its are small, readers/writers can see they don’t need to write a lot
    • How Does It Work?
      • Model how to use text with a short passage (~2 paragraphs)
        • notes for confusing points
        • notes for surprising points
        • nots to summarize key points
      • Let students try out strategy.  After several minutes of using the strategy, encourage students to turn their neighbor and discuss their notes.
      • Discuss the post-its with the whole class.
        • Can call on feedback related to key points by asking for post-its at specific locations in the text (bottom of page 3)
        • Ask questions to pull out key elements of the text – conflicts, debates, main ideas, confusing points, surprising points, etc
      • Can also have students bring their notes to a common whiteboard area and group notes under key categories such as: main idea, conflict, confusing points, etc
      • Prior to transferring notes out of book, have students write their name on post-its and the page #
    • Variation
      • Color code notes to distinguish between different types of responses such as summaries, questions, etc
      • Use chart paper to divide up post-its into different categories
      • Use summary notes and quotes to write a paragraph summary of the text.  See Writing to Learn articles and Quick Writes articles for even more ideas.
      • Can use Post-Its as Admit or Exit Slips
  3. Annotating Text
    • Focus
      • Reading as thinking
      • Making connections to other texts, information and self
    • Description
      • Students take notes on key, puzzling, surprising points in the text in the text margins
    • Why Use It?
      • Teaches active reading processes: stop, think and react
      • Practice generating questions from the text
    • How Does It Work?
      • Model how to use the strategy with a short passage.  Think aloud as you mark up the margins to show how to stop, think and react to text excerpts.
      • Ask students to categorize model feedback according to types such as
        • questions
        • connections
        • visual images
        • important parts
        • predictions
        • times I got lost
        • wow factors
        • authors’ style, point of view
      • Have students implement strategy with the above list of types of feedback in view.  Encourage students to stop and think at points that go with all the categories listed above.
      • Provide many opportunities for students to develop their annotation skills over time
    • Variation
      • Have students read and annotate text while assuming a content-specific point of view such as a famous scientist, historical figure, etc (Point of View Annotation)
      • (Conceptual Annotation) have students to watch for specific conceptual groupings while taking notes.  For best results, limit categories to 3 or 4
        • Example of concept groups: causes of concussions, symptoms of concussions, treatment of concussions, prevention of concussions
    • Related Reading


3-sowhat
Teaching students how to actively process texts while reading them can help them grow into smarter readers who know to stop, think and react to texts.  Helpful reactions to texts include noticing key points, surprising points, and confusing points and generating related questions and predictions.


4-nowwhat
Preparation Steps
  • Decide which During Reading strategies will help your students actively and effectively process texts
  • Practice the strategy you’re about to model
  • Select a short passage for the demonstration of the strategy
  • Gather related materials: texts, post-its, chart paper, etc
Early Implementation Steps
  • Model the strategy using a sample text and think aloud protocol
  • Give instructions for strategy and explain how strategy artifacts will be used later
  • Give students opportunities to use the strategy (multiple opportunities for annotation strategies so students can develop skills over time)
  • Facilitate discussions based on strategy artifacts
Advanced Implementation Steps


5-relatedstuff

156: Five Pre-Reading Activities

1-sources


2-what


Screen Shot 2016-05-09 at 12.15.57 AM


  1. Reading aloud
    • Focus: Building Enjoyment of Reading
    • Description
      • Teacher reads aloud short, ear-worthy passages
      • Individual students, pairs or small groups may read passages aloud
    • Why Use it?
      • Student experience powerful language about important ideas
      • Evoke time-honored experience of listening to stories
      • Helps students grasp big ideas and questions that make subjects meaningful
      • Draw students into school topics
      • When student read aloud – build text fluency and comprehension
    • How it works?
      • Select appropriate texts
        • these cover key ideas in clear, vivid language
        • they involve beautiful brilliant content-specific language
        • Note – students might be able to understand higher than normal lexile texts when they read them aloud
      • Practice reading with energy, drama and vocal variety
        • Rule of thumb – read 5x before going public
      • After modeling read aloud several times, invite students to do some reading aloud on their own – individually, in pairs, or in small groups
  2. Front loading with Images
    • Focus: Visualizing Meaning
    • Description
      • students primed for upcoming unit by studying photographs or works of art that communicate upcoming settings, contexts, processes, problems, or people
      • teacher may encourage a deep study of image by revealing image in parts before showing the whole
    • Why Use it?
      • we are in competition with vibrant multimedia images
      • low floor tasks – everyone can play
      • build background knowledge and evoke curiosity
      • Common Core requires students to read visual images
    • How it works?
      • Select appropriate images
        • build background knowledge
        • introduce subject
        • seek out dramatic, puzzling, surprising images
        • seek out one emblematic anchor image
        • assemble collection of 6-12 slides into a slide deck with NO CAPTIONS
      • Do not lecture through the slides.  Provide purpose and instructions:
        • Introduce purpose of images – to provide background knowledge of upcoming reading.
        • Instruct students to think aloud and talk aloud to the screen individually to describe what you’re seeing and thinking
        • Model how to think and talk aloud to the screen in response to an image
        • After talking aloud to the image, jot down words and phrases that cover highlights of what you said aloud
      • Conduct a close reading of Anchor Image
        • Present entire anchor image –  students write down every detail they notice
        • Mimic process of “rereading” by presenting anchor image in cropped sections – students continue to write down details they notice (1 min per section)
        • Present entire anchor image one more time – students continue to write down noticed details
      • Facilitate class discussion on images
        • What did whole set of pictures show?
        • What are the larger themes?
        • How do details contribute to understanding of larger themes?
      • Ask student to make predictions about what upcoming reading will be about based on images, image notes and discussions
    • Related reading
  3. Pre Reading Quiz
    • Focus: Connecting to and building background knowledge
    • Description
      • Trivia Quiz related to concepts and misconceptions in an upcoming reading
        • focuses on big ideas, concepts, surprising or puzzling info, controversial issues
    • Why Use it?
      • establish a tangible purpose of reading = compare what one knows to what’s in the reading
      • reading supports or challenges one’s positions
      • guide students to big ideas in the readings
      • reading becomes part of an ongoing conversations between students and the texts
      • help students think while they read
    • How it works?
      • Create 3-5 short questions or statements related to the text
        • use true/false, agree/disagree formats
        • effective questions post big open-ended questions or draw attention to curious or startling information
      • Students read related passage.
      • Discuss quiz with partners.
      • Provide time to write down justifications for responses.
      • Discuss quiz – note common agreements and disagreements with info in the text.
    • Related reading
  4. Vocabulary Predictions
    • Focus: Building academic vocabulary
    • Description
      • Students are given list of vocabulary words and categories to sort them into.
      • They write a gist statement to summarize the words.
      • They asks questions they hope to learn from reading as a result of words they don’t know in the list.
    • Why Use it?
      • activate prior knowledge
      • call attention to key vocabulary words
      • use prediction to build active thinking about a topic before reading
      • sets a purpose for reading = discover meanings of confusing words
      • thinking about own questions gets students more engaged in the texts
    • How it works?
      • Select appropriate list of words and categories to group them
        • 8-15 terms
        • some words students already know or can easily figure out
        • some technical terms
        • some terms connected to key concepts
        • select categorizing group names – examples: people, settings, causes, effects, etc
      • Use Think Aloud to model the processes of classifying terms and asking questions of the terms
      • Provide a few directions
        • Unknown pile is only for terms team has no idea about
        • Set expectations for gist statement (all or some of the words used)
        • Explain that if gist statements mismatches text it’s OK, but it’s important to note that expectations of text were not fully met.  Differences can highlight new lessons learned and surprises in text.
        • Note list of “to discover” questions inspired by the terms
      • Give students in groups time to following instructions
      • Small groups share their questions and groupings with the class
      • Read the texts and see if they answer the “to discover” questions
      • Discuss answered and unanswered questions
    • Variation (Quotation mingle)
      • Give students 8-15 sentences (quotes from the text)
      • Students make hypotheses about the text using the sentences
  5. Clustering
    • Focus: Visualizing Meaning
    • Description
      • Clustering – students create a 2-D map of ideas with connecting lines showing how they think ideas relate – good for pre-reading
    • Why Use it?
      • Access prior knowledge
      • Open up students to possibilities they were unaware of until they got started
    • How it works?
      • Using Think Aloud and drawing to model how to create a cluster
      • Write a central nucleus word at the center of the visual used for clustering
      • Students write relate terms, circle them and draw lines that represent how they are related to each other and the nucleus word
      • Students share parts of their clusters with teacher to create a class cluster
      • Have students read the text
      • Compare what students read to the relationships in their pre-reading cluster – what was the same and different


3-sowhat
Pre-reading activities help teachers build and activate students’ prior knowledge so that they are well primed to make sense of texts.  These activities can engage students in reading, give purpose to their reading, build visual and mental maps of upcoming concepts, and pose questions to discover.  Using these strategies can make texts more accessible and more interesting to students and can help them to read texts more deeply.


4-nowwhat
Preparation Steps
  • Research texts that would be useful references for an upcoming project.
  • Decide which pre-reading strategies can be used to best highlight key ideas and terms in the text.  For example
    • Read aloud – texts with beautiful brilliant language
    • Front loading with images – texts with concepts with good visual representations
    • Pre-reading quiz – texts with controversial or surprising conclusions or many misconceptions
    • Vocabulary predictions – texts with a lot of vocabulary
    • Clustering – texts with a lot of interrelated ideas
Early Implementation Steps
  • Implement pre-reading strategy that goes with text – be sure to model the strategy well using the think aloud strategy if students are using strategy for the first time
  • Use formative assessments to measure the impact of pre-reading activities on student learning through reading related texts and to assess whether or not students are enjoying and “getting” the strategy
  • Use formative assessments to fine tune strategies
Advanced Implementation Steps
  • Supplement pre-reading activities with related Writing to Learn activities.
  • Incorporate effective and engaging pre-reading strategies into classroom routines.
5-relatedstuff

150: Assessment of Analytical & Critical Thinking Skills (1 of 2)

Screen Shot 2016-05-09 at 9.51.05 AM

  1. Categorizing Grid
    • Purpose:
      • Assess students’ sorting rules – makes explicit the implicit rules that students are using to sort objects
      • Give opportunities for students to revise their sorting rules
    • What It Is: 
      • Students sort concepts in a work bank into categories
    • Suggestions for Use:
      • Use in introductory classes that have lots of detailed info that is structured
    • Step-by-Step Procedure:
      1. Select 2-3 sorting categories.  Make a list of examples that go with each category.  Review list to make sure examples clearly go in one category and all are recognizable from students due to recent learning activities.
      2. Make a handout with sorting grid and word bank.
      3. Alternately can use objects to be sorted in slides or list them on the board.
    • Analysis Tips:
      • Check accuracy of grids
      • Note patterns of common errors
      • Identify which sorting categories and/or objects are giving students the most problems
    • Extension Tips:
      • Ask students to explain why they categorized items together.
      • Provide categories and have students come up with examples themselves
      • Assign grids with a few examples sorted but no category labels.
      • Use Defining Features Matrix (see below) to follow-up to assess student understanding of features that go with each category.
      • Use dotted lines or buffers between categories to accommodate items that straddle multiple categories.
    • Pros:
      • Quick assessment of categorization and recall
      • Can be used as a study tool in multiple subjects
    • Cons:
      • Unless items are challenges, assesses rote memory.
    • Caveats:
      • Doesn’t assess students’ memory organization schemes that are different from the organization scheme in the grid
  2. Defining Features Matrix
    • Purpose:
      • Assesses student ability to assess objects according to the presence or absence of criteria
      • Helps students separate similar ideas
    • What It Is: 
      • Students categorize concepts according the presence (+) or absence (-) of key features
    • Suggestions for Use:
      • Good for courses that teach similar concepts
    • Step-by-Step Procedure:
      1. Focus matrix on 2-3 similar concepts.
      2. Determine which important features can be used to evaluate / characterize concepts.
      3. Create a matrix with concepts across the top and features listed down the side.
      4. Check to see that each cell can be filled with a clear + or -.  Eliminate features that produce ties.
      5. Draw up finished matrix (with +/- cells blank).  Ask students to complete the +/-.
      6. Explain how to fill out matrix, time limit and how data will be used.
    • Analysis Tips:
      • Compare students’ matrices to key
      • Look for patterns in common errors.
    • Extension Tips:
      • Give students a model completed matrix and ask them to create one for several key different concepts.
      • Replace + / – with Always Present, Sometimes Present, Rarely Present, Never Present.
      • Ask students to explain what pattern of responses in matrix mean.
    • Pros:
      • Can help clear up differences between similar concepts.
      • Break down complex comparisons into manageable parts.
      • Students practice highly transferable approach to categorizing data.
    • Cons:
      • Time consuming prep to prepare matrix
      • Not all material can be easily categorized using +/-
      • Unless students understand the comparison emphases, becomes a simple recall assessment.
    • Caveats:
      • Keep features in matrix parallel in kind or level of importance.
      • Don’t analyze more than 2-3 concepts at one time.
  3. Pros and Cons Grid
    • Purpose:
      • Assess student analysis of issues of mutual concern
      • Forces students to go beyond first reactions to investigate two sides of an issue
    • What It Is: 
      • List pros and cons listed with an idea
    • Suggestions for Use:
      • Good for courses that deal with value questions
      • Assess costs and benefits of possible solutions to projects / problems
    • Step-by-Step Procedure:
      1. Focus on a key decision, dilemma, or issue that relate to key content ideas
      2. Write out a prompt that will elicit pros/cons for target issue.
      3. Communicate expectations for lists – format (phrases or sentences), time limits, numbers of items in lists
    • Analysis Tips:
      • Do a frequency count of students’ listed pros and cons to determine what students found most important
      • Compare students’ grid to yours – have they excluded key points? have they included key unexpected points?  How balanced are both sides of grid?
      • Facilitate discussions related to questions above.
    • Extension Tips:
      • Have students complete pro / con list from different viewpoints
      • Have students back up pro / con list with evidence.
      • Use this assignment as a springboard for a debate.
    • Pros:
      • Quick and easy way to see if students can imagine more on one side or other
      • Can indicate what ideas students find most compelling – these can be touchpoints for future lessons
    • Cons:
      • Oversimplifies issues that have more than 2 sides
      • Students who don’t see value in this task may provide flippant answers
      • Some students may reject 2 side framework
    • Caveats:
      • Assignment may create controversy.  Be prepared to explain education rationale for the assignment.
3-sowhat
The Categorizing Grid can be used to assess how students classify ideas.  The Defining Features matrix can be used to assess how students use features to separate similar concepts.  The Pro/Con Grid can help assess how students see multiple viewpoints for an issue.  All of these assessments can be used to help teach the analytical skills they assess.


4-nowwhat

Preparation Steps
  • Analyze standards and write aligned student friendly learning targets.
  • Determine if any of concepts in the learning targets are organized in ways that relate well to these assessment strategies
    • ideas that can be categorized by major key topics go well with the Categorized Grid
    • similar ideas can be compared using the Defining Features Matrix
    • multifaceted issues can be unpacked using the Pro/Con Grid
Early Implementation Steps
  • Implement assessments for concepts that fit them.  See above.
  • Analyze assessments to understand patterns in what students got right, got wrong, included, and omitted.
  • Share results with students and describe how results will impact future teaching and learning.
Advanced Implementation Steps
  • Use extension ideas for the assessments if they help students dig deeper in key concepts.
  • Incorporate most effective assessment strategies into class routines.


5-relatedstuff

135: Assessing Understanding

1-sources


2-what


Screen Shot 2016-05-09 at 10.47.00 AM


  1. Minute Paper
    • Purpose:
      • Assess how well students are understanding content
      • Help make mid-course adjustments
      • Feedback on minute papers helps students distinguish between how experts and beginners distinguish what’s important
    • Description: 
      • Students take 1 minute to answer following questions:
        1. What was the most important thing you learned in class?
        2. What important questions remain unanswered?
    • Suggestions for Use:
      • Assess what students learned from a variety of learning activities
      • Wrap-up or warm-up activities
      • Good for courses that present a great deal of new information
      • Well suited for large classes because it is easy to analyze
    • Example of Implementation:
      • European History
        • Two questions were:
          • What is the single most significant reason why Italy was the center of the Renaissance?
          • What one question puzzles you most about the role of Italy in the Renaissance?
        • Analyzed responses and found that some students were confusing cause & effect
        • Reshaped outline for future activities using student questions
        • Categorized responses by: Major Causes, Minor Causes, Effects, Actors, TBD
        • Answered popular questions
      • Statistics
        • Questions
          • What were the 5 most important points from that session
          • Top 2 questions about the session
        • Compiled lists of responses.  Categorized and tallied similar responses.
        • Responses revealed that students struggles to sort the wheat from the chaff.
        • Showed students top 10-12 responses and discussed their relative importance to each other and the course.
        • Learned to be more explicit in his instruction – example – started providing key points at start of lectures
    • Step-by-Step Procedure:
      1. Decide what to focus on and choose a time to administer assessment that takes place soon after learning activity related to focus item(s)
      2. Write 2 questions – use 2 questions in the Description as a template.  Try out assessment.
      3. Set aside 5-10 minutes to do minute paper and debrief time.
      4. Prepare visual related to 2 questions.
      5. At appropriate time, hand out paper for 1 minute papers.
      6. Suggested – let papers be anonymous.
      7. Let students know their time limits, format of acceptable responses and when the results will be debriefed.
    • Analysis Tips:
      • Tabulate responses and make related useful comments
      • Compare results over time.
    • Extension Tips:
      • Use Half Minute papers – only one question.
      • Make prompt more specific – example – most illustrative example, most compelling charcter, etc.
      • Let students compare and discuss their responses in pairs or small groups
      • Let students in small groups invent own minute paper questions and let members of the group analyze and present results to the class.
    • Pros:
      • Immediate teacher / course feedback
      • Gather questions while time is fresh (and limited) to address them
      • Data can be analyzed and summarized quickly
      • Encourage active listening
      • Shows how teachers value student feedback
      • Feedback on minute paper allow students to compare their responses with the rest of the class
    • Cons:
      • If overused, may seem gimmicky
      • Tricky to come up with questions that can be quickly comprehended and answered
    • Caveats:
      • Technique is flexible but not universally applicable
      • Accept students’ starting points even when they are troubling or irritating.  Don’t develop responses to their paper until frustration (if it arises) subsides.
      • Set flexible time limits for feedback.
      • Promise less feedback than you plan to deliver.
  2. Muddiest Point
    • Purpose:
      • Assesses what students misunderstand
      • Identify which topics need more explanations
      • Requires some higher order thinking
    • Description:
      • Students answer question: What was the muddiest point in ______________?
    • Suggestions for Use:
      • Good for large class sizes because it is easy to analyze
      • Use frequently in classes that present a lot of new information (muddy points accumulate quickly)
    • Example of Implementation:
      • Chemistry:
        • Question: What was the muddiest point in enthalpy versus entropy?
        • Results revealed students had trouble distinguishing between 2 concepts.
        • Showed need for more explicit instruction of each concept in isolation.
    • Step-by-Step Procedure:
      1. Determine which learning activity (or part of learning activity) you want feedback on.
      2. Allow time for students to respond to question at the appropriate time.
      3. Let students know time limit and how responses will be used.
      4. Pass out paper for students to write on.  Collect papers.
      5. Present feedback in next class or soon after.
    • Analysis Tips:
      • Find common muddy points.
      • Divide responses into common categories of muddy points and one miscellaneous pile.
      • Tally responses in each pile.
      • Classify piles as concepts, facts, and skills.
    • Extension Tips:
      • Assign muddiest point to homework assignments
      • Students read each other’s drafts and list muddiest points
      • Ask different groups of students to categorize and summarize responses
      • Followup with other assessment – Directed Paraphrasing, Memory Matrix, Concepts Maps to see if muddy points remain muddy
      • Relate muddy points to upcoming exam questions
    • Pros:
      • Very little prep – can be spontaneous
      • Can be safe outlet for student reluctant to ask question in class
      • Can help teachers identify what students find hard to learn – help set different focus for future learning activities
      • Get in students’ shoes
      • Can help students become more metacognitive
    • Cons:
      • Can undermine motivate and sense of self efficacy – can combat that this by teaching students the value of struggles and mistakes
      • Can be discouraging to know what students misunderstand in a well-prepped learning activities
      • Students may struggle to identify and describe their struggles
      • Students may raise challenging questions that are hard to answer on the spot
    • Caveats:
      • Don’t express anger or disappointment when students list muddy points that you thought you explained well
      • Don’t spend too much time responding to muddy points – may lose course momentum
      • Don’t convey that all muddy points can be resolved quickly – some are landslides that take a lot of time to uncover
3-sowhat
The Minute Paper and Muddiest Points are easy-to-analyze assessments of student (mis) understanding.  These can be used to give teachers immediate feedback on the effectiveness of learning activities and insights on how to refine upcoming activities.


4-nowwhat
Preparation Steps
  • Decide opportune times for students to summarize what they know (or don’t know) using Minute Paper or Muddiest Point.
  • Decide how you will quickly analyze and summarize the data and how you will use that data summary.
Early Implementation Steps
  • Assign Minute Paper or Muddiest Point
  • Analyze and summarize the assessments.  Decide how to make adjustments that highlight student understandings and resolve student misunderstandings.
  • Share results with students with students and how these will impact instruction and student learning.
Advanced Implementation Steps
  • Involve students in the writing of Minute Paper & Muddiest Point questions and in the analyze and summarization of results.
  • Have students reflect on how their understanding of muddy points is improving (or not) over time.


5-relatedstuff

134: Assessing Recall

2-what


Screen Shot 2016-05-09 at 10.59.25 AM


  1. Focused Listing
    • Purpose:
      • Assessing what students recall in regards to a specific topic
      • Improve students’ focus and recall
    • What It Is: 
      • Students list several ideas that relate to a focus topic
    • Suggestions for Use:
      • Can be used before, during, or after a lesson
      • Simple assessment that can be used in many classes
      • Good for courses that involve a lot of new information
    • Example of Implementation:
      • Physics:
        • Used to assess students’ understanding of vocabulary such as “work” (2 min exercise per list)
        • Divide into 3 piles: mostly current, confused with everyday meanings of words, the rest
        • Includes concepts and student wording into lesson on work – especially when differentiating between everyday and physics definitions of work
      • Finance:
        • List 5-7 fundamental concepts related to “stocks”
        • Briefly define each concept (10 min exercise)
        • Analyzed sheets to see what was present and missing from students’ lists
        • Following class meeting handed out printed sheet with concepts and definitions and reviewed 3 fundamental concepts not found in sheets
        • From then on, prior to lessons – listed few topics to key in on during upcoming lesson
      • Political Science
        • Prior to a lesson on Federalism handed out 3×5 index cards
        • Wrote BEFORE on one side of cards and listed topics related to Federalism
        • Near end of lesson, wrote AFTER on back of cards and listed more topics related Federalism
        • Gathered top 3 topics from each students
        • To respond to wide variation in topics, at start of next lesson showed student visual that included
          • all 23 topics mentioned by students organized into 6 categories – top 5 fundamental ideas and Other
          • Also organized topics in a concept map
    • Step-by-Step Procedure:
      1. Select important topic currently being studied in class.
      2. Write topic at top of a blank answer sheet.
      3. Set time and/or list item number limits.
      4. Following own time limits, create sample focus list.
      5. Revise list, add items as needed.
      6. If list is well defined and worth discussing, run the same exercise with your class.
    • Analysis Tips:
      • Compare students’ lists to your list and divide into piles: Appropriate, Inappropriate Or Related / Unrelated
      • Categorize responses by relationship to the focus topic – examples: definitions, examples, descriptions, illustrations, primary, secondary, tertiary relationships to focus topic
    • Extension Tips:
      • Allow students to work in small groups to develop collective focus lists
      • Make your focused lists available for comparison and discussion in class
      • Have students in small groups create compiled lists that contained best items from their lists and your list
      • Ask students to define terms on their lists
      • Have students convert into paragraph(s) that relates terms to each other and focus topic
      • Use Focus List strategy at regular intervals to increase recall and prioritization of content
      • Follow-up this strategy with Empty Outlines activity – see below
    • Pros:
      • Simple, quick and flexible way to measure student recall
      • Identify terms students recall and don’t
      • Time limits have students list what they perceive to be the key terms, not what they think the teacher wants
      • If used before instruction, can be used to prime the pump, ready the brain for new learning
    • Cons:
      • Basic form only assesses low cognitive skill, recall
      • Some students can product reasonable lists without really understanding terms
      • Focuses on one idea at time – some key knowledge focuses on relationships among several key concepts
    • Caveats:
      • Create your own master focused list to trial key topic prior to assigning focused list.
      • Focus lists on key big ideas (enduring understandings).
      • Pick a topic that is not too broad or too narrow to create a somewhat convergent variety of lists.
      • Add specifics about relationship between focus list words and focus topic – examples, defining words, synonyms, examples, etc
  2. Empty Outlines
    • Purpose:
      • Assess students’ recall and note-taking skills
      • Emphasizes key topics and their sub-topics
    • What It Is:
      • Students complete an empty or partially completed outline – if partially completed, include key headings and empty spaces for sub-topics
    • Suggestions for Use:
      • Good for courses that have a lot of detailed information that are highly structures
    • Examples of Implementation:
      • Nursing Course
        • Provided students with outline with 4 major topics and empty slots for 5-7 subtopics for each major topic
        • Students completed outlines using their notes
        • Teacher compared outlines to her lecture outline
        • Uses disparities in the prioritization in her notes and her students’ notes to learn how to better emphasize key points in future lectures
      • Child Development Course
        • Prior to showing a video to a class, teacher watched the video and created outline of video contents
        • Created empty outline by deleting sub-headings and keeping major headings
        • After students watched the video, gave students 5 minutes to complete the empty outlines in pairs
        • Found that their notes coincided with his notes at the beginning and end of the video and deviated most near the middle of the video
        • In the future, paused video in the middle to give students time to take notes
    • Step-by-Step Procedure:
      1. Create an outline for an upcoming learning activity.
      2. Decide what info you want students to provide – major topics, sub-topics, supporting details etc.  Let that inform empty outline design.
      3. Limit number of blank items for students to complete on empty outlines to less than 10. (if you want them to complete it from memory)
      4. Communicate expectations – time limits and types of things to put in empty outlines
      5. Convey purpose of assignments, when results will be shared, and how results will be used.
    • Analysis Tips:
      • Compare student outlines with your outline and learn from agreements and disagreements
      • Look at range of responses and notice patterns in responses
    • Extension Tips:
      • If students struggle to complete the outline, provide a word/phrase bank.
      • Vary between providing major subtopics and asking for supporting details and providing supporting details and asking for major topics.
      • For advanced students, provide guidelines only
      • Use focused listing activity prior to completing outlines – use focused list items in outlines
      • Do outline as a warmup to see student expectations for a lesson
    • Pros:
      • Repeated use can improve student listening and note taking.
      • Feedback on outlines gives students better models for note taking.
      • Can help students better organize knowledge in their notes and in their brains.
      • Can make organizing ideas of a subject more explicit
    • Cons:
      • May feel constrained by the master empty outline
      • Not all information is best organized in hierarchical structure of outlines
      • Unless students make outlines from scratch, little higher order thinking is required
    • Caveats:
      • Students’ varied readiness levels will lead to variation in their empty outlines
      • Limit amount of info captured in empty outlines (less than 10 points)
  3. Memory Matrix
    • Purpose: 
      • Assess recall and organization of important information
    • What It Is:
      • Students complete a chart that has row and column labels that emphasize key relationships between ideas
    • Suggestions for Use:
      • Works well with subjects with a lot of detailed information that relates to each other
      • Can assess recall of information after a variety of learning activities
      • Can be used as a pre-assessment
    • Example of Implementation:
      • Spanish:
        • Gave students a matrix to complete that had types of verbs (-ar, -er, ir) as the column headings and (regular/irregular) as the row headings
        • Found that students sometimes classified regular verbs as irregular verbs and confused -er and -ir verbs
        • Info help teacher decide to review in upcoming classes
      • Art History:
        • Gave students a matrix with column headings: France, US, and Britain and rowing headings: Neoclassicism, Impressionism, Postimpressionism, Expressionism.
        • Students completed matrix in groups of 5; then transferred responses to a whole class chart
        • Students could categorize artists by country but struggled to separate them by time period
        • Use their misconceptions as a starting point for upcoming lectures
      • Nursing class:
        • Gave students a matrix with column headings: structure, functions, enzymes and row headings: mouth, esophagus, etc (other digestive system organs)
        • Students completed matrix in teams of 5
        • While students watched a video on enzymes he analyzed the students’ matrices.
        • Using model matrix, he reinforced what students got right and discussed what students got wrong.
        • Then gave individuals another blank matrix and had them complete it at class end.
    • Step-by-Step Procedure:
      1. Draw simple matrix with row and column labels that represent key topics in the course.
      2. Create a key based on learning activities.
      3. Revise Memory Matrix if needed – check for fit of row and column labels to key ideas.
      4. Create a blank version of Memory Matrix that only has row and column labels.  Make blank cells large enough to record several ideas.
      5. Give students time to complete the matrix.  Set a lower limit for the number of items in each cell.
      6. Analyze matrices for correctness.
    • Analysis Tips:
      • Analyze correctness of matrices and look for trends in correctness and incorrectness to identify student strengths and gaps.
      • Analyze errors and look for patterns in the errors.  Use this diagnose amount of learning time & type of activities associated to each topic.
    • Extension Tips:
      • Complete Memory Matrix as part of a class discussion.
      • Allow students to work in groups on the matrix.
      • Fill in some of the middle cells and have students guess the rowing headings or column headings.
      • Give students a Work/Phrase Bank and have them create the Memory Matrix (complete with original row and column headings) that organizes the terms in the bank
    • Pros:
      • Assess recall of information and how well students can relate information
      • Simplicity of format makes it easy to analyze
      • Graphic format may appeal to visual learners
      • Can improve memory organization and retrieval
    • Cons:
      • Row and column headings impose organization formats that may hide organizational relationships students are using to relate content
      • Basic format of assessment may not separate prior knowledge and current knowledge well
      • Can obscure flexibility and complexity of the actual relationships among content
    • Caveats:
      • Start with small matrices (2×2) for students unfamiliar with this strategy.
      • May obscure relationships that are flexible / blurred.  Need to point out these nuances in learning activities.
      • Recognize matrices as a convenient simplification of a more complex reality
3-sowhat
All 3 of the strategies in this article assess student recall and assess relationships students see among the information items they recall.  Providing feedback on these items can provide opportunities to make priorities and relationships among content more explicit.  Varying the format for the recall assessments can emphasize different relationships.  The Focused List assessment shows how one central idea relates to sub-ideas or supporting evidence.  The Empty Outline can show how several central ideas relate to other pieces of information.  The Memory Matrix shows how 2 groups of ideas (categories) can be used to show relationships between detailed pieces of information.


4-nowwhat
Preparation Steps
  • Analyze the knowledge and skills in the standards in the upcoming standards.  Look at the key relationships you’d like to teach to students to students among major and supporting ideas.
  • Decide which type of recall assessments best illustrates the relationships you’d like students to use to organize ideas in upcoming learning activities.
  • Prepare samples / keys for the selected strategies you will use.
Early Implementation Steps
  • Ask students to work on assessment(s) individually or in teams.
  • Analyze assessments.  See above for tips.  Try to learn student strengths and gaps and what are the patterns in their strengths and gaps.
  • Use what is learned from assessments to modify instruction.
  • Share results with students and how results will impact upcoming instruction and student learning.
Advanced Implementation Steps
  • After students have had practice with the recall strategies – try extension version of the activities.  See above.
  • Incorporate a recall strategy into classroom routines – pick one that emphasizes skills and organization styles that fit well with your course.
5-relatedstuff

133: Assessing Prior Knowledge

1-sources


2-what


Screen Shot 2016-05-09 at 11.04.24 AM


  1. Background Knowledge Probe
    • Purpose
      • gather detailed information on students’ prior knowledge related to most important materials to be studied
      • determine more effective starting points for scaffolding
      • determine range of readiness / preparation levels in a class
      • serve as pre- and post- assessments
        • administer before scaffolding for pre-assessment
        • administer after scaffolding to post-assess what was learned during instruction
    • What it is:
      • short, simple questionnaires used to assess knowledge at the start of a course or the start of a unit
    • Suggestions for Use:
      • Focus on key concepts needed to be successful in upcoming material
      • At least one low floor question – most can get it right
      • At least one high ceiling question – most will get it wrong
      • Use to introduce important concepts about to be uncovered
      • Use to assess knowledge midway and after related scaffolding
      • Share enough data related to assessments that students can determine how they performed relative to the class
    • Examples of Implementation:
      • ELA – List all Shakespeare’s plays you’ve been exposed to.  Check off if you read the play, listened to the play, watched a live performance, watched an adaptation, etc.  After analysis – point out which plays they will see again in the course and how they can help students who haven’t had prior exposure to the plays.
      • Electrical Engineering – Showed pictures of 5 pieces of electrical equipment and asked students to determine readings on the illustrations.  Observe what students can read or not and the format (standard notation, engineering notation, with units or without) of their responses.  After 1st individual probe, combined students into heterogeneous groups and had them try again with the expectation that all students needed to make sense of the correct answers.  Gave tips to more experiences students on how to help less experienced students
    • Step-by-step procedure:
      1. Consider what students may know at the start of a course or a unit (and to what degree they may know it).  Try to identify at least one point most will know and have that lead off into related, less familiar points.
      2. Prepare probe.  Formats could include
        • 2-3 open ended questions (see ELA example)
        • Handful of short answers
        • 10-20 multiple choice questions
        • Use student-friendly language that will make it easier to access what they already know
      3. Give students the probes.  Emphasize the need for thoughtful responses and the fact these pre-assessments will not be graded.
      4. In a timely manner, report the results and discuss implications:
        • how results will affect the way the course will be taught
        • how results will affect what they do as learners
    • Analysis Tips:
      • Affinity group responses by different levels of preparedness
      • Assign scores to each pile of preparedness
        • +2 significantly prepared
        • +1 some relevant background knowledge
        • 0 no background knowledge
        • -1 wrong background knowledge
      • Total the scores to determine overall level of preparedness
      • Fast method – Divide responses into prepared and not prepared piles prior to teaching related concepts.  This related to Clustering student needs for more efficient planning.
    • Extension tips:
      • After individually completing groups, have students work in small groups to come up with mutually acceptable answers.
      • Ask students in small groups to rate and sort answers from other groups – see Analysis Tips above
      • Ask students to interview each other and annotate responses and sense-making related to probe questions.
      • Use version of probes as a post-assessment
    • Pros:
      • Provide info on students’ content and communication skills
      • Provide specific baseline data that can inform instructional decisions
      • Can provide opportunities to hook students in by tying things back to their prior knowledge
      • Can prime the pump, i.e. prepare students to take in new information by making them aware of connection to things they already know
    • Cons:
      • Feedback might demoralize teacher
      • Responding to probe can be frustrating for unprepared students
      • Classifying responses may create hard-to-change false impressions of students which may impact expectations later in the course
    • Caveats:
      • Can show big holes in course-long sequence due to knowledge gaps in students – only do this if you have time and energy to make significant revisions to course materials
      • Do not generalize too much from one assessment
      • Plan response for both prepared and underprepared students
  2. Misconception / Preconception Check
    • Purpose: 
      • Identify incorrect or incomplete knowledge that can interfere with new knowledge
      • Help students identify “early on” beliefs that may hinder their understanding of new knowledge so they have a better chance of revising and transforming their knowledge structures to accommodate new info
    • What It Is:
      • Pre-assessments that uncover prior knowledge or beliefs that my hinder or block further learning
    • Suggestions for Use:
      • Use it to uncover common sense knowledge that is counteracts content information
      • Use it to uncover beliefs that allow some facts to get through but block out deeper understanding of method or worldview
    • Example of Implementation:
      • History –
        • Anonymous responses to 3 questions: 1) How many people lived in North America in 1491? 2) About how long had they been on this continent in 1491? 3) What significant achievements had they made at that time? (5 minutes to respond).
        • Shuffled papers and handed back.
        • For (1) and (2) collected highest and lowest answers.
        • Teacher analyzed question (3) at home.
        • Then added question (4), where did you get your answers for 1-3.  Class realized that most of their guesses were grounded on thin ice.
        • As homework students paired up and conducted research to find acceptable ranges of answers to 1-3.
      • Health –
        • Prior to a unit on STDs, used a probe that had 10 statements that represented true facts or common misconceptions about the symptoms, treatment and transmission of STD’s.  Students answered in Likert scale from this is certainly true, mid range (I have no idea) to this certainly false.
        • Analyzed responses and found that many students were clinging more (or less tightly) to several misconceptions.
        • Tied their response results to specific lessons related to the prompts.
      • Astronomy  –
        • On large blank sheets of paper asked students to respond to question – What makes the season change on Earth” and said any answer was acceptable except “I don’t know”.
        • Divided responses in 4 piles – correct, distance, weather, others piles.
        • Picked best response from each pile and created another assessment – same as before with 4 responses as multiple choice question.
        • Asked proponents of each model to explain their answers to the class.
        • For homework, students had to identify and verify the correct response.
        • After discussing their research with some specific feedback, concluded lesson by explanation why some incorrect model were reasonable and reminded students how long it took to figure out what actually caused the seasons.
    • Step-by-Step Procedure:
      1. Identify most troublesome common misconceptions or preconceptions students bring to the course.
      2. Focus Misconception/Preconception check on most common or harmful preconceptions
      3. Create simple questionnaire to elicit beliefs related to list in step 2.
      4. Get another teacher to check questionnaire to make sure it’s helpful and not patronizing or threatening.
      5. Think of how you will respond to several outcomes of questions – strike out questions that you are comfortable responding to.
      6. Explain purpose of pre-assessment.  Let it be anonymous.  Explain how and when you will use the feedback gathered from it.
    • Analysis Tips:
      • Use responses to answer these questions
        1. What specific misconceptions do my have about course material that may interfere with their knowledge?
        2. How many students have these beliefs?
        3. How deeply embedded are these problematic beliefs?
      • Affinity group responses by type of response / misconception
      • Use Likert responses to get at question 3.
      • Also group Likert responses to identify –
        • strongly held correct ideas
        • loosely held correct ideas
        • strongly held incorrect ideas
        • loosely held incorrect ideas
    • Extension Tips:
      • Prior to answer questions, have students identify common misconceptions held by other people related to topic or field.
      • Have students come up with reasonable explanations for misconceptions.
      • Use same questionnaire as a post-assessment later in the term
    • Pros:
      • uncover likely barriers to learning early on
      • anonymity of responses will make students more likely to be truthful about what they know and don’t know
      • can generate sense of relief for not being the only one to have a misconception
      • develop students’ metacognition skills
    • Cons:
      • unlearning errors can be challenging, unpleasant
      • changes in ideas take time
    • Caveats:
      • thread lightly around sensitive issues to help students open up about their opinions
      • don’t use this strategy until a positive safe classroom culture is established


3-sowhat
Knowing how to effectively gather and analyze assessment data related to students’ prior knowledge can help teachers tailor course materials to match students’ readiness levels.  Uncovering unhelpful beliefs can help students and teachers investigate the rationale for the truth (and falsehood) of these beliefs and create room in students’ knowledge structures for new ideas.


4-nowwhat
Preparation Steps
  • Analyze upcoming standards.  Identify key big ideas and possible misconceptions related to these.
  • Design questionnaires that are design to elicit ideas related to big ideas and misconceptions.
  • Build a positive safe culture that values using student feedback to make better instructional / learning decisions.
Early Implementation Steps
  • Implement prior knowledge questionnaires at the start of a course or unit.  Do NOT grade them.  Tip: Keep them anonymous.  Also see Step-by-Step Procedures above.
  • Analyze responses and use patterns in their responses to inform future instructional decisions.  See Analysis Tips above.
  • Share responses with students and explain how these will be used to change instructions and tips to improve student learning.
Advanced Implementation Steps
  • Use student data and feedback to design better questionnaires and refine upcoming projects and scaffolding activities.
  • Implement some of the Extension Tips above.
  • Have students conduct research on questionnaire questions and discuss their findings in class.


5-relatedstuff

125: Asking More Engaging Questions

2-what


Screen Shot 2016-05-09 at 12.16.48 PM


Taxonomy of Personal Engagement:
  1. Interest – student appears to be attentive, may like the subject
  2. Engaging – student actively participates in learning tasks
  3. Committing –  students are actively involved/engaged in material, find it hard to move on to other topics
  4. Internalizing – student “gets it”, sees connections between learning and other experiences
  5. Interpreting –  student wants to talk about implications and opinions related to learning
  6. Evaluating – student “owns” the knowledge, may ask questions to check their understandings
 
Using Taxonomy of Personal Engagement to Design Questions:
  1. Interest – What questions will I ask to attract students’ attention?
  2. Engaging – What questions will I ask to get students more actively involved in discussion? that signal that I value their ideas?
  3. Committing – What questions will I ask that will get students to take on responsibility for line(s) of inquiry?
  4. Internalizing – What questions will I ask that will get students to relate their prior experiences, their feelings and opinions to targeted content material?
  5. Interpreting – What questions will I ask that will invite them to express their understanding of their own worlds in relationship to the world of the subject matter?  What opportunities will students to ask questions about their new understandings?
  6. Evaluating – What questions will I ask that will let students try our their new thinking in new media?


3-sowhat
The taxonomy of personal engagement creates and visualizes a road map for  different types of affective responses toward new learnings.   The taxonomy of personal engagement can help teachers consider what affective response they would like students to have with material and to design questions to stimulate these responses.  Using this taxonomy can help teachers design students that get students more engaged in learning and that stimulate students to ask more questions.


4-nowwhat
Preparation Steps
  • Analyze standards and develop aligned learning targets.
  • Decide which levels of personal engagement are desired for each learning target.
  • Design questions aligned to learning targets and selected levels of personal engagement.
Early Implementation Steps
  • Ask students questions designed for different learning targets and for different levels of personal engagement.
  • Observe students’ responses to see if the questions are stimulating the expected levels of engagement. Use observations to fine tune questions strategies.
Advanced Implementation Steps
  • Ask students what types of questions stimulate different levels of personal engagement.   Ask for characteristics and examples.  Use this feedback to design better questions.
  • Give students topics and ask them to design questions at various levels of cognitive engagement.  Use these questions to facilitate discussions.


5-relatedstuff

124: Teaching Students To Generate Questions

1-sources


2-what
Reasons Why Students Struggle to Generate & Share Own Questions:
  1. Relationship between perceived (and actual) academic ability & question asking
    • the more students need help, the more reluctant they are to ask for it
    • the more competent students are, the more likely they are to ask for help when needed
    • the lower the achievement scores, the less likely the student is to ask questions
  2. Relationship between students’ grade level in school & question asking
    • as students advance in their careers, the trends above get worse or better creating a wider and wider achievement gap in asking questions
    • low achieving students ask even less questions
    • high achievement students learn to ask better questions and direct them to the right people
  3. Relationship between student value on asking question & question asking
    • when students like asking questions and find them helpful to learning, they tend to ask questions
  4. Relationship between teacher relatedness with student & question asking
    • teachers ask more questions of those they feel more connected to
Strategies to Meet Challenges of Question Asking
  1. Create safe environment that values & leverages mistakes
  2. Engage students in question: Do the benefits of asking questions outweigh the costs?
  3. Provide instruction on how to ask questions
  4. Use cooperative learning strategies to encourage students to ask for help from peers
  5. Structure classroom to value intrinsic motivation & rewards over extrinsic motivate & rewards
  6. Develop good caring relationships with all students
Elements of Effective Instruction in Question Generation:
  1. Provide procedural prompts specific to strategy being taught.
    • Examples: question stems, signal words.
  2. Provide models of appropriate responses.
    • Model how to use question stems and how to give appropriate responses to questions.
  3. Anticipate potential difficulties.
    • Use prior knowledge of students to predict potential pitfalls and constructive responses to these.
  4. Regulate difficulty of material.
    • Start formulating question from short passages and then lengthen passages and deepen their complexity over time.
  5. Provide a cue card.
    • Use cue cards or cue posters that relate to questioning framework in use – e.g. Bloom taxonomy.
  6. Guide student practice.
    • Practice in multiple modes: with teacher, reciprocal teaching, in small groups.
  7. Provide feedback and corrections.
    • Give opportunities for teacher and peer feedback structure by feedback protocols such as Critical Friends.
  8. Provide and teach a checklist.
    • Teacher age-appropriate checklist that describes good questions.
  9. Assess student mastery.
    • Set aside multiple practice opportunities described over time for students to develop the skill of formulating good questions.  Assess their ability to formulate good questions and provide more practice opportunities and feedback as needed.
 
Stages to Teach Students for Designing Questions:
  1. Planning phase – students experience things and ask questions
  2. Implementation phase – student pursue and refine questions
  3. Assessing phase – students assess effectiveness of questions
Student Question-Generation Formats
  1. Reciprocal Teaching
    • What – Students and teachers use dialogue to draw meaning from text
    • Why – Improve comprehension & metacognition
    • How – Teacher selects a text selection and assigns to students to read.  Student summarize what they have read and generate questions about the text.  Teacher assigns one student to role play as teacher and ask students questions about the text.  Teacher asks as a coach who helps students ask good questions.  Students not playing the teacher are encouraged to answer questions and ask clarifying questions.
  2. Pair Problem Solving
    • What – Students solve problems while interviewing each other in pairs
    • Why – Promote metacognition and analytical thinking
    • How – Students assigned problems and paired up.  One person in pair solves problem by thinking aloud.  Partner records approach, asks clarifying questions to learn specific of problem solving steps and does NOT intervene if he or she perceived errors in thinking.  Partners take turns being in the think aloud and listening roles.
  3. Metacognitive Anchoring
    • What – Students ask metacognitive questions of themselves while reading texts
    • Why –  Improve comprehension & metacognition
    • How – Student ask themselves questions while reading a text and write in their responses in margins or on sticky notes.  After reading and annotating the text, students can transfer their response to a metacognition chart which these columns:  Type of Questions I asked during Reading, Type of Thinking in Questions, Why I asked that Questions.  Questions include:
      • What does this remind me of?
      • Why dd this happen?
      • What evidence supports this?
      • Is this ethical?  How can I evaluate this?
      • Is write trying to persuade me? Do I believe this?
      • What point of view is guiding the reading?
  4. Role-play Questioning
    • What – Students ask questions about a problem while role playing as investigators of a problem.
    • Why – Promote engagement & higher-level thinking
    • How – Students are organized in teams with one recorder.  Teacher poses a potential problem.  Students posing as investigators of problem ask questions about the problem.  They may brainstorm some answers related to questions.  Then ask more questions related to this brainstorming.  After question sessions, teams meet to compare questions and decide which might be the most effective questions to investigate to solve the problem.
  5. Press Conference
    • What – Students ask questions of a visiting expert.
    • Why – Stimulate curiosity & practice active listening
    • How – Students work in pairs to brainstorm questions in advance.  Pairs compile a master class list.  Students prioritize and categorize questions.  Students select a reasonable number of related questions to ask visiting expert.
  6. Textbook Question Analysis
    • What – Students analyze textbook questions to determine their cognitive values and assign them values
    • Why – Promote analysis & review content
    • How – Teach students first about the different cognitive levels of questions and their purposes.  Students record textbook questions in a question form that has students determine the cognitive level of question, consequence of question (what would student learn), and assign value to the question
  7. Question Review
    • What – Students in peers provide feedback on research questions that can be used to refine them
    • Why – Promote critical thinking
    • How – Students individually brainstorm potential questions and approaches for investigating these questions.  Students pair.  Students take turns presenting questions and giving presenter warm and cool feedback about questions.  After review session, students summarize feedback and revise questions.
  8. Round-Robin Questioning
    • What – Students create questions and answers and take turns asking questions of other students and giving feedback.  Cooperative groups ponder questions with uncertain responses
    • Why – Review & promote key ideas
    • How – Teacher directs students to generate 7 questions – 6 they know the answer and 1 they are curious about but are uncertain of the answer.  Students take time to record questions and answers.  Teacher called on 1st student.  1st student calls on another student and asks one of her questions.  He responds while she cues and probes as needed.  Teacher only intervenes to clear up misconceptions and to coach questioners to give appropriate wait times and to ask probing questions.  Student who responded to the first question calls on the next student and asks a question.  This pattern continues until all students have taken a turn to ask a question or until activity time expires.  Then students are divided into cooperative teams.  They discuss their questions with uncertain responses and try to brainstorm responses.  They select their favorite question to share with the whole class.
  9. Twenty Questions
    • What – Students ask 20 yes/no questions in an attempt to guess a person, place or thing related to a given topic
    • Why – Practice reasoning & problem solving & how to ask relevant questions
    • How – Divide students into play groups (whole class or down to groups of 5).  Announce a topic. One person thinks of a person, place, or thing related to the topic.  The rest of the students take turns asking yes/no questions in an attempt to funnel down to the correct person, place, or thing.  Students can take a guess (in place of a question) if they think they know the answers.  Teams can take up to 3 guesses to get the right answer.
  10. Actor, Actor
    • What – Students practice responding to questions from the perspective of a key person
    • Why – Promote retention & engagement
    • How – Divide students into teams of 4.  Select a topic.  Students select an important person related to the topic.  One person in the topic role plays as the chosen person.  The remaining team mates ask that person questions that the chosen person could answer in a distinctive way.
  11. Question / Question
    • What – Students interact using only questions
    • Why – practice active listening & thinking
    • How –  Group students in pairs.  Announce a topic.  Students discuss the topic for as long as they can using only questions.
  12. Answer/ Question
    • What –  Students develop questions that go with given stimuli (like Jeopardy)
    • Why – promote retention & higher level thinking
    • How – Select stimuli (text excerpts, diagrams, charts, etc.).  Challenge students to come up with as many questions as possible that could go with the stimuli.
  13. Talk Show
    • What – Students practice conversing about a topic using the roles of actor and interviewer
    • Why – apply knowledge, stimulate higher level thinking
    • How – Divide students into pairs.  Assign students roles – one role is a key character or person related to a current topic in class and one role is a news reporter.  The students role-play the interview while acting in character.


3-sowhat
Students who ask questions are more likely to be plugged into the learning that is occurring in class.  Teaching them how to ask questions helps them approach learning more actively and more critically.  Using varied protocols to encourage student questioning can give students multiple opportunities to formulate, analyze and use their questions.


4-nowwhat
Preparation Steps
  • Develop criteria for good questions and for types of questions.  Example – question stems based on Bloom’s taxonomy
  • Teach students how to use criteria to generate good questions
  • Analyze standards and products in upcoming products.
  • Brainstorm which types of interactions with question will help enhance students’ learning of specific standards and development of specific products.
  • Select activities (see above and also here) that provide ALL students with opportunities to create, use, and respond to questions.
Early Implementation Steps
  • Practice using one of the alternate question response (or formulating) activities with students.
  • Have students reflect on what they learned as a result of the activity.
  • Use feedback from students to fine tune activities.
Advanced Implementation Steps
  • Give students feedback on the quality of their questions.  Give students opportunities to use that feedback to improve their questions.
  • Ask students for feedback on questioning activities.  Use their feedback to improve activities and to decide which activities to incorporate into class routines.


5-relatedstuff

123: Alternate Question Response Formats

1-sources


2-what


 Screen Shot 2016-05-09 at 12.35.47 PM


  1. Choral Responses
    • What – Class answers at once in unison
    • Why – Check for understanding, review, reinforce knowledge, drill & practice
    • How – Develop routine cue to signal time of response
  2. Signaled Answers
    • What – All students answer with a hand signal
    • Why – Check for understanding, review, reinforce knowledge, drill & practice
    • How – Develop routine for types of signaled answers (ex: thumbs up, thumbs down)
  3. Numbered Heads Together
    • What  – Students in numbered teams think together and provide response when number is called
    • Why – Peer teaching, Holding students accountable to cooperative learning styles (ex: jigsaw), review concepts prior to learning new ones, activate prior knowledge
    • How – Form heterogenous teams where each member has a different number (1, 2, 3 or 4).  Pose question.  Give teams time to compose responses.  Call out a number and all students with that number raise their hands.  Call on a couple students with their hands raised.
  4. Think-Pair-Share
    • What – Students process responses individually, in pairs, and with the whole group.
    • Why – Review, activate prior knowledge, give students processing time prior to discussions
    • How – Pose question.  Give students time to compose responses quietly and individually.  Give students time to share responses with a partner.  Then pairs share responses with whole group.
  5. Peoplegraph
    • What – Students stand on a continuum line to express their opinion
    • Why – engage students in active thinking prior to a discussion or written assignment, give students time to consider core concepts
    • How – Setup way to communicate meaning of high and low values on the continuum, pose question, ask students to stand on the line according to their opinion, provide time for students in close and far proximity to share why they chose their position on the line
  6. Data on Display
    • What – Creating collective visual displays of students’ opinions
    • Why – Examine assumptions.  Practice hypothesizing, making predictions and analyzing data.
    • How – Students given a set of questions on a workshops; each response is a percentage from 0 to 100%.  Poster bar charts for each question are set up around classroom – horizontal axis is divided into 10% bins.  Students use post-its to place their responses on the poster charts.  Once all votes are posted, students examine each poster, notice and discuss trends.
  7. Synectics
    • What – Students use metaphors to make connections to ideas and solutions
    • Why – Develop deeper insights into topics by viewing them from different perspectives.  Promote divergent thinking and diverse points of view.
    • How:
      • Simple – Pick 2 opposite objectives (ex: ice cream or spaghetti)  Ask students to think individually whether they think a topic is more like 1 metaphor or the other.  Then group students and have them discuss their associations and come to a group response.  Then each group shares responses.
      • 4 corner – Pick 4 metaphors and label 4 corner of room (ex: football, tennis, basketball, golf).  Place a poster post-it at each corner.  Present a topic.  Students decide which metaphor goes best with the topic.  They work in teams with students who share their opinion to list the reasons why the topic goes with the selected metaphor (5 minutes).  All 4 groups share their lists with the whole group.  Then students continue discussing topics or do a related writing assignment.
  8. Interview Design
    • What – Students collect answers to interview questions in round robin style.
    • Why – Encourage students to respect and become aware of different points of view.  Promote active listening and note taking.  Provide structure for every student to answer every question.  Practice in summarizing.
    • How – Divide class into 1 of 2 concentric circles.  Each student gets one sheet with copy of a single interview question.  Students sit in concentric circles.  Time is allotted for inside person to ask outside circle person their interview question and listen and take notes (1 min).  Then time is allotted for the outside person to interview the inside circle person and take notes (1 min).  Then the outside person rotates 1 spot in the clockwise direction.   Time is allotted for each pair of interviews.  Then the outer circle rotates again until all students have had the opportunity to answer all interview questions.  Then groups are assembled of students who had the same interview question.  Each group looks for major themes in the responses (5-6 min) and then each group reports these to the class
  9. Fishbowl Discussion
    • What – Students discuss topics while other students take notes and analyze them for major themes
    • Why – Practice note taking and active listening.  Practice discussion skills and receive feedback in a safe environment.
    • How – Arrange students in 2 concentric circles.  Seat enough students in the inner circle to leave 1-2 seats empty.  Go over discussion norms: examples: invite all people to speak. use appropriate wait time. Pose a question.  Students in the inside circle discuss question while outside circle students take notes.  After discussion facilitate a debrief discussion in which outer circle students share major themes and to what extend the discussion was effective
  10. Say-It-In-A-Word
    • What – Students respond to a question with a single word
    • Why – Practice decision making and active listening.  Level playing field by insure that every student has same opportunity for initial response.
    • How – Class sits in a circle.  Teacher poses a questions.  Gives students processing time.  Students take turns responding to question with one word.  Teacher asks following up choices that ask students to explain their word choices.


3-sowhat
Knowing alternate response formats can help teachers facilitate classroom conversations that are more varied and that require and value participation from all students.  Varying the format can keep conversations fresh and high energy.  For best effect, it helps to select a response format that matches an instructional goal.


5-relatedstuff
Preparation Steps
  • Analyze standards and develop aligned learning targets.
  • Use characteristics of quality questions to brainstorm variety of questions that relate to learning target.
  • Decide which response formats go best with key questions.
  • Develop resources that go with selected response formats
Early Implementation Steps
  • Use selected response formats to encourage active participation of all students.
  • Have students reflect on how response formats are affecting their participation and attitude toward classroom conversations.
Advanced Implementation Steps
  • Poll students to find out which response formats they prefer for specific instructional formats.  Use their preferences to identify response formats that can be built into classroom routines.


5-relatedstuff

122: Characteristics of Quality Questions

1-sources


2-what


Screen Shot 2016-05-09 at 12.42.33 PM


  1. Quality questions promote 1 or more carefully defined instructional purposes
    • When teachers are very deliberate and clear about the purposes of their questions, they can better assess student performance.
    • When students are aware of the purposes of questions, they can better monitor and modify their responses.
    • Two types of question styles
      1. Recitation:
        • teacher involved in each exchange
        • students tend to answer in short factual answers
        • usually low-level questions involving recall
        • Purposes:
          • review for test
          • check for completion of assignments
          • assess what students know about topics
          • cue students to important content
          • drill and practice
          • get students to talk
          • model good questioning
      2. Discussion:
        • typically more rare
        • teacher acts as facilitator who ensures full participation for all
        • students don’t wait for teacher’s permission to speak
        • students engage in dialogue with one another
        • students make own evaluations
        • teacher poses 1-2 provocative, open questions that start a discussion
        • Purposes:
          • student practice thinking aloud
          • encourage listening and sharing different perspectives
          • improve listening skills
          • students work out own understanding of a topic
  2. Quality questions focus on important content
    • Frameworks can help prioritize content:
      • Wiggins & Tighe Schema:
        • divide up content into 3 areas:
          • primary – big ideas, enduring understandings
          • secondary – important skills to know and do
          • tertiary – worth being familiar with
        • Good questions:
          • relate to a big idea worthy of discussion
          • aligned to standards
          • tie to needs and interests of students
      • Christenbury & Kelly Framework:
        • Model is a Venn diagram of 3 knowledge domains:
          • content knowledge
          • student prior knowledge
          • outside knowledge
        • Use questions that form a variety of 3 types:
          • Single domain questions deal with one domain
          • Overlap questions deal with 2 domains
          • Dense questions deal with 3 domains
  3. Quality questions facilitate thinking at a stipulated cognitive level
    • questions are tools for information seeking AND information processing
    • when formulating questions, need to communicate to students the types of thinking needed to generate appropriate responses
    • Bloom’s Taxonomy:
      • New 2-D Schema:
        • Cognitive Process Dimension
          • Remember
            • recognize, identify, recall
            • lower level, but essential – students need to be able to retrieve info from memory before they can use it
          •  Understand
            • interpret, exemplify, classify, summarize, infer, compare, explain
            • connect new knowledge to prior knowledge
            • beyond remembering – must involve information not included in initial instruction of content
          •  Apply
            • execute – apply procedure to familiar task
            • implement – apply procedure to unfamiliar task
          •  Analyze
            • differentiate, analyze, attribute
            • examples:
              • separate fact from fiction
              • back conclusions with evidence
              • separate relevant and extraneous info
              • identify unstated assumptions
              • identify primary and secondary themes
          •  Evaluate
            • check – looking for internal consistency
            • critique – comparing things to external criteria
          •  Create
            • generate, plan, produce
            • draw upon many elements and integrate them into a novel structure relative to one’s prior knowledg
        • Question Planning Tool related to 6 Cognitive Level – Q-Card
        • Knowledge Dimension
          • Factual knowledge – knowledge of discrete packets of info
          • Conceptual knowledge – knowledge of more complex bodies of info
          • Procedural knowledge – knowledge of skills
          • Metacognitive knowledge – knowledge of one’s own cognition and about cognition in general
      • Marzano’s Taxonomy
        • Recitation questions
          • retrieve previously learned info
        • Construction questions
          • construct new knowledge not previously learned
      • Gallagher & Aschner’s Taxonomy
        • Recall
          • Remember level in Bloom’s
        • Convergent
          • lead to one correct response
        • Divergent
          • allow for several correct responses
      • Reading Teacher’s Taxonomy
        • Reading the lines
          • answer is right there in the text
        • Reading in between the lines
          • think about what text is saying
        • Reading beyond the lines
          • bring own perspectives to the text
      • Walsh & Satte’s Taxonomy
        • Recall
          • Remember level of Bloom’s
          • recall what was learned
        • Use
          • Understand, Apply, Analyze levels of Bloom’s
          • use what was learned
        • Create
          • Create and Evaluate levels of Bloom’s
          • use imagination to go beyond what was learned
    • Choosing a taxonomy
      • select one that is age appropriate, aligns to content, etc
      • recommend school wide use of the same framework
    • Caveats
      • Actual cognitive level of response is dependent on context and student’s prior knowledge
      • On average – 50% of student responses do not match the cognitive level of question
        • teach students the cognitive levels to help them perform at the right level
        • follow-up incorrect responses with probing questions
      • Most textbook questions are at lowest level because textbook organizes info in such a way (compared to primary sources) that answers to questions can be found in book (recall)
      • False assumption = lower level students can’t answer high cognitive level questions
        • all levels of students can answer high cognitive level questions with the right scaffolding
  4. Good questions communicate clearly what is being asked. 
    • Be clear and concise
    • Use student friendly language
    • Sound right when spoken aloud
  5. Good questions are seldom asked by chance
    • Crafting good questions can be time consuming
    • It only takes a handful of good  pivotal questions to drive a lesson


3-sowhat
Knowing the characteristics and frameworks that support quality question design can help teachers plan and implement questions that create an engaging culture of inquiry that supports students actively processing new and old knowledge at deeper levels.


4-nowwhat
Preparation Steps
  • Create a laminated quality question framework map.  Example: could be a matrix with
    • columns being Bloom’s Cognitive levels and
    • rows could be Bloom’s Knowledge dimensions or rows for 3 standards
    • grids squares are large enough to hole small post-its and contain notes and examples
  • Analyze standards in upcoming project and determine
    • enduring understandings, skils, good-to-knows
    • academic and character (long term & supporting) learning targets
  • On placement – circle the most useful types of questions
  • Use post-its to brainstorm high quality questions that fit with circled questions
Early Implementation Steps
  • Use completed quality question map to ask students questions that get them to actively process key information.
  • Use methods for calling on students that provide opportunities for ALL students to participate
Advanced Implementation Steps
  • Teach students the types of thinking in your questioning framework – teach them the question types and responses that go with each type of thinking
  • Model for students how to classify the question type and model how to think aloud in the correct cognitive level. Then give them time to process the question with that lens of thinking before calling on them
  • Continue modeling question classifying and processing (using think aloud) until students are able to this independently


5-relatedstuff