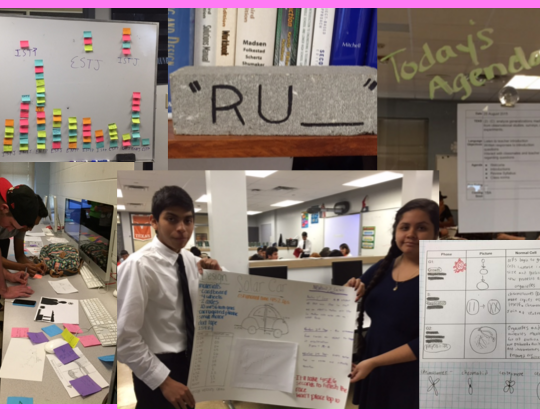
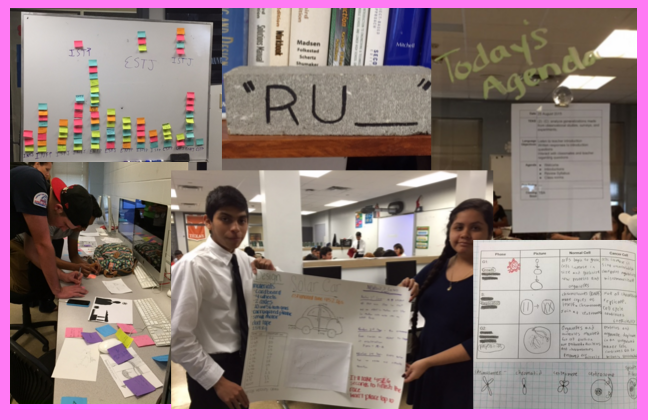
A Tale of Two Projects: Week 2 IPE Emerging Tech (NSF Project)

This blog entry describes what my students and I did during Week 2 of the Emerging Tech (NSF Grant) project.  The events in this blog entry took place at the same time as the events in this article.  As a pair, these describe what a PBL teacher does while running two projects in two different preps at one time.  To see accounts on earlier or later weeks of these projects, go here.


Week 2, Day 1 IPE Emerging Tech (NSF Project):


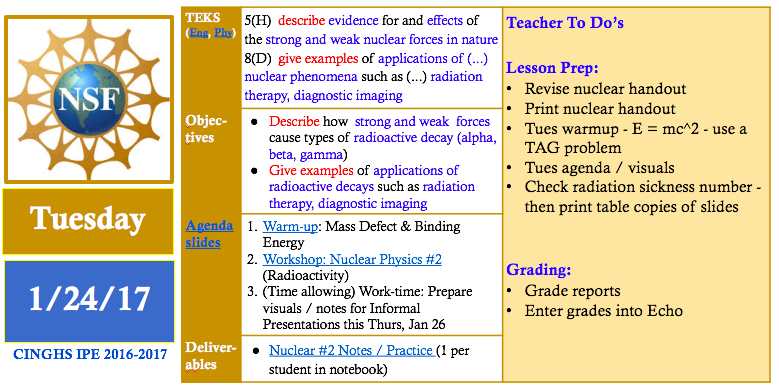
During Day 1, I was not available to work directly with the students because I was at a training related to my responsibilities as Campus Testing Coordinator.  The students started work on informal presentations on physicists who had contributed to our understanding of nuclear phenomena and quantum mechanics.  The students delivered these presentations on Day 4 of this week.
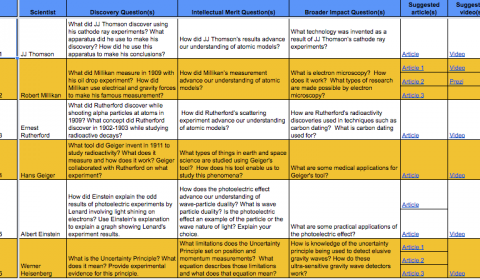
Each team was assigned a different physicist.  To start preparing students for a grant they would write several weeks later, the research questions for each physicist focused on the research of the physicist, its intellectual merit, and its broad impact.  The assigned physicists and related questions for teams 1 to 6 are shown in this linked image.  I provided them with at least 3 age-appropriate and accurate sources to research the questions to streamline their research process.


Each team was also given a template slide deck that limited teams to 3 slides per scientist (see linked template).  The template also constrained students to mostly images and very limited text on the slides.  The bulk of their responses to the research questions were hidden in the slides’ speaker notes sections.


Later on Day 1, I finalized a lesson for Day 2 of this week by analyzing test bank questions related to TEKS on nuclear phenomena and the weak nuclear force.  I found that my workshop needed to focus on types of radiation (alpha, beta, and gamma) and their relationships to nuclear forces (weak and strong) and various technology.  They also needed to introduce half-life and how to use half-life to select appropriate isotopes for different types of technology.  I designed a graphic organizer that included an embedded half-life chart and questions that asked students to interpret the chart to select isotopes for different technology applications – see Day 2 handout.


Week 2, Day 2 IPE Emerging Tech (NSF Project):


Early on Day 2, I made some minor adjustments to my visuals for the upcoming Nuclear Workshop because I needed to look up specific radioactivity values that corresponded to harmless and harmful levels of radiation and their effects.  I typically outline and draft lesson plans and related resources several days ahead of time and then refine them until the day before (or day of) the actual lesson.
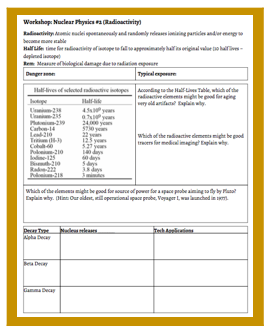
 

Later on Day 2, I facilitated a workshop on Radioactivity with the IPE classes.  In this workshop, we introduced healthy and dangerous levels of radioactivity and used these thresholds to interpret the harmfulness (or harmlessness) of different types of radioactive technology.  We introduced the idea of half life and used specific half lives to discuss whether or not various isotopes were safe (or not) for consumer use.  We also introduced 3 types of radioactive processes (alpha, gamma, and beta) and discussed their connections to nuclear forces and technology applications.  After the workshop, students had time to answer the questions on the graphic organizer and to continue developing their presentations on nuclear / quantum physicists.


Later on Day 2, I finished grading revised reports from the previous IPE project on Rube Goldberg machines.  In this project, students built and tested Rube Goldberg devices in order to investigate conservation of energy and conservation of momentum.


Week 2, Day 3 IPE Emerging Tech (NSF Project):


Day 3 was the final work day that students had to prepare for their informal presentations on nuclear / quantum physicists.  In the warmup, we practiced using the half life chart to select the appropriate isotopes for specific technology applications.  During the warmup discussion, I was able to repeat and model correct thinking relating to interpreting the half lives of isotopes in the context of emerging technology.


While the students worked on their slides, I started contacting potential panelists in order to provide feedback to students during Week 5 of the project when students would draft their grant proposals.  I drafted a recruitment letter that summarized the project logistics and the types of support the student needed.  I linked the recruitment letter to a Google form that gathered information on volunteer panelists’ degrees, areas of expertise, and availability.  By the end of this week, this work yielded 5 panelists, a great number to support 10 student teams.  If you’d like to volunteer to be a panelists at CINGHS, click the linked form above.


Also during student work time, I ordered equipment from the UTeach department that related to an upcoming emission spectra lab.  I thought this equipment was critical to give students hands on experiences related to modern physics and to give students a break from a project featuring lots of online research and very few hands-on research activities.


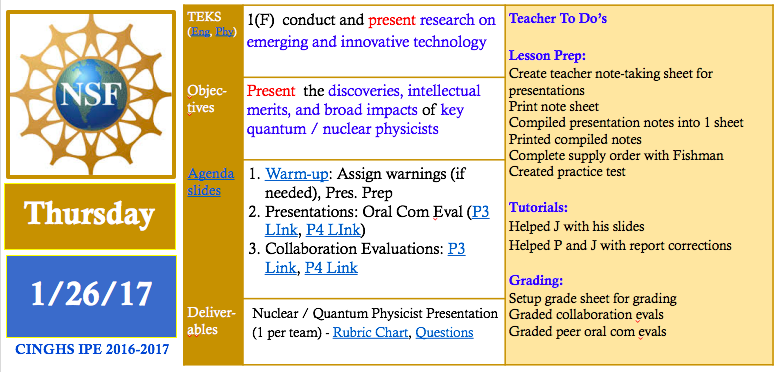
My co-teacher and I prepared for presentations the following day by setting up Google Forms to gather peer grades on collaboration and oral communication.  I created a set of note sheets for capturing our teacher notes on teams’ presentations on quantum and nuclear physicists.  To prepare for our notebook grading day later that week (Friday, Day 5), we decided what assignments we would grade for that week and how many points we would assign to each assignment in each of our class’s learning outcomes (Oral Communication, Written Communication, Collaboration, Agency, Knowledge & Thinking, Engineering Content, Physics Content).


Week 2, Day 4 IPE Emerging Tech (NSF Project):


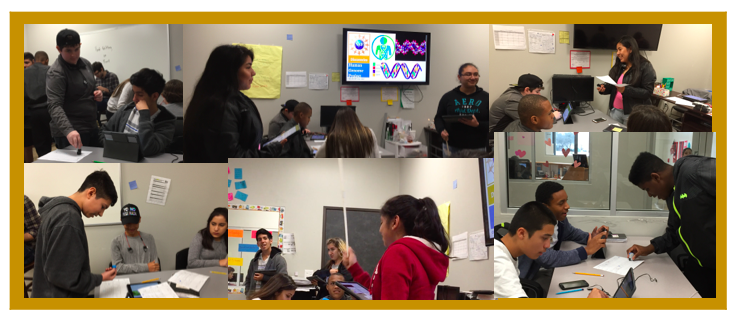
Early on Day 4, I decided to create an experimental tool to keep students in the audience of presentations more engaged.  I created a graphic organizer that students could use to take notes on other teams’ presentations.  I showed this tool to my co-teacher, Mr. Fishman, and shared a related idea: why not let presenting students’ stamp the parts of the graphic organizer related to their presentation so they could get real time feedback on how well they communicated their key points and also hold their peers accountable for taking good notes?  He was willing to try it.


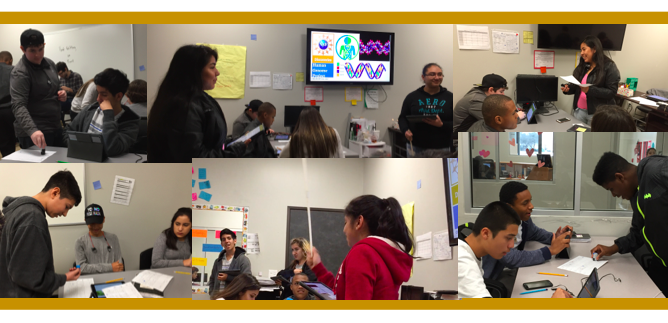
The experiment was a success.  The students seemed to really enjoy stamping their peers.  Also several students insisted on making their peers improve their notes prior to stamping their papers so the level of accountability was kept high throughout the note-taking activity.  In addition to note-taking, students in the audience evaluated the presenters on their oral communication skills.  Meanwhile, my co-teacher and I took notes on their presentations relating to the rubric so we could use our notes to supplement what we would later gather from reviewing their slides and their hidden speaker notes.  Sometimes students say more than they write, so we use both our notes from what they say and what they write to evaluate their presentations and related research.


Later on Day 4, I used pivot tables to analyze data gathered via Google Form to generate peer grades relating to collaboration and oral communication.  I typed out my presentation notes in order to create a graphic organizer that summarized the key points delivered by all teams in both class periods.  I shared these notes with students the following day so they could learn from students in both periods.  See linked notes on tne left.  At the end of Week 4, the students used these notes and other notes to take an open notebook test on nuclear physics, quantum mechanics and biotechnology.


 Week 2, Day 5 IPE Emerging Tech (NSF Project):


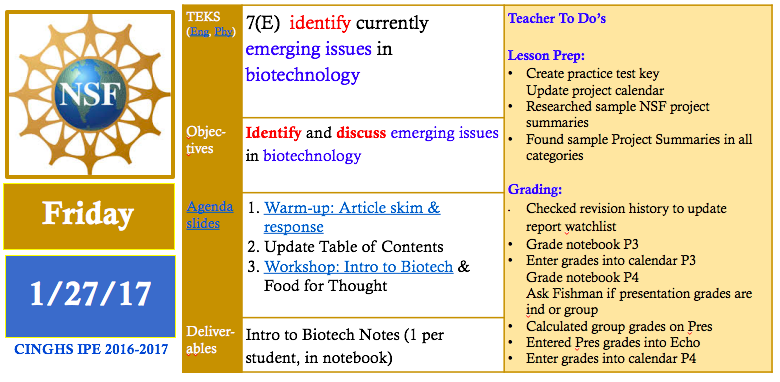
On Day 5, we switched gears by introducing emerging (and ancient) examples of biotechnology.  We opened the class with a discussion on a Washington post article on the creation of pig-human embryonic chimeras.  After this introduction, Mr. Fishman led the class through an introductory workshop / discussion on biotechnology.  Students were so open with their opinions and prior knowledge of biotechnology that the 1-day workshop spilled over into the following day.


Week 2, Day 6-7 IPE Emerging Tech (NSF Project):


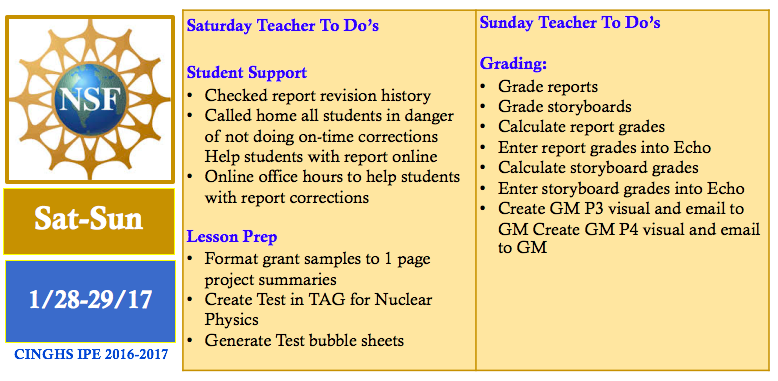
On Saturday morning, I checked the file revision histories of report documents to check which students were in danger of not meeting the final report revisions deadline.  I called the homes of all students who needed extra reminders and parental support to meet this important deadline.  Later on the day, I held online office hours to support students working on their report corrections.  While doing this, I gathered and re-formatted sample grant summaries that students would eventually analyze to learn the style of writing related to their grant proposals.  I also created a test on Nuclear Physics and generated the question sheet and bubble sheets for this test.


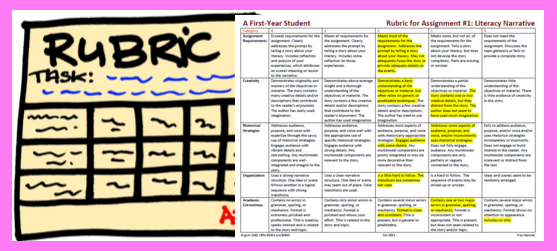
On Sunday, I graded the final revised versions of the students’ engineering report from the prior project (the Rube Goldberg project).  I also graded students’ presentations from earlier in the week using my presentation notes and also considering all the written texts and images on students’ slides and their speaker notes.  Using our IPE tool, the rubric chart (see linked Google Sheet), I was able to grade their presentations fairly quickly and enjoy the rest of my weekend.  The presentations were easy to grade because most of the students had done the assignment perfectly or nearly so.  I think the pre-selected articles, the specific research questions and the verbal feedback on the slides given throughout the week had really helped the students create quality products.
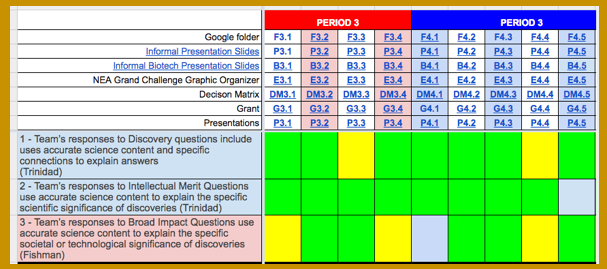
 

For more grading tricks, go here.  To continue reading  about this project, go here.
 

A Tale of Two Projects: Week 2 Algebra 2 Sports Science Project

Week 2 of the Sport Science Video Project was jam-packed with content scaffolding on quadratic functions.  It turns out that analyzing the motion of 100-m runners is not a simple task.  To analyze and draw interesting conclusions from 100-m position-time data, one must know how to:

  • formulate quadratic equations from data tables,
  • solve quadratic equations
  • solve systems of linear and quadratic equations
  • interpret motion quantities embedded in linear and quadratic equations

In Week 2, we covered all these skills (and then some) and started applying them to the run data generated by students and by world class athletes (Usain Bolt).  

Note: If you’d like to learn more about this project in its earlier or later phases, go here.


Week 2: Project Day 4: Data Analysis


On Day 2, we started class with a warm-up that had students make connections between the coefficients in quadratic equations and motion quantities such as initial positions, initial velocities and accelerations.

We went over the correct results so that students could start to interpret some of the quadratic functions that fit their run data.  


After this warm-up, the teams used Coach my Video to advance their running videos frame-by-frame and gather time data that went with each 2-m increment marker on the 100-meter track the students created on Day 3.  They entered these times into a Google Sheet that automatically graphed their data on a position-time graph.


Then they used their position-time graph workshop notes to divide up their graph into sections that corresponded to different types of motion.  They started using Desmos to find regression equations that fit their data.  Their recorded their results in a graphic organizer called a Run Data Chart that they copied and stored in their project Google folder.


Later in the day, I prepared for the rest of the week by grading revised reports from the NERFallistics project and by preparing a workshop on formulating quadratic equations from data tables using technology.


Week 2: Project Day 5: Content Scaffolding

On Day 4 of the project, we learned several skills related to quadratic functions.  I also got to check out if students responded well to a new method I had developed for displaying procedural skills.


We started the class by going over how to use Desmos to find regression equations from points in a data table.  We went over a handout with this step-by-step graphic organizer:

We went over the steps for a sample problem together.  Then we set a work timer for 10 minutes to try these steps on 4 other regressions: 3 sample problems and 1 from their own run data sets.


This visual also shows my new method for displaying procedural skills: the left column outlines each step in the procedure and the right column demonstrates each step on a sample problem.


After they had a little time to practice the skill of using Desmos to find regression equations, we moved on to a new mini workshop on the attributes of quadratic functions.  This mini-workshop covered things they already knew (vertex, axis of symmetry, y-intercept, x-intercepts) and introduced new attributes (focus, directrix).  I gave them time to read through the definitions and then we discussed how to label the attributes on a sample quadratic function.


After we had reviewed the forms of quadratic equations and the attributes of quadratic functions, we started going over different ways to use the attributes of quadratic functions to find their equations.  


The first method we covered was how to find the quadratic equation for a function given its roots.  I kept with my new format for presenting new procedures.  The left column outlined each step to find the equation.   On the space on the right, we applied each step to a sample problem.   After we had gone over 1 sample problem, we set a 10 minute timer for the students to practice this new skill on a couple practice problems.  While they practiced, I monitored their work and answered their questions.


Then we learned how to find the quadratic equation of a function given its vertex and one other point.  We learned how to find the equations in vertex and standard forms.  We again worked through a sample problem together and then set aside work time to practice the skill on new problems.  Some students requested that I email them the Notability file containing the workshop problems.  Students always have the option to get a pdf-copy of workshop materials because I use Notability for a majority of workshops – especially ones where I demonstrate how to do various types of calculations.


After we went over this skill, we called it a day because everyone’s heads (mine included)  were hurting by that point.  What a productive day!  I told the students that they were markedly smarter (at least within the specific domain of using quadratic functions) as a result of their hard work during that day.   


Later in the day, I prepped for the remainder of the week by preparing workshops on formulating quadratic equations given any 3 points and on transforming equations from standard to vertex form (completing the square).   I also figured out a way to analyze Usain Bolt’s data.  I used his average stride length (2.44 m) to associate positions with all his footfalls.  I then then paired those positions with times I gathered using Coach my Video.  I also found a storyboard template that my students could use to plan their videos and I uploaded it to the students’ project briefcase.

Week 2: Project Day 6: More Content Scaffolding

On Day 5, we learned 2 more ways to formulate quadratic equations: using a focus and directrix and using any 3 points.  We kept with the format of modeling a practice problem with each new skill in a mini workshop following immediately with practice time to apply the skill to several practice problems.  


The mini workshop on formulating quadratic equations given a focus and directrix was the final workshop in a series dedicated to using the attributes of quadratic functions to formulate quadratic equations.  While making my keys, I noticed how easy it was to mess up this process by substituting the focus (instead of the vertex) into the vertex form for the quadratic equation.  I made a mental note to watch for students making this easy-to–make error and was able to catch it a couple times during the students’ practice work time.


For the next workshop, I used the TI-emulator to show students how to use a scientific calculator to solve systems of linear equations.  To find a quadratic equation from 3 points, one can substitute the 3 points into the standard form of a quadratic equation three times.  The result will be a system of 3 linear equations.  In an earlier project, students had learned how to use Gaussian elimination to find the solutions to systems of 3 linear equations.  Using their prior knowledge, we discussed and demonstrated how to convert the 3 linear equations into an augmented matrix.  Then I introduced them to a new matrix: the reduced row echelon matrix.  I wrote a sample one on the whiteboard and asked them what was the (x,y,z) solution embedded in the matrix.  The students used their prior knowledge of matrices to find the answer quickly and accurately and then they started to appreciate the power of this matrix.  Then I demonstrated how to enter the augmented matrix into the TI-83 and then use it to find the reduced row echelon matrix.  The students were able to do this with some coaching in very little time and then several got pretty emotional.  I think they were remembering the trauma of using Gaussian elimination to solve systems by hand and comparing it to the ease of using the calculator to solve matrix equations.  Some got really happy.  Some were irritated and asked why I taught them Gaussian elimination instead of this method earlier.  I replied because Gaussian elimination is written into the Texas TEKS so I am professionally bound to teach it to you.  We ended the class period on this high / sour note.


Later in the day, one student requested that I change the project logo from the ESPN Sports Science logo to an image of one of the Algebra 2 students running during our data collection day.  I got permission from the running student to make this change and then made it official.


I prepared for the remainder of the week by preparing lessons on solving quadratic equations and solving systems of quadratic and linear equations.  I also prepared a Practice Test on quadratic functions for the following Monday.  I updated the warm-ups in the class version of the Algebra 2 notebook.  I also started setting up my grade sheet and Echo for the tasks I would grade later this week.


Week 2: Project Day 7: Content Scaffolding (Finale)

Day 7 of the project was the final day for introducing new content skills.  The remainder of the workshops in the project would be dedicated to fine tuning those skills to apply them to products.  Prior to introducing students to the quadratic formula, we introduced the discriminant: how to calculate it and how to interpret it.


We used this visual during the workshop to go over how to calculate the discriminant and then how to interpret its value.  After this mini-workshop, students had 10 minutes to practice calculating and interpreting discriminants before we moved on to a mini workshop on the quadratic formulas.


For our mini workshop on using the quadratic formula to solve quadratic equations, I intentionally chose a sample problem with 2 complex roots.  This gave me an opportunity to introduce complex numbers and how to use these to find the solutions of quadratic equations with negative discriminants.  When we got to the step of simplifying the square root part of the equation, I let them plug in the expression into the calculator as is and let them see the errors that the calculator generates.  Then we talked about how to use “i” to resolve this dilemma.  Several of the students had seen “i” before but had never been formally introduced to it.  After we discussed this sample problem, the students asked for 15 minutes of practice time to work through several practice problems.  The practice set included problems with 2 real roots, 1 real root, and 2 complex roots.


In the final workshop of the class period, we went over how to use the quadratic formula to solve systems of linear and quadratic equations.  We practiced setting the equations equal to each other and rearranging the resulting equation into a form that could be resolved by the quadratic formula.   In the remainder of the class period, they practiced using this skill to solve several systems of equations (3 given by me and 1 using equations they had found from their analysis of their run data).


Later in the day, I finished making my Quadratic practice set keys.  Any student can get access to a key on a practice set by showing me their work on the practice set.  As long as they try all problems, I share them on a Google pdf copy of key.  Many students asks for the keys and many have learned to correct their work in different color pencil using the key so that they know what they need to think about to improve their skills.    I also completed my Practice Test key to prepare for Monday’s class.


Week 2: Project Day 8: Full Work Day

After a dense week of content scaffolding, we ended the week with a full work day.  The students used this day to apply the skills they had learned that week to the analysis of their student run data and of Usain Bolt’s run data.  They worked on recording their results in a Run DataChart and in a storyboard for their sports science video.  Some students also used this time to finish and ask for help on practice sets from earlier this week.  Aside from helping them with the warm-up and from answering their questions, I was pretty hands off on this day.  I kept my spidey senses alert to hear what difficulties students were running into while analyzing their data and preparing their storyboards.  I took note of these things to anticipate the types of workshops students might need next week.


This visual shows a sample slide in a student storyboard and the rubric chart I use to show feedback feedback on their work: green squares = full credit and yellow squares = partial credit.  I add comments inside their products that describe how to convert yellow rubric chart squares to green ones.


Later in that day, I prepped for the following week by preparing next week’s warm-ups, agendas, and agenda / activity visuals.  I also got the class notebook up to date with this week’s activity sheets.  Then I graded the students’ notebook activity sheets for this week and entered those grades into Echo.


Week 2 Weekend: Week 3 Prep

Saturday at midnight was the final deadline for NERFallistics report corrections.  Because this grade was so high stakes, I supported the students in 2 ways: parent phone calls and virtual office hours.  Saturday morning I called the parents of all students who had not started report corrections because it was the final day in a 2-week correction period.  During the late afternoon and evening, I made myself available online for students with report corrections.  I ended up using the messaging feature on Google docs to support students with many questions about their report corrections.   


Also on Saturday, I used our test software (DMAC) to create the end-of-project test.  We are required to use DMAC for two assessments per six weeks.  I typically use DMAC for my end-of-project tests and my trimester exams.  


On Sunday, I graded the students storyboard and run charts and realized they needed more time and support so I extended the deadlines on these and modified some of the upcoming warm-ups to cover issues that I was seeing in their products.  I noticed they were struggling to associate the numbers in their spreadsheets and in their regressions with meaningful running statistics.  I created a couple warm-ups to make those connections more explicit.  


After finalizing my grades, I created the Week 20 Task Completion chart.  The image below shows the task completion chart (with student names boxed out).  Red boxes denote missing assignments.  The grade manager uses this visual to provide face-to-face and emailed reminders to students to turn in missing assignments.


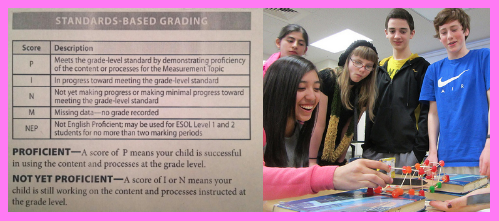
86: Standards Based Grading

1-sources

Chapter 8 in Berger, Ron, Leah Rugen, and Libby Woodfin.  Leaders of Their Own Learning: Transforming School through Student-engaged Assessment. Print.

2-what


Screen Shot 2016-05-09 at 4.49.10 PM


Purposes / Uses:
  • Tie grades to specific understandings and learning
  • Communicate progress to students & their families about progress towards concrete goals (transparency)
  • Measures mastery at closure of grading period – not on average over the period
  • Make connection between work habits and skills more clear
Guiding Principles
  • Grades describe student’s progress and current level of achievement.  This involves:
    • considering trends in student work – especially most recent ones because these reflect more time to develop mastery
    • multiple opportunities for students to show mastery
  • Habits of scholarship are reported separately from content mastery grades.  This involves:
    • keeping separate grades  for assessments of character learning targets (in New Tech schools – this may be covered by showing the learning outcome grades separate from the content grades)
    • scaffolding and assess character learning targets, just as one does for academic learning targets
  • Grades communicate (not motivate or punish).  This involves:
    • knowing that low grades are not a motivation for better habits
    • early communication of grading criteria
  • Student engagement is the key to success.  This involves:
    • teaching students how to effectively self assess their knowledge and use it to plan next steps
    • knowing that effective self assessment leads to more feelings of self-efficacy
    • believing that all students can succeed with the right supports
    • comparing work to standards not to other students’ work
  • Communicating clearly about achievement.  This involves:
    • realistic accounting for early mistakes
    • opportunities to learn and improve
  • Engaging students.  This involves:
    • students playing an active role in understanding and assessing learning targets
  • Holding students accountable.  This involves:
    • holding students accountable to academic AND character learning targets
    • having frequent conversations about what that accountability means and using those conversations to guide learning
 
Getting started involves …
  • developing and using learning targets to guide curriculum, instruction and assessment
    • building supporting learning targets that build towards long term learning targets
  • defining clear character learning targets based on school-wide behavior expectations
  • committing to student-engaged assessment practices
School-wide implementation involves …
  • formulating and communicating school-wide grading guidelines to ensure school-wide consistent grading. These include expectations for …
    • building body of evidence for mastery
    • using formative and summative assessments
    • fine tuning instruction in response to assessments
  • vertically aligning curriculum that prioritizing essential standards and shows a clear progression from grade level to grade level
  • developing consistent criteria for meeting or exceeding proficiency on learning targets
  • professional development on good practices relating to writing, scaffolding and assessing learning targets
Casco Bay High High School’s Grading System
  • 1 = Does not meet standards.  Does not demonstrate substantive progress towards learning target over the course of several assessments.
  • 2  = Approaches the standards.  Substantive progress towards learning target, but more time needed for mastery
  • 3 = Meets the standards.  Demonstrates competency in learning target.
  • 4 = Exceeds standards.  Demonstrates deeper level of understanding / skill than learning target required.
Sample Guidelines for Determining Progress Towards Long Term Learning Targets
  • Break long-term learning targets into several supporting learning targets that scaffold up to long term targets
  • Create assessments built on supporting learning targets
  • Assess long term target over the course of several assessments tied to relating supporting learning targets
  • Require students to demonstrate long term target RELIABLY not PERFECTLY
  • Value and reward long term progression towards mastery of long term learning targets over early demonstrations of mastery that can not be reproduced reliably later
  • Base mastery of long term learning targets on multiple summative assessments
Different approaches to passing courses:
  • Base passing grade on average grade over all learning targets
  • Passing course can only occur if student passes ALL learning targets.  Scores 3 or above (see above) on all learning targets.  (Casco Bay HS approach)
Reporting on habits of scholarship.  This involves:
  • Consistent school-wides standards for assessing and reporting grades on character learning targets
    • Interesting features of Casco Bay example:
      • Uses 1-4 grading scale on character learning targets (similar to academic learning targets)
      • HOW honor roll for students who earn 3 or above on all character learning targets
      • HOW scores of 3 or above on all character learning targets can NOT fail.  Instead get an incomplete and extra support and time (2 wks) to meet academic learning target criteria
  • Structures for supporting students who don’t meet character learning targets.  This can include:
    • Team teacher meetings that brainstorm how to provide support to students who are struggling to meet targets
    • Regular student opportunities for self assessment on character learning targets
    • More formal individualized intervention programs for students who are still failing to meet standards by the end of the grading period
Examples of Student-Engaged Assessment Practices:
  • Regular formative assessments
  • Descriptive feedback that supports multiple revisions of work
  • Formal presentations of learning
  • Passage presentations – students present their progress to an audience
  • Assessments tied to meaningful work
  • Peer and self assessments made by comparing work to established criteria tied to learning targets
Checklist for Quality Assessment Plans:
  • Learning targets are high quality:
    • aligned to standards
    • includes ONLY ONE clear, aligned verb
    • divided into long term and supporting standards
    • student friendly language
    • I can … format
    • collection includes variety: reasoning, knowledge & skills targets
    • knowledge and skills targets build up to reasoning targets
    • collection includes prioritized collection of content, literacy, numeracy & character learning target
  • Summative Assessments:
    • multiple opportunities to demonstrate mastery of long-term learning targets
    • clear assessment tools used to measure mastery
    • learning targets and assessment tools align
    • collection is varied in format and type
    • motivate students
    • includes smaller formative assessments
    • aligned to standards
  • Formative Assessments:
    • formative assessments for each supportive learning target
    • prepare students for summative assessments
    • accommodates multiple learning styles
    • motivate students
    • clearly communicate learning target and means to achieve them
    • involve self & peer assessment and reflections
Supporting Students who need Additional (outside class) Time & Support
  • Intensives
    • 4-8 day remediation courses
    • intense focused study on learning targets not met
    • students who don’t need these have menu of electives to choose from
    • earns back lost credit
    • involves 1-on-1 conferences, small group instructions, lots of formative feedback
  • Block seven
    • extra study hall period with teacher support
  • Mud season school
    • opportunity to earn 3’s on character learning targets and 2+’s on academic learning target
  • Summer standards intensives
    • See above.   Takes place in summer instead of school year.
  • Out of class tutorials
    • afterschool, before school, Saturday, etc


3-sowhat
Woah! This looks hard.  However some advantages I can see:
  • better communication of what students are actually learning
  • better means to target support
  • assessments that reward reliable knowledge built over time instead of averages over instances of learning that may or may not be reliable
  • clear separation between scaffolding, assessments and consequences (both good and bad) for academic and character learning targets
  • school-wide consistency on how grades are assigned
  • school-wide consistency on how students are supported in their efforts to achieve mastery
  • stronger professional culture in staff that emerges from school-wide agreements, training, & experimentation related to meaningful assessment practices


4-nowwhat

Preparation Steps
  • Identify a team of guinea big teachers who are willing to commit to building prototype systems that lay the foundation for this strategy.  These systems:
    • break up courses into long term and supporting learning targets
    • establish agreements on high priority character learning targets and develop long term and supporting targets for these
    • define consistent means for assessing long term and supporting learning targets
  • Conducting classroom trials to test and refine these systems
Early Implementation Steps
  • Guinea pig team of teachers implement and refine prototype systems described above
  • Consolidate tested strategies into a Faculty Standards Based Grading Guide
Advanced Implementation Steps
  • Wide implementation of Standards Based grading based on field guide and related professional development sessions
  • School-wide agreements are made and supported that relate to grading and support structures


5-relatedstuff

73: Writing Workshops

1-sources


2-what


Screen Shot 2016-05-09 at 6.00.49 PM


Main components of writing workshops
  • students write during workshops that occur during class
  • teachers observe and give individual feedback
  • teach writing skills in a step-by-step manner
 
Reasons to Run Writing Workshops
  • ensures that students get writing done
  • diagnostic – learn what students are succeeding at and not
  • individualize instruction
  • can be more efficient than whole group instruction
  • model discipline specific thinking patterns and writing styles
Play by Play:
  • Building engagement, choice & individual goal setting:
    • students list possible writing topics they’d like to explore
    • teachers assign topics based on their interests and to ensure class-wide variety in topics
    • students conduct preliminary research to narrow down writing topic
    • student complete individual goal setting sheets that list specific content and writing goals they’d like to achieve in the project
  • Students working independently:
    • students conduct more research on color-coded notecards that categorize types of information and that record summaries and resources
    • students create outlines and draft pieces while waiting for conferences
    • set norms for independent work so that conferences can occur simultanously
      • write need-to-knows on sticky notes and place them on designated board
      • if you finish writing early, work on editing and revising
      • use low voices and sit close to thought partners
      • go to writing resource area for more ideas if you get stuck
  • Brief, Focused Teaching & Modeling:
    • assign a thinking sheet that outlines how to think / draft a small section of writing piece
    • conduct a mini-lesson on contents of thinking sheet
    • also support mini-lesson with modeling
    • can assign thinking sheets, teach mini-lessons, and model other key features of the writing pieces
    • could use tree diagrams and other graphic organizers to represent and outline arguments
  • Teacher Student Conferences and observations:
    • doesn’t instruct on right and wrong – instead asks questions that get students to make connections, justify arguments, etc.
    • can be short – 2-3 minutes and focused
      • commit to a learning target (writing or content) and focus feedback and inquiries on that focus to keep meetings targeted and short
    • could address any idea that students need help
    • possible prompts –
      • what are you working on?
      • how is it going?
      • what help do you need to move forward?
      • tell me more about why you …
      • what else do you know about …
      • how are you achieving your goals?
    • incorporate individual goal sheets – lists skills students want to master in current project
    • incorporate rubric
      • highlight rubric together or go over student highlighted rubric
      • give feedback specific to the rubric
      • use a rubric reflection sheet with columns: rubric criteria, successful or not, evidence, next steps
    • another way to share feedback
      • take notes on post-its while working the room
      • place on student work during work time or during conference times
    • storing conference notes
      • write on sticky notes that start on clipboard
      • move to student work
      • after it is used by student, move to a notebook that has pages for each student
  • Writing Folders:
    • keep work organized in writing folders – contain note cards, drafts, outlines, brainstorm ideas, individual goal sheets, peer review sheets, etc 
  • Share the Results:
    • conclude with oral presentations to share findings
Making time:
  • focus writing assignments on topics that involve big subtle ideas that are need to be taught over time
  • use writing workshop format for other types of problem solving – e.g. solving real world math problems, writing lab reports, etc


3-sowhat
See Reasons for running writing workshops above.


Teaching students how to write within discipline-specific genres is tricky.  The elements of the writing workshop can be used to scaffold key features of writing pieces, guide students during work time and give specific formative feedback on work.  Incorporating student goals and student choice into the work builds student engagement, agency, and ownership of the work.


4-nowwhat
Preparation Steps
  • Develop thinking sheets and mini lessons and gather models to scaffold key features of the writing piece
  • Develop overarching topic or essential question that can be used to stimulate and focus student-geneterated topics and questions
  • Develop assessment sheets – could have columns for rubric criteria, successful or not?, related evidence, next steps
  • Plan logistics and gather resources – writing folders (physical or online), sticky notes
    • Tech Note: Google keep might be a good substitute for conference sticky notes because they can be shared with students and organized by tags and students can check off items in the list as they complete them.  Google keep may be good for storing student goals for similar reasons.
Early Implementation Steps
  • Run writing workshop that focuses on 1 to 2 elements of writing piece.  See elements listed above for details:
    • build engagement though some student choice
    • conduct mini-lessons, provide thinking sheets and model each feature (1 at a time)
    • facilitate independent work time – focus work time goals and communicate norms
    • meet with students in conferences and record feedback
    • organize work in writing folders
Advanced Implementation Steps
  • Make writing workshops part of work time routine in multiple projects
  • Track writing samples over several projects and use these to help students reflect and set progressive writing goals


5-relatedstuff

48: Building Data Organizations

1-sourcesChapter 1 in Boudett, Kathryn Parker., Elizabeth A. City, and Richard J. Murnane. Data Wise: A Step-by-step Guide to Using Assessment Results to Improve Teaching and Learning. Cambridge, MA: Harvard Education, 2005. Print.

2-what


Screen Shot 2016-05-09 at 10.56.50 PM


This book was intended for school administrators.  I think it can also apply to teachers.  Here I summarize parts that are generalizable to all settings so that both teachers and administrators can benefit from the book.
Two Question to Ask:
  1. Are you satisfied with the way you capture info garnered from assessments?
  2. Are you satisfied with how you gather information from multiple data sources for your students?
Building Data Organization Steps:
  1. Build a data inventory: a chart or spreadsheet that organizes and lists all data sources that will be interpreted to improve student learning.  Columns on data inventory sheet could include:
    • data source name (hyperlinked)
    • content area
    • collection date(s)
    • students assessed
    • accessibility – how to get to the data
    • current data use
    • possible more effective use
  2. Build a Data Team(s)
    • identify well-connected stake holders who would be interested in investigating data to improve student learning
    • types of data teams:
      • organizing data – small team
      • interpreting data – big, collaborative effort – the more who are involved the larger number of stakeholders have ownership in school improvement
  3. Create a Schedule that Allows for Regular Collaborative Work
  4. Plan for Productive Meetings: 
    • establish norms – example – no blame, approach data as a learner
    • use protocols to structure conversations
    • adopt an improvement process: small groups analyze data charts and discuss what they notice, share key findings on chart paper, use structured protocol for formulating questions about why data looks like that, whole group – establish consensus on most important questions to address
    • plan agendas for meetings
3-sowhat
Organizing data teams to summarize data and organizing data meetings to interpret data and formula key questions from the data is a process that can improve student learning at the staff level and at the teacher student level.


Compiling a data inventory and writing out current and possible uses for data is an exercise that can make teachers and administrators more aware of how they are currently leveraging data and what they can possibly do to make more use of the data.

Teachers generate A LOT of data when they comply with school-wide grading expectations. Teachers can make more use of this data by creating compelling, summarizing data displays and using these displays to facilitate small and whole group discussions with students on data inferences, possible emergent questions, and possible followup experiments to further investigate or improve the data.  This process can make students feel like more valued stakeholders in the education process and could help students set and achieve individual and community level academic goals.


4-nowwhat
Preparation Steps
  • Create a data inventory of past and upcoming data sources that are worth interpreting
  • Research and/or brainstorm protocols for discussing data
  • Create data displays that are compelling.  These could
    • NOT reveal confidential individual student data
    • show how learning of student group(s) evolve over time
    • mastery levels of student group(s) tied to key big ideas
  • Develop an agenda that has time for students to interpret data as individuals, in pairs, and as a whole group
Early Implementation Steps
  • Facilitate a project reflection (or semester reflection) that features the data discussion agenda developed above
  • Record key findings of students
  • Work with students to achieve consensus on key questions and methods to investigate these and possible next steps and methods to verify that these are working
Advanced Implementation Steps
  • Form a data organization group that includes students after running several data meetings.  This committee can advise teacher on how to summarize data that makes it more easy to identify compelling questions and trends
  • Survey students to check about whether or not data meetings are making them feel like more valued contributors to the learning community
5-relatedstuff

41: Rubric Design & Implementation

1-sourcesChapter 8 in Wiggins, Grant P., and Jay McTighe.  Understanding by Design. Alexandria, VA: Association for Supervision and Curriculum Development, 1998.  Print. 


2-what


Screen Shot 2016-05-09 at 11.26.19 PM


Types of rubrics:

  • Holistic – assign one score to performance
  • Analytic – assign multiple scores to multiple factors that evaluate performance
  • Analytic rubrics communicate more information than holistic rubrics

Rubric purposes:

  • communicate criteria for evaluating performances and products when there is no single correct answer to the challenge
  • communicate expectations to students
  • establish consistent ways to evaluate performances and products

Rubric writing suggestions:

  • develop rubrics for understanding (content) and performance quality (21st century rubrics)
  • derive criteria from targeted standards.  One method:
    • Use VERB in standard for proficient column
    • Use VERB that is a lower Bloom’s verb than standard VERB for emerging column.  Select a verb that describes an  skill that supports the development of the targeted skill.
    • Use VERB that is a higher Bloom’s verb than standard VERB for advanced column.  Select a verb that describes an enrichment task relative to criteria in proficient column
  • double check that targets align with learning targets
  • use 6 facets of understanding to develop advanced criteria
  • do not confuse “just engaging” assessments with “engaging AND valid” assessments
  • use past student work
    • divide student work into piles of similar quality
    • cluster reasons that unite piles into traits
    • write a definition for each trait
    • select samples that illustrate each trait
    • continually refine
  • rubric evaluating questions:
    • could student do well on this task without understanding key learning goals?
    • could student do poorly on this task while understanding key learning goals?

Rubric implementation tips:

  • use rubric to evaluate exemplars and provide rationales for scores
  • use rubrics to give formative feedback from teacher, self, and peers throughout the project
  • use rubric feedback to refine products


3-sowhat

Rubric criteria are needed to evaluate responses to open-ended questions and to measure levels of understanding.  Rubric criteria help communicate clear communication expectations.  They make evaluations more clear, consistent and fair.  Designing aligned rubrics ensures that the performances we require from students demonstrate mastery of targeted standards.  Criteria can steer attention from correctness to levels of understanding.  Evaluating rubrics can help us make inferences about what students are learning.


4-nowwhat

Preparation Steps

  • Analyze NOUNS, VERBS and CONTEXTS in targeted standards.
  • If possible, analyze student work using method describe above.
  • Use analysis of student work and standards to develop rubric criteria.
  • Ask for feedback on rubric from teachers and student – check for alignment (from other teachers) and clarity (from students).

Early Implementation Steps

  • Distribute rubrics to students early in the project
  • Let students analyze rubric using tools such as Knows & Need-to-Knows charts and GRASPS – see this article for more on GRASPS
  • Use rubrics to generate teacher, self, and peer feedback that students use to improve understanding and product
  • Clarify expectations by evaluating exemplars using rubrics and providing rationales for scores and concrete tips for achieving criteria.

Advanced Implementation Steps

  • Guide students to seek out multiple exemplars and use their common traits to develop rubric criteria.   For more info on how to use models to generate rubric criteria – see this article: Models, critique, and descriptive feedback
  • Use rubrics and related tools to guide students in goal setting and tracking progress towards those goals over time


5-relatedstuff

40: Assessment Design & Implementation

1-sources


2-what


Screen Shot 2016-05-08 at 9.44.01 AM.

Guiding Questions for Designing Assessments:
  • What evidence can show that students have achieved desire results? (ALIGNMENT)
  • What assessment tasks and other evidence will anchor projects and guide instruction? (ANCHORING)
  • What should we look for, to determine the extent of student understanding? (EVALUATION)
  • Does the proposed evidence enable use to infer a student’s knowledge, skill or understanding? (FORMATIVE ASSESSMENT, ALIGNMENT)
Assessment Implementation tips:
  • Use judicial analogy while assembling assessment portfolio – student is ignorant until proven otherwise
  • Check that assessments align to standards, essential questions and learning targets
  • Use self and peer assessment to improve understandings and products
  • Vary assessment types depending on type of knowledge:
    • use contextualized applied assessments to assess enduring understandings
    • use more traditional assessments for enabling skills
Embed assessments in authentic tasks.  Authentic tasks …
  • involve real world contexts
  • require judgement and innovation
  • ask students to do the subject
  • simulates challenging situations handled by discipline experts
  • assess student ability to use a repertoire of knowledge to solve a complex problem
  • creates opportunities for practice, rehearsal, research, feedback and revision
 
Use GRASPS to design and frame authentic tasks:
  • Goals
  • Roles
  • Audience
  • Situation
  • Performances and/or products
  • Standards to evaluate performance


3-sowhat
Rigorous coherent units are more likely to be designed when a variety of assignments are planned that align to learning goals.  Prioritizing activity planning over assessment planning can lead to watered down, unaligned assessments and activities.  Planning assessments around understanding can lead to measures of students’ ability to apply and transfer knowledge.  Well planned assessments can lead to targeted feedback that helps students improve their learning and products.


Authentic tasks and assessments can demonstrate to students how adults really use (or don’t use) knowledge.  These can also show students how discrete packets of information come together to create more meaningful solutions and performances.


4-nowwhat
Preparation Steps
  • Analyze standards to determine learning targets, enduring understandings, and enabling skills
  • Uses GRASPS and standards analysis to design project contexts and product problems / products that are authentic and aligned to standards
  • Use 4 Guiding Assessment Questions (see above) to design and evaluate assessment portfolio to project
  • Design scaffolding activities that support student achievement on assessments
Early Implementation Steps
  • Use GRASPS to help students analyze project launch materials
  • Use feedback from assessments to give students helpful formative feedback and to fine tune scaffolding activities
  • Use assessment data from multiple assessments to determine whether or not students are progressing towards mastery of learning goals
Advanced Implementation Steps
  • Have students evaluate the quality of assessments use student friendly versions of the assessment guiding questions
  • Have students use a Learning targets chart to provide and justify evidence from previous assessments and tasks that they have successfully achieved mastery of learning targets
 
5-relatedstuff

38: Effective Grading & Reporting

1-sources


2-what


Screen Shot 2016-05-08 at 9.08.55 AM

Guiding Principles of Effective Grading & Reporting


Grades should be based on clearly specific learning goals and performance standards
  • establish and communicate standards that are indicators of success
  • describe criteria for measuring success
  • report results in a clear and consistent manner
Evidence for grading should be valid
  • measure evidence related to learning goals
  • do not let factors unrelated to learning goals affect grading such as: students’ disabilities, learning style, forgetting to put name on a paper
  • eliminate conditions that impede students’ ability to demonstrate mastery of learning goals
Grading should be based on established criteria, not arbitrary norms
  • don’t grade on a curve
  • if student’s IEP requires grading modifications – modify learning goals and establish assessment criteria related to these goals
  • design and implement systems that allow ALL students to achieve by demonstrating clearly defined standards
Not everything should be included in grades
  • do not grade pre-assessments or diagnostic assessments
  • formative assessments should not factor too much into grades
  • base grades primarily on summative assessments that measure student mastery of learning goals over extended periods of time
Avoid grading based on averages
  • evaluate student learning later in a learning cycle
  • consider using median or mode to assign grades
  • do not average in zeroes for incomplete work
  • assign an incomplete for missing work and use consequences other than grades
Focus on Academic Achievement and Report Other Factors Separately
  • report things other than achievement in ways other than grades


3-sowhat

Grades should provide qualitative and quantitative data on how students are progressing towards learning goals.  The evidence for measuring this progression should clearly be linked to learning goals.  Achievement is hard to strive for if criteria are unclear.

Factors other than grades should not factor into grades since grades are relative measures of academic achievement.  Grades should be a summative measure of student mastery of learning goals.  This measure can be diluted if grades from early in the learning cycle factor into the grade.  Basing grades on mastery later on the learning cycle avoids penalizing students who do not learn quickly.  Giving formative feedback is not the same as assignment grades.  One can do the former frequently and the latter less frequently.


4-nowwhat
Preparation Steps
  • Design learning targets (academic and character) that are either directly standards-based or support standards-based work
  • Design criteria that relate to learning targets and the tools needed to communicate these effectively to students (rubrics, checklists, other graphic organizers)
  • Evaluate grading practices and decide what are one’s primary purposes for assigning grades
  • Develop grading systems that align to one’s primary reasons for assigning grades
Early Implementation Steps
  • Give more formative feedback than grades
  • Assign grades to students more often late in the learning cycles
  • Seek out student feedback to determine if grading systems are fair and accurate measures of student achievement
  • Assign other consequences to late and incomplete work – for ideas see Grading smarter, not harder
Advanced Implementation Steps
  • Communicate grading purposes to students and ask them to volunteer their opinions on whether to not current grading systems are achieving those purposes.
  • Ask for student suggestions on how to improve grading practices
5-relatedstuff

24: Checks for Understanding

1-sources

Chapter 2 in Berger, Ron, Leah Rugen, and Libby Woodfin.  Leaders of Their Own Learning: Transforming School through Student-engaged Assessment. Print.

2-what


Screen Shot 2016-05-08 at 11.34.20 PM


Checks for Understanding Techniques:
  • oral, written, and visual techniques, implemented in variety or groupings (individually, in teams), that teachers and students use to assess content
 
Benefits of Checks for Understanding:
  • Students monitor their own progress
  • Students support reasoning with evidence
  • Students become more independent learners
  • Students build growth mindset
  • Students break large goals into smaller ones
  • Students evaluate progress while learning
  • Students build metacognitive understanding of their learning process and academic mindsets
  • Teachers learn if their scaffolding is working
Checks for Understanding: Strategies 
  • Requires culture of trust – see section below
  • Model and practice techniques with students
  • Discuss purpose of techniques with students
  • Discuss importance of honest self assessment
  • Embed in rich tasks aligned to meaningful learning targets
  • Structure such that. ALL students participate
  • Structure such that ALL students support ideas with evidence
  • Develop good questions that simulate and assess powerful thinking
  • Assign and quickly assess using “write to learn” tasks
  • Use varied discussion protocols
  • Select strategies that match depth of thinking
  • Use Quick Checks strategies
  • Strategically listen to students working in small groups and track evidence of progress towards content and character learning targets using checklists
  • Use checklists to track which students were supported, are struggling, etc
  • Use cold call strategies – like using popsicle sticks on randomly call on students to respond to a prompt
  • Use warm call strategies – use popsicle sticks to randomly call on students who will get time to review notes and then respond to a prompt
  • No opt out – all students given opportunity to either get prompt correct on first call or paraphrase a previously given response on second call
  • Give students appropriate thinking time to respond to questions
  • Cue, Clue, Probe, Rephrase
    • Cue – use pics, words, etc to help with recall
    • Clue – use overt reminders
    • Probe – look for reasoning to clarify a correct response or unpack an incorrect response
    • Rephrase – pose response in different words
  • Close lessons with Debriefs –
    • Students synthesize and reflect on lesson
    • Student gather evidence of their learning
  • Use exit tickets to modify next day’s lesson
  • Catch-release – gather students for instruction. release to practice
  • Release-catch – let students explore material and make initial meaning of material, then gather for instruction
Building a Culture of Trust & Collaboration:
  • Treat students as partners in learning process – let them co-create learning targets and norms
  • Be transparent about learning goals and their rationale
  • Get to know students
  • Differentiate instruction for individuals
  • Create norms that promote perseverance and backing up conclusions with evidence
  • Create climate of courtesy and respect, not compliance and control

3-sowhatSee benefits listed above.

Frequently using checks for understanding can help students learn how they are progressing towards learning targets.  Using a variety of checks for understanding strategies can keep feedback and reflections fresh and can encourage active participation of ALL students.  A culture of trust can help students be honest about their progress and help them to actively seek out help as needed.

4-nowwhat

Preparation Steps
  • Research and gather assessment strategies that go well with different types of learning targets (knowledge, skill, reasoning, character)
  • Design activities that build a culture of trust in classroom
  • Develop checklists that help teachers observe students for key evidence of understanding
  • Build a culture of trust early in the year
Early implementation Steps
  • Model how to use checks for understanding and the importance of using strategy correctly
  • Students use strategies to communicate what they know and need-to-know
  • Modifies lesson pacing in response to checks for understanding
  • Structures lessons and assessments so that all students actively participate
  • Runs debrief and exit ticket activities with students to check what they learned that day and uses that info to plan for tomorrow
Advanced Implementation Steps
  • Uses checklists to track observations of students during work time; uses patterns to improve instruction
  • Designs and uses checklists to track progress towards character learning targets
5-relatedstuff

10: Grading Smarter, not Harder

1-sources

Dueck, Myron. Grading Smarter, Not Harder: Assessment Strategies That Motivate Kids and Help Them Learn. Print.


2-what


grading


  • CARE Method for Evaluating Effectiveness of Grading Strategy:
    • C: Students care about consequences
    • A: Grades assess content mastery alone
    • R: Strategies have good results
    • E: Strategies empower students to learn better
  • Instead of assigning a zero or incomplete to an assignment …
    • Assigned due time spans instead of due dates
    • Used late incomplete form that explained reason for late assignment, next steps to turn in assignment late, and signatures of student and parent/guardian
    • Assigned overall incomplete for a marking period if student was missing any major assignments. Converted that to a grade once all major assignments were turned in
    • Used homework club to help students complete assignments
    • CARE results: Students worked harder to avoid interventions because they didn’t want to lose free time to homework club. Grades more accurately measured content mastery. Interventions on late form reduced negative behavior more that homework incomplete and late points. Personalized interventions empowered students to complete assignments.
  • Instead of grading homework sets …
    • Incentivized homework sets by making them entry tickets into meaningful classroom activities
    • Graded occasional homework quizzes
    • Used individual homework completion to identify student homework profiles, i.e. how much homework student needed to complete to develop skills
    • Used homework profiles to determine appropriate interventions
    • Provided in-school support (homework club during lunch and after school) to complete homework
    • CARE results: Students did homework to gain access to more engaging activities and to perform better on quizzes.  Homework quizzes better assess content mastery than homework sets. Shifted focus from just completing homework to using homework to perform better on other tasks. In school supports empowered students to do better.
  • Instead of just grading tests …
    • Students completed test form that graded problems and related them to key skills
    • Students used test form to identify their content strengths and gaps
    • Students allowed to retest in specific topics that match their gaps only
    • Cascaded test grades to quizzes, i.e. if student demonstrated mastery on a topic in a test, quiz grade on same topic was changed to reflect current content mastery
    • CARE results: Motivated students to do better on tests to recoup quiz grades. Did not penalize students for developing content mastery slower than others.  Better assessment of content mastery over time.  More students opted to retest because they did not need to retest on all test topics.


3-sowhat

Designing and implementing projects can be very time consuming.  Developing systems that save time and also improve learning are invaluable to teachers who aim to be both effective and sane.  Dueck’s CARE criteria are a good checklist for evaluating similar grading experiments aimed at creating new grading strategies that are more effective and less time consuming.  Aiming to use grading practices to measure content mastery, not behavior, challenges the idea of scaffolding and assessing 21st Century skills.  One can resolve this conflict by converting learning outcomes to student-friendly, measurable learning targets and scaffolding and assessing these learning targets to the same levels as content-specific learning targets.

3-sowhat
Preparation Steps
  • Use CARE criteria to evaluate current grading practices and determine which are effective and ineffective practices
  • Brainstorm grading practices that can replace ineffective practices
  • Use a parent letter to notify parents/guardians of new grading practices and rationale for these
  • Develop resources (e.g. forms) related to new grading practices
Early Implementation Steps
  • Implement new grading practices
  • Use CARE criteria to determine if new grading practices are a good fit for one’s students
  • Make adjustments to grading practices that improve their ability to demonstrate CARE criteria
Advanced Implementation Steps
  • Develop grading routines and tools around CARE-tested grading strategies
  • Have students reflect on how grading routines are affecting their mindsets and achievement levels
  • Use student input to refine grading strategies
  • Refine student strategies to make students more active agents in the grading process


5-relatedstuff